Cracking a simple binary with radare2
Created on Wed. 29 Jul 2020
Today I will use radare2 to debug a simple crackme from crackmes.one . This crackme is very simple and I use it to showcase what you can do with radare2.
I first started by downloading the binary from the link included above and I then opened it using radare2:
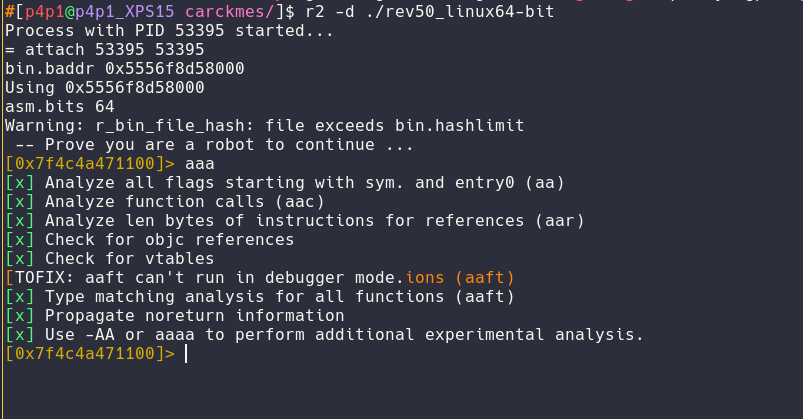
$ r2 -d ./rev50_linux64-bit
Analyzing the binary
With this command I am able to tell the radare2 debugger that I want to attach to it's process id using the "-d". Opening this binary I first start by analyzing it using this command:
[0x7f4c4a471100]> aaa
Using this command I ask radare to triple analyze the binary. The first a is there so that radare understand I wish to analyze the binary the second a is there so that I extract the "sym" or the functions that are inside of my binary and the third a is there so that I analyze all of the function calls, perform a matching analysis on the functions etc... It is usually a convention to use three a's on the first run of radare2.
I then tell radare2 that I wish to move my current position to the main function inside of the binary like a cd inside of the binary.
            [0x7f4c4a471100]> s main
            [0x5556f8d591c4]>
As you can see the prompt changed to a different address telling me that radare found the main function inside of the binary.
Debugging the binary
For this part I will use the Visual Mode of radare2 so that I can have a tree view of the architecture of the binary. Radare2 is a lot like vim and uses a lot of shortcuts and terminology as vim (eg: seek or s or v for visual)
[0x5556f8d591c4]> VV
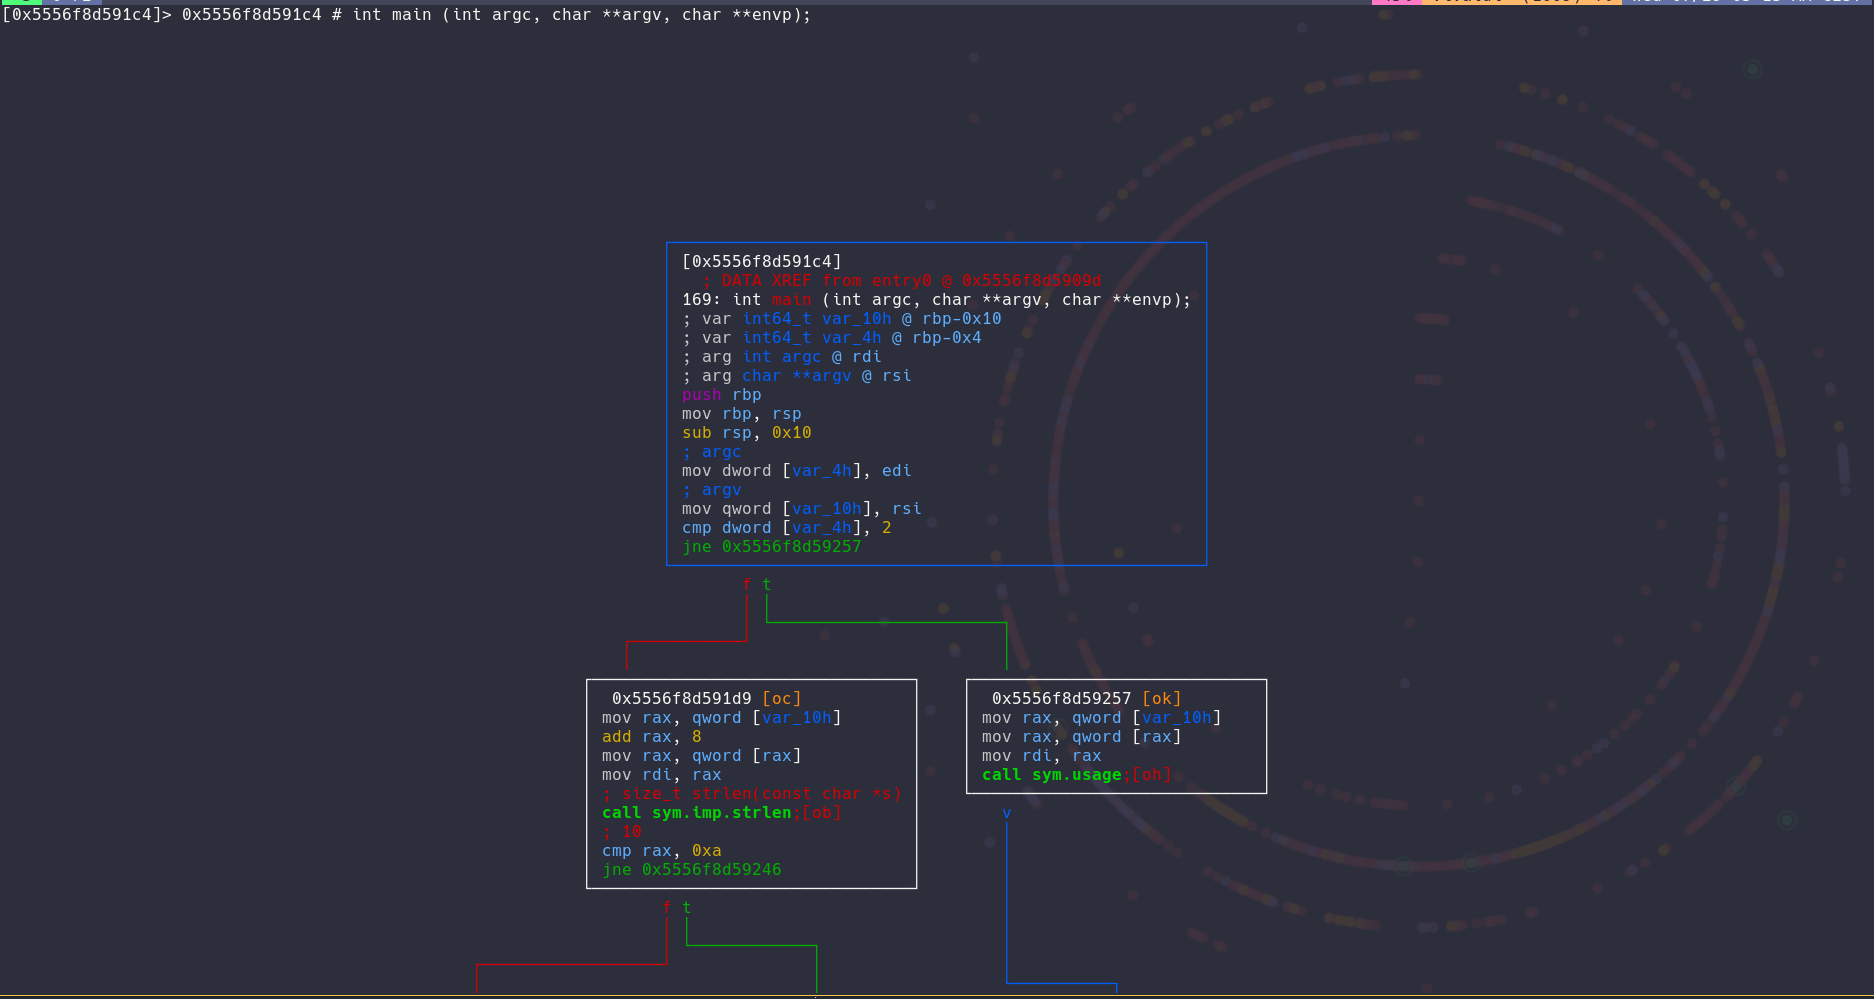
This visual tree is very useful and can help you gain a better understanding of the software you are working on. I then look around the binary and a few things catches my eyes:
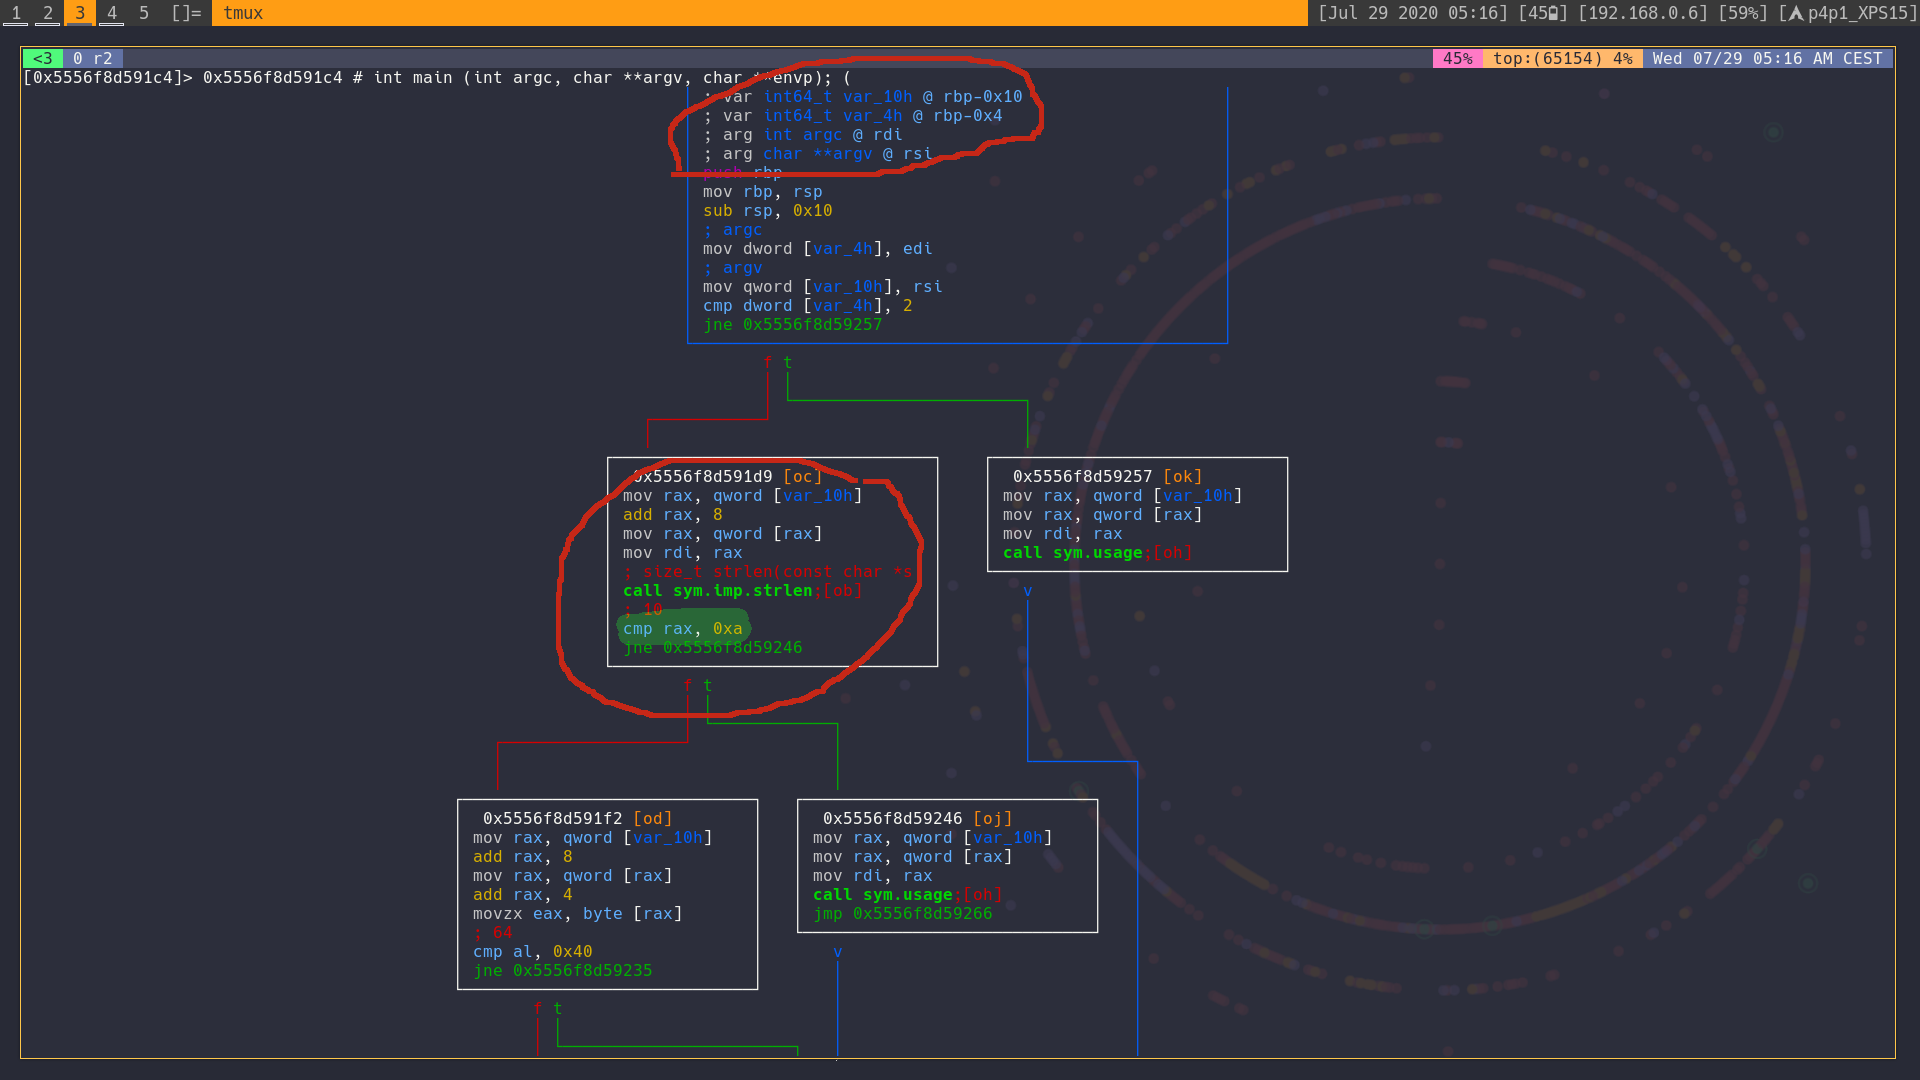
I circled out all of the important information for you, at first we can see that argc or the number of arguments is assigned to the rdi register and that it gets compared if a certain number of argument is not met (2 arguments). Then in the second red circle we can see that argv or rsi is sent through strlen and than that return value is compared with a fix digit (the number 10). This gives us our first information that the argument need a size of 10.
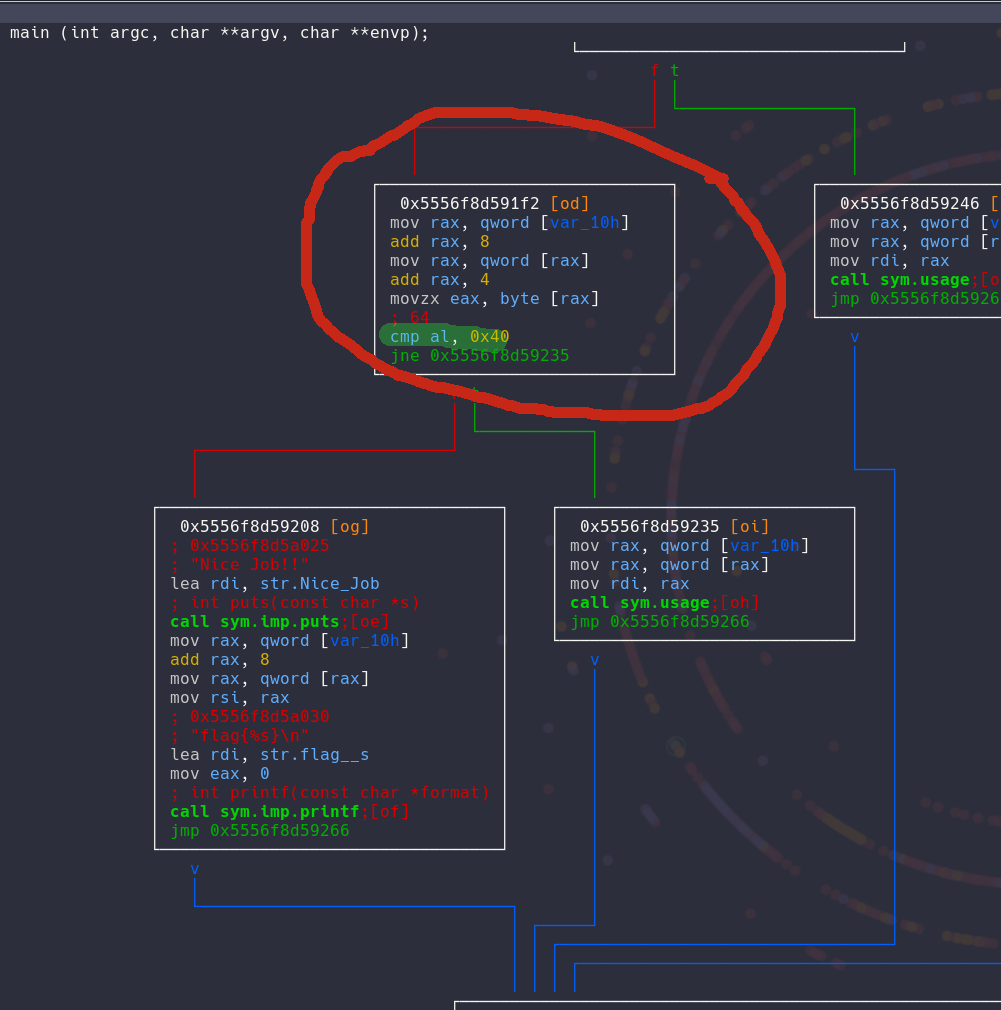
We then see a comparison here circled in red looking more closely at it we can see an other hard coded character that is 64 or '@' by looking at the man ascii page we can also see that the pointer is offseted by 4 so that means that the compare only checks the fifth character, because pointers.
With all of this information we can actually test the binary to see if we successfully cracked it!

As you see in the output we successfully cracked the binary!
Thank you for reading, check out my other blog posts for more stuff like this. You can also try the challenge for yourself, try using and other tool like gdb or ghidra to complete it.
Links
Questions / Feedback
Donate
If you like the content of my website you can help me out by donating through my github sponsors page.