Presentation
What is p3ng0s
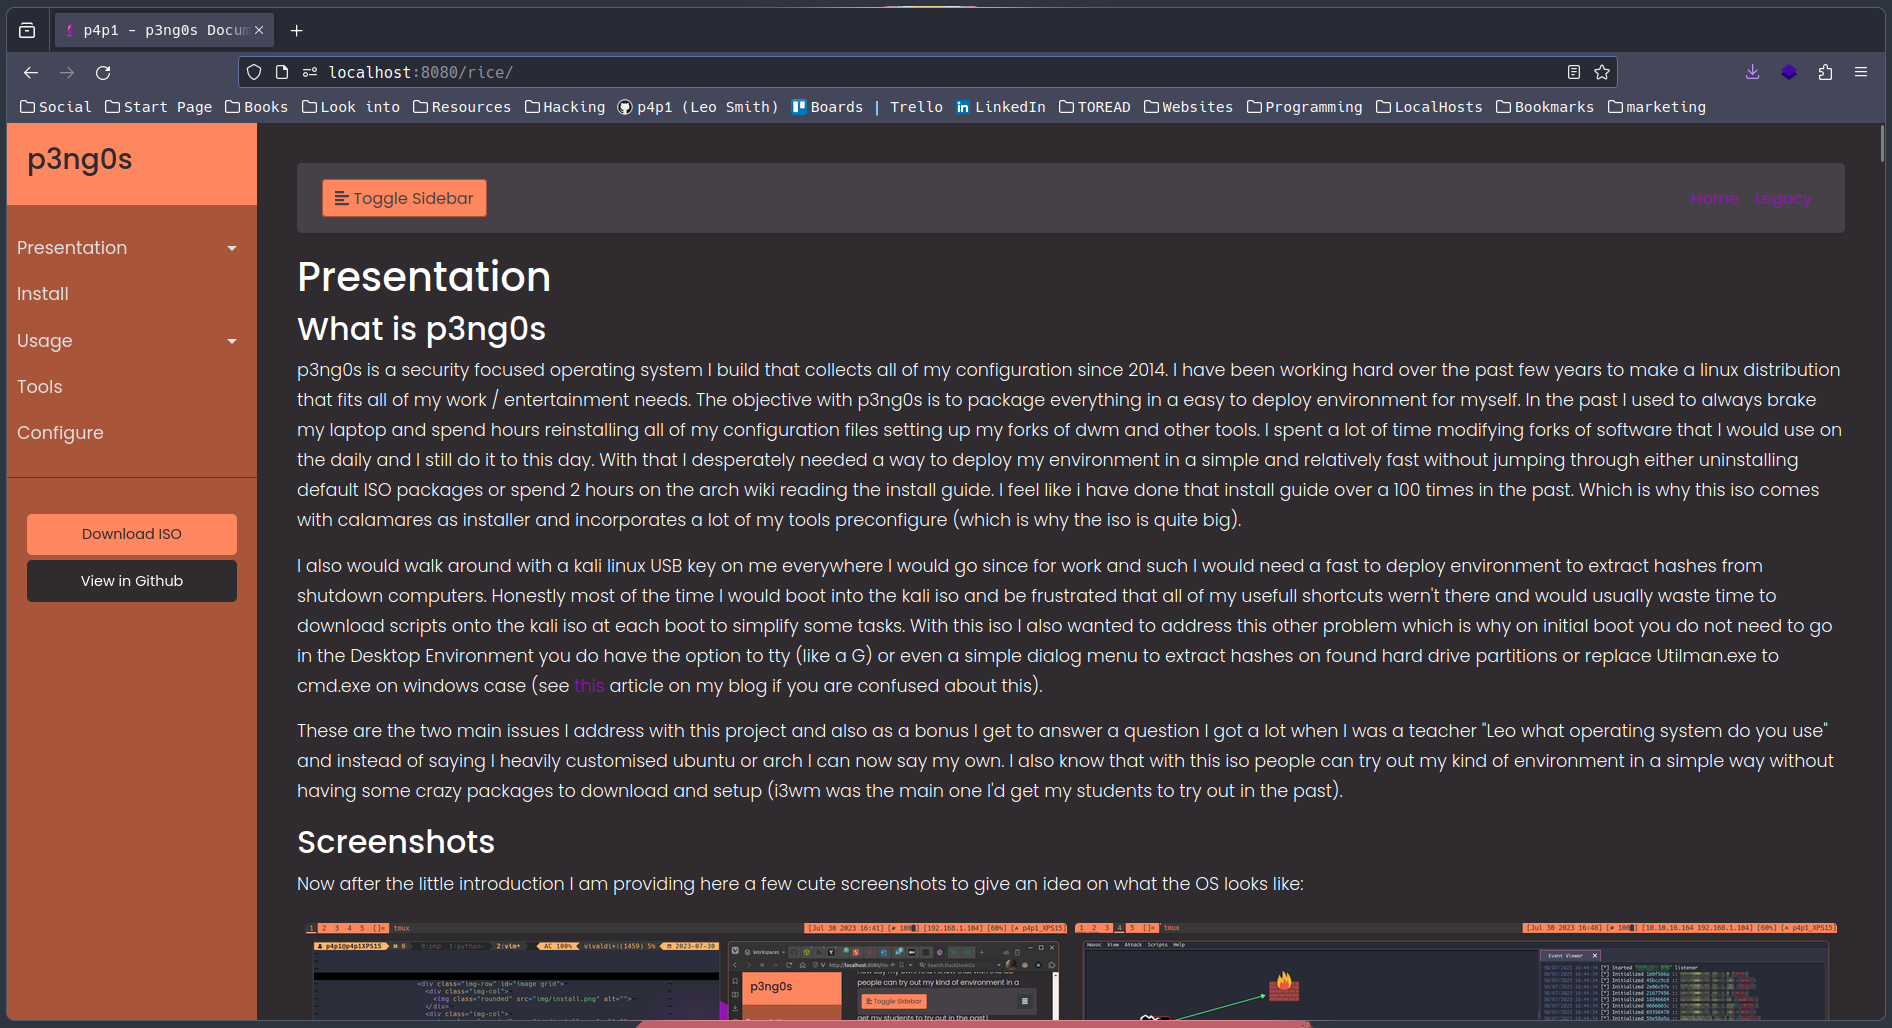
p3ng0s is a security focused operating system I build that collects all of my configuration since 2014. I have been working hard over the past few years to make a linux distribution that fits all of my work / entertainment needs. The objective with p3ng0s is to package everything in a easy to deploy environment for myself. In the past I used to always brake my laptop and spend hours reinstalling all of my configuration files setting up my forks of dwm and other tools. I spent a lot of time modifying forks of software that I would use on the daily and I still do it to this day. With that I desperately needed a way to deploy my environment in a simple and relatively fast without jumping through either uninstalling default ISO packages or spend 2 hours on the arch wiki reading the install guide. I feel like i have done that install guide over a 100 times in the past. Which is why this iso comes with calamares as installer and incorporates a lot of my tools preconfigure (which is why the iso is quite big).
I also would walk around with a kali linux USB key on me everywhere I would go since for work and such I would need a fast to deploy environment to extract hashes from shutdown computers. Honestly most of the time I would boot into the kali iso and be frustrated that all of my usefull shortcuts wern't there and would usually waste time to download scripts onto the kali iso at each boot to simplify some tasks. With this iso I also wanted to address this other problem which is why on initial boot you do not need to go in the Desktop Environment you do have the option to tty (like a G) or even a simple dialog menu to extract hashes on found hard drive partitions or replace Utilman.exe to cmd.exe on windows case (see this article on my blog if you are confused about this).
These are the two main issues I address with this project and also as a bonus I get to answer a question I got a lot when I was a teacher "Leo what operating system do you use" and instead of saying I heavily customised ubuntu or arch I can now say my own. I also know that with this iso people can try out my kind of environment in a simple way without having some crazy packages to download and setup (i3wm was the main one I'd get my students to try out in the past).
Screenshots
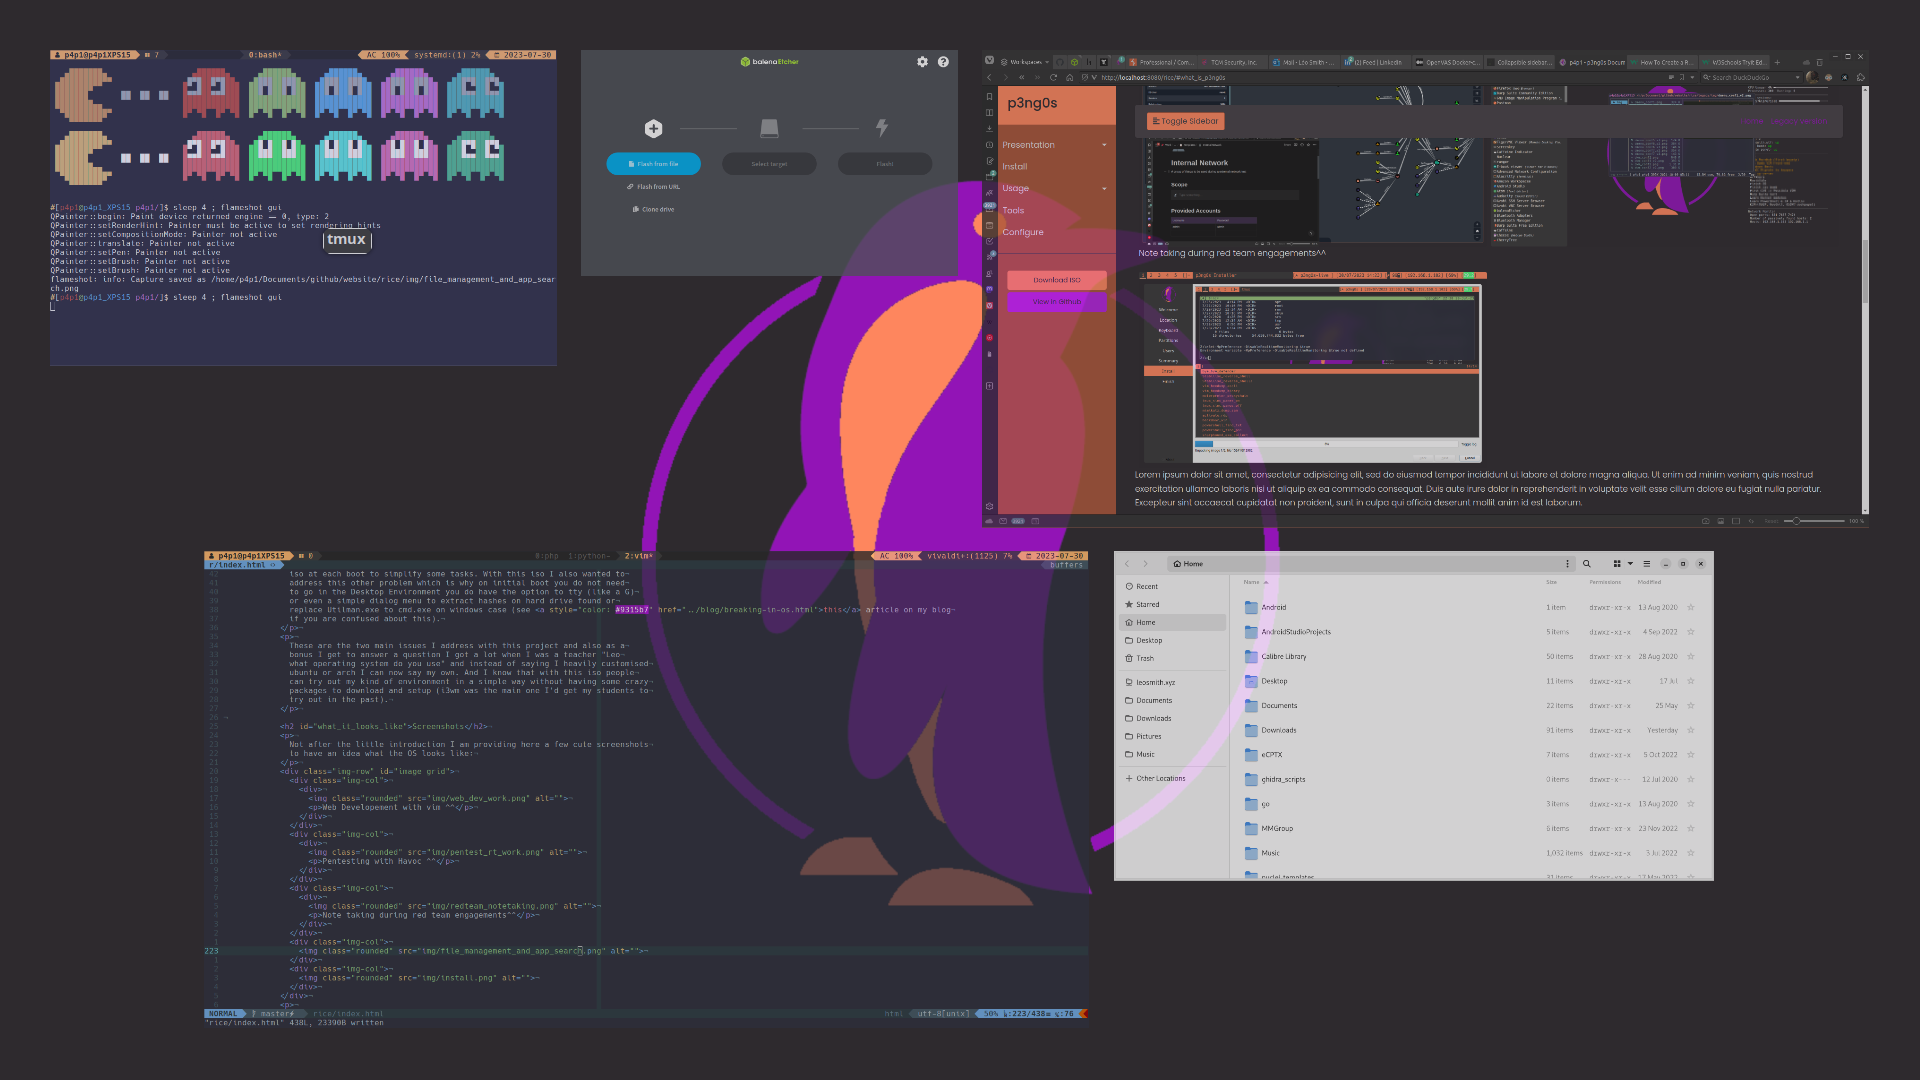
Now after the little introduction I am providing here a few cute screenshots to give an idea on what the OS looks like:
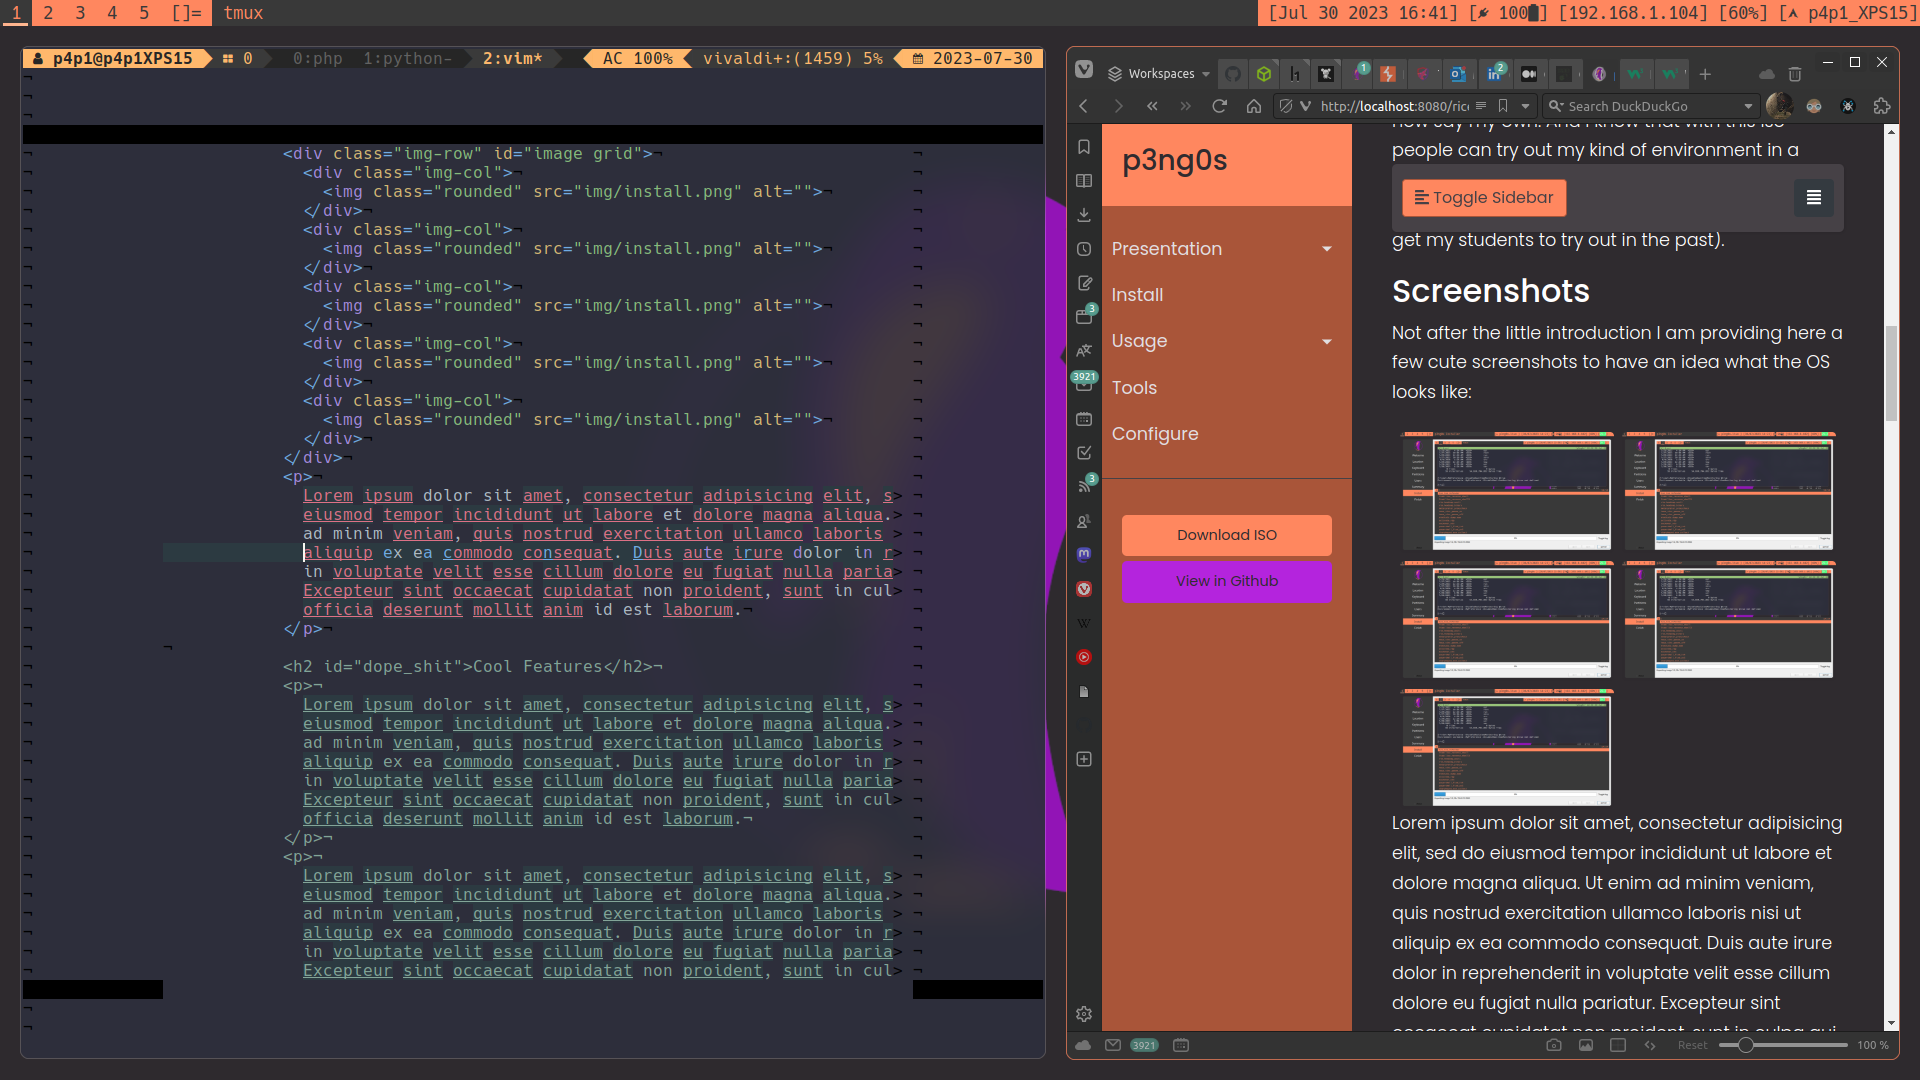
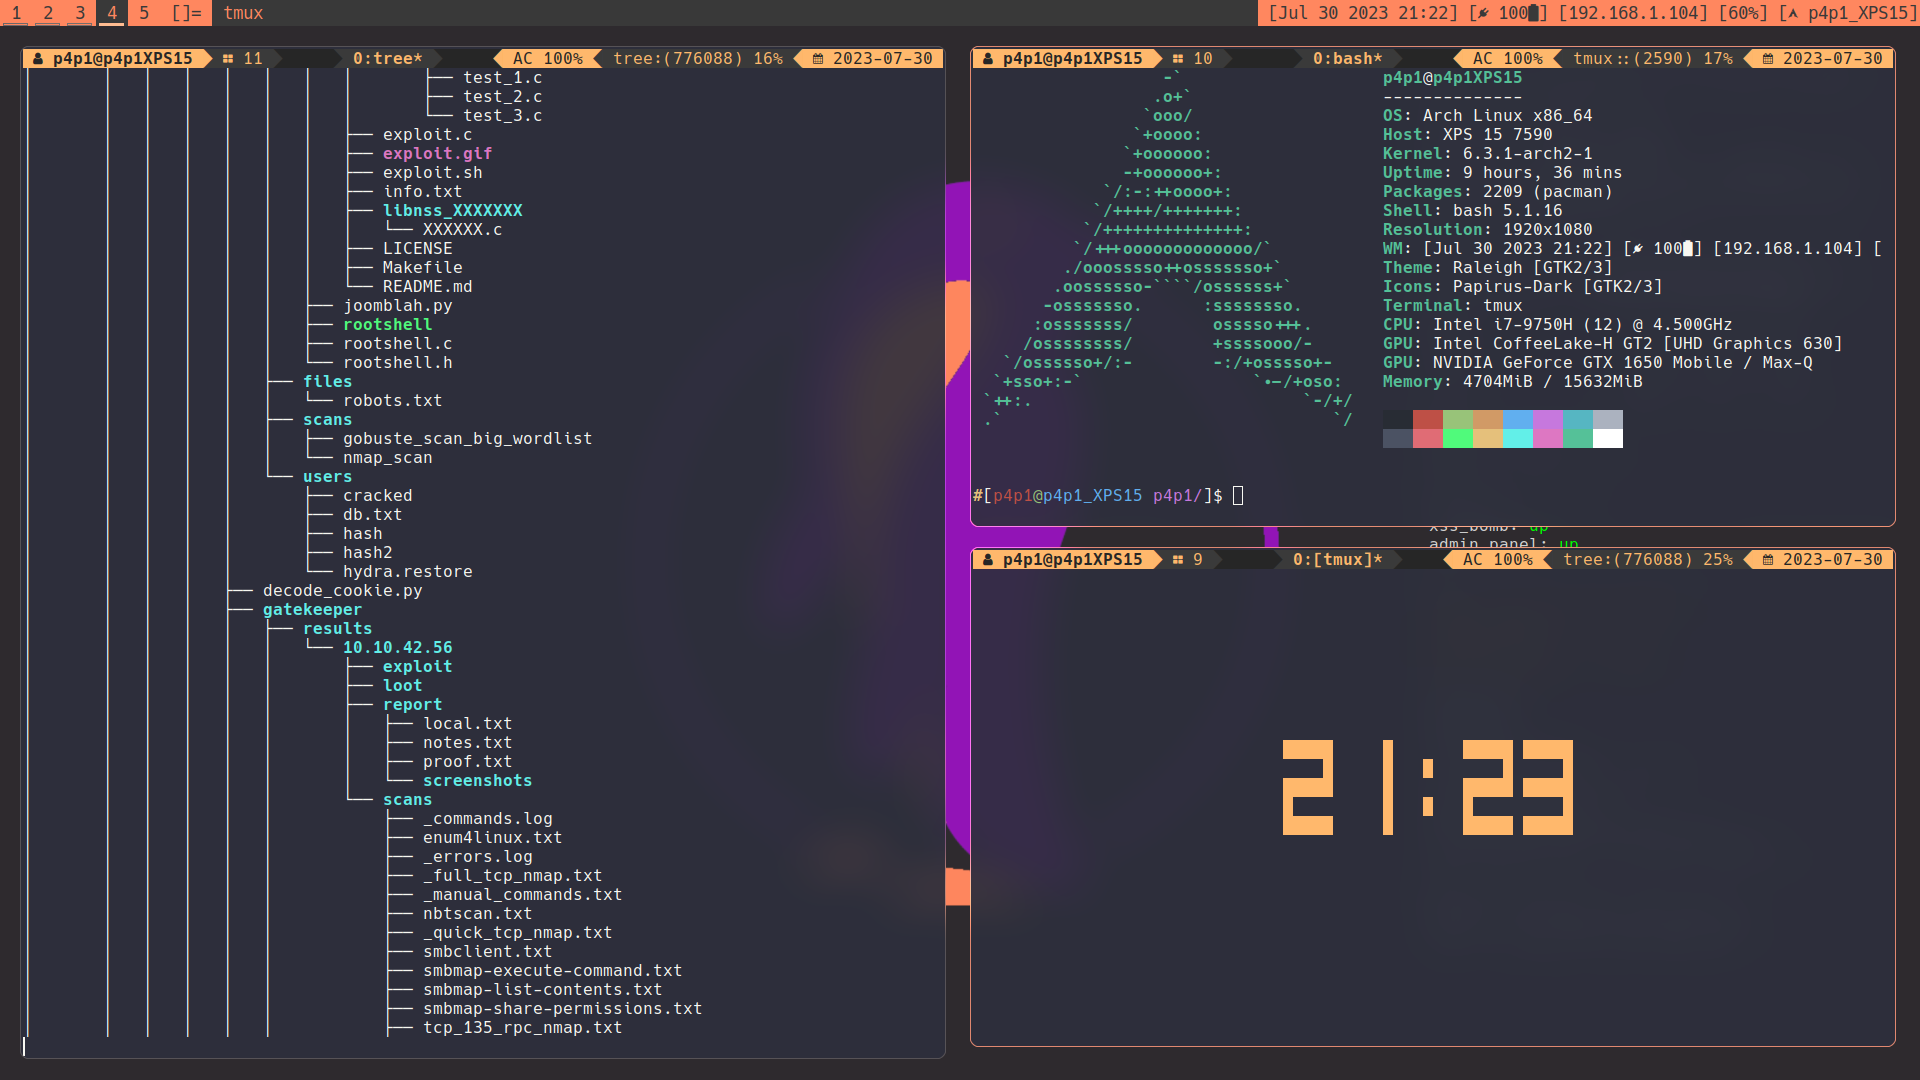
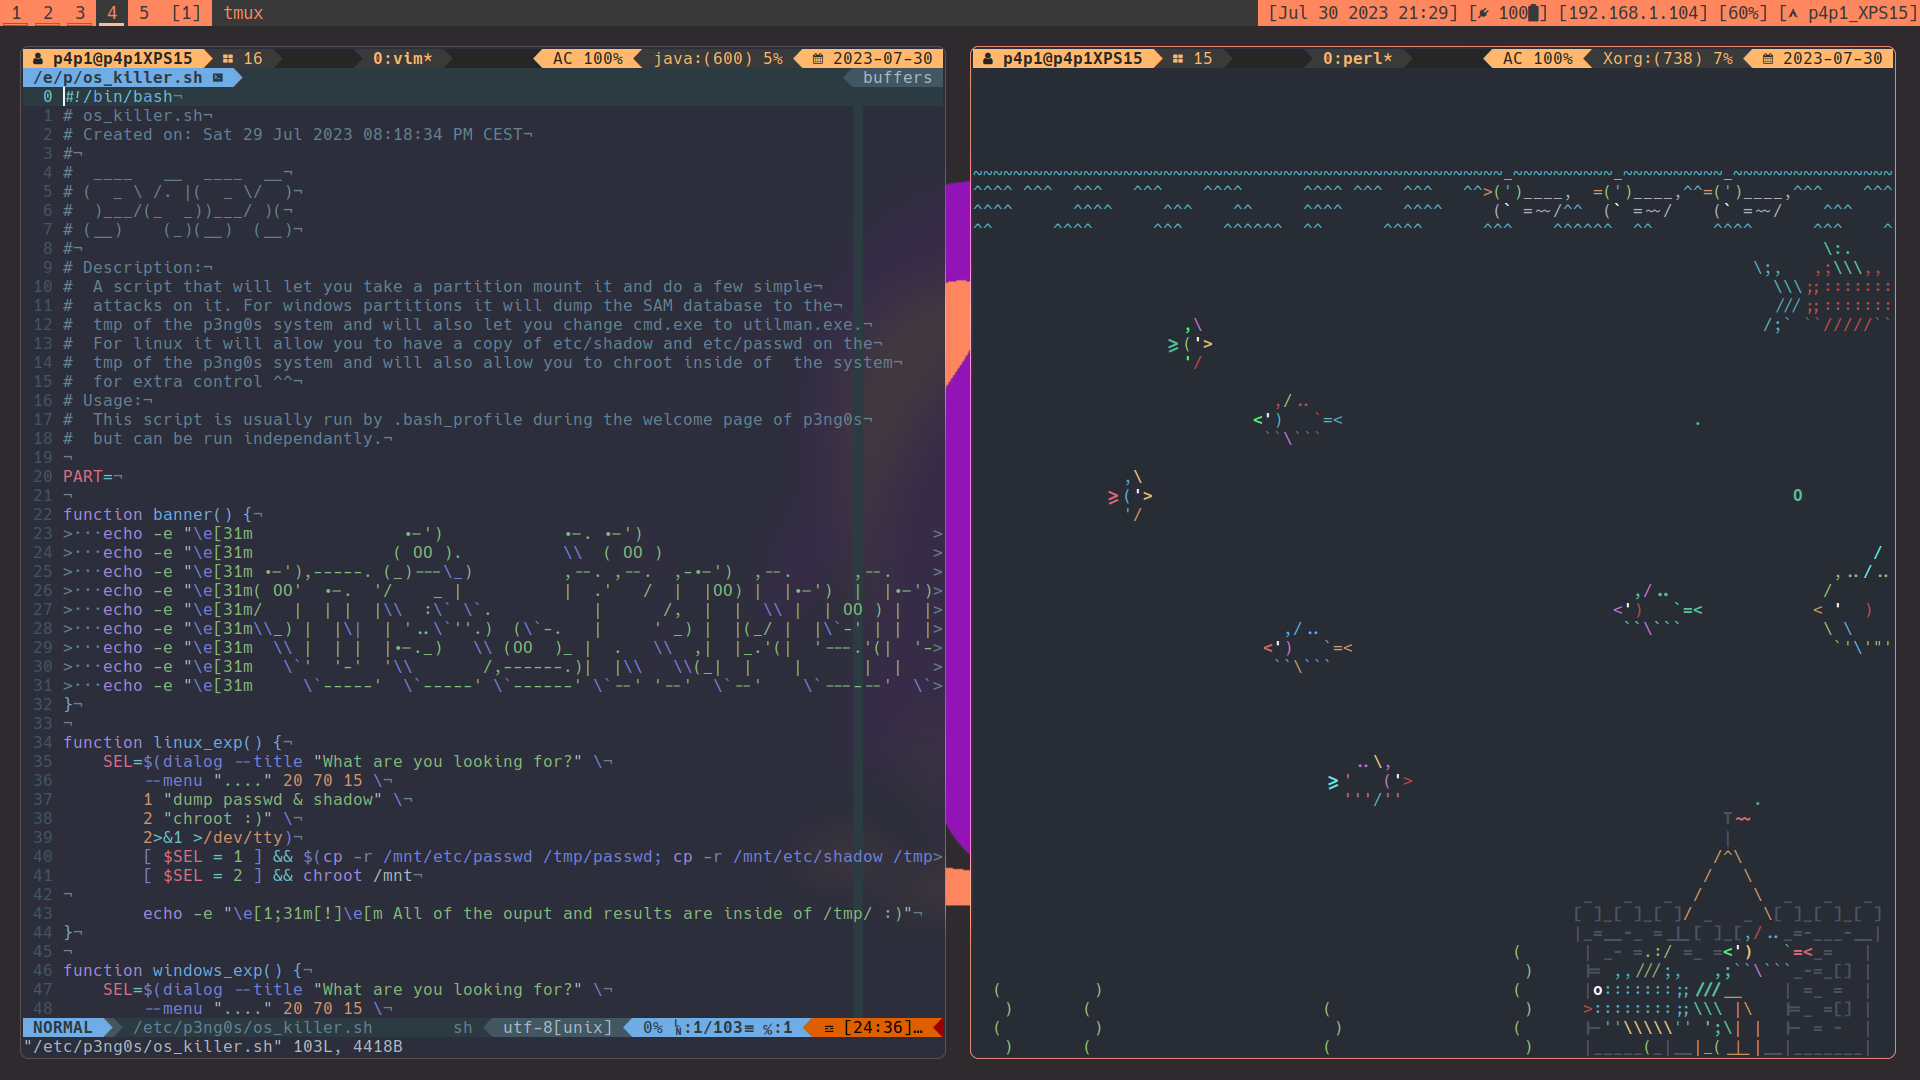
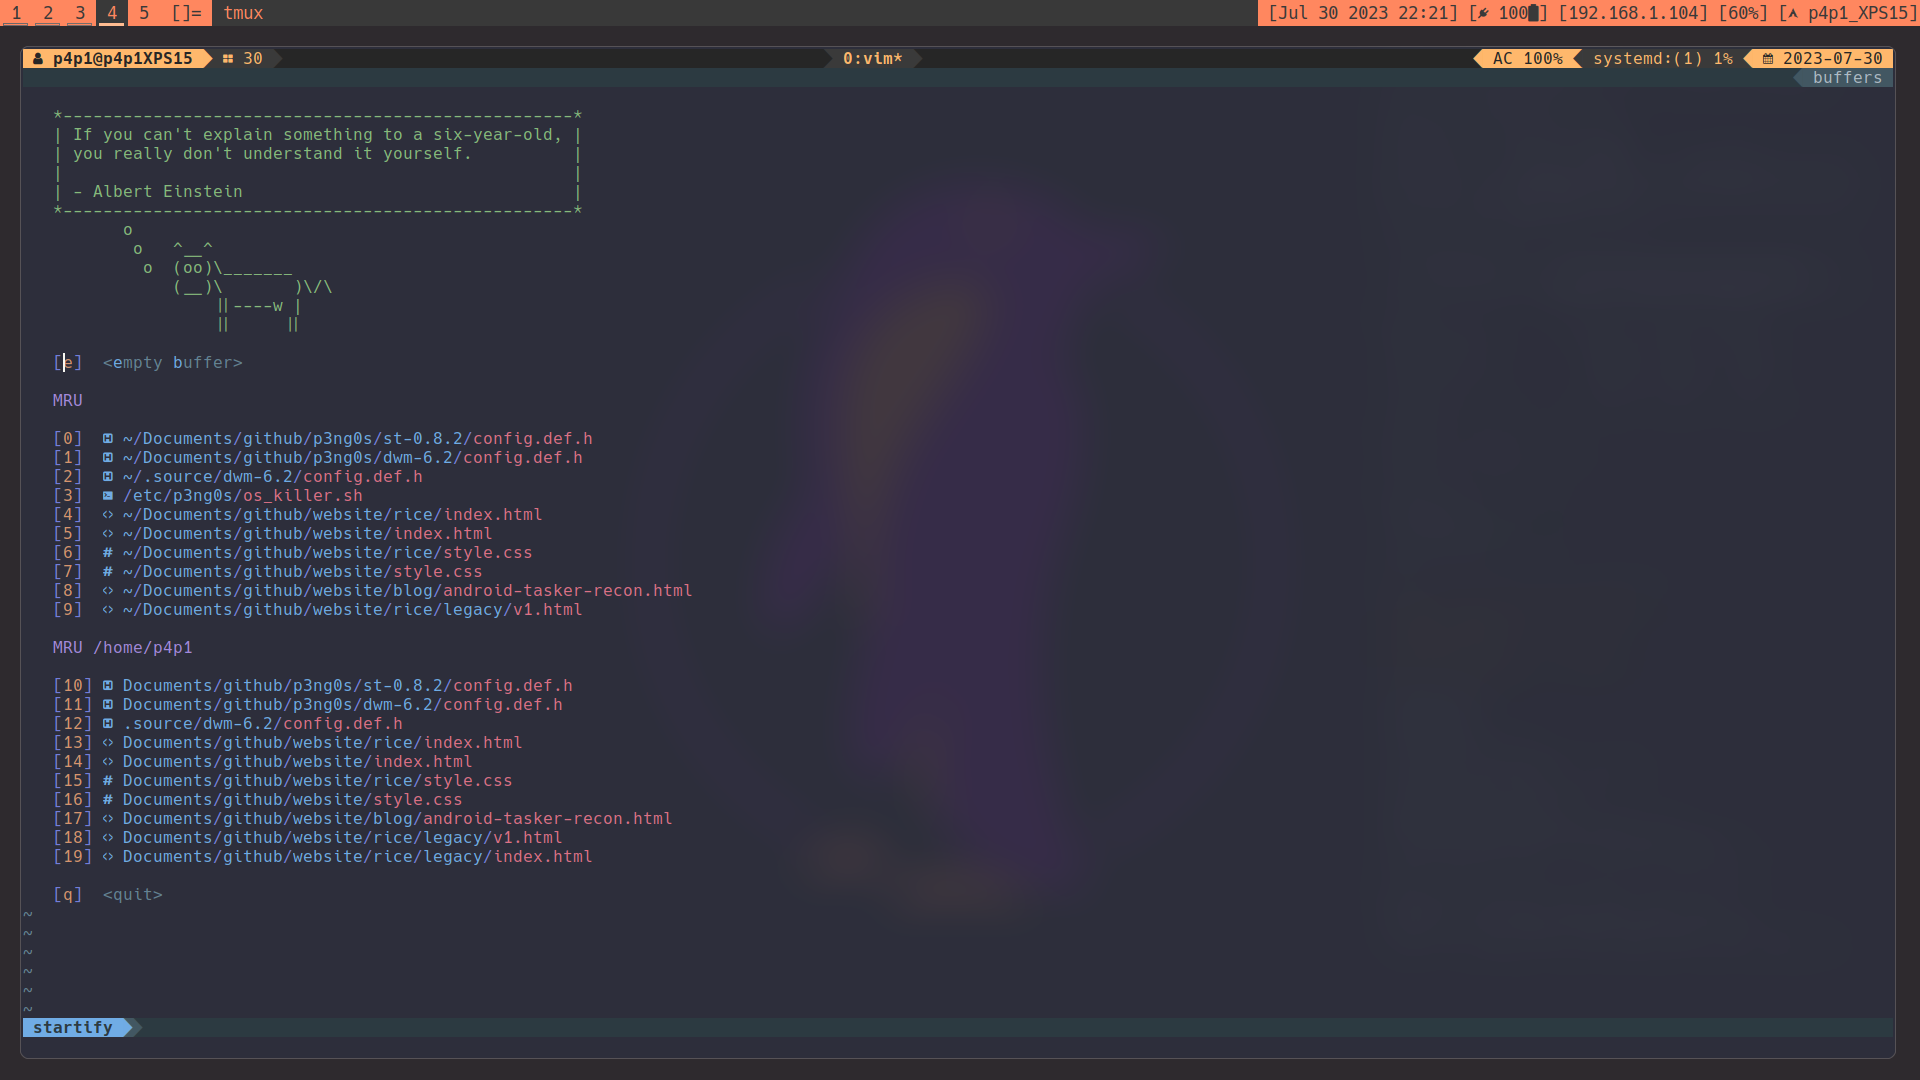
Web Developement with vim ^^
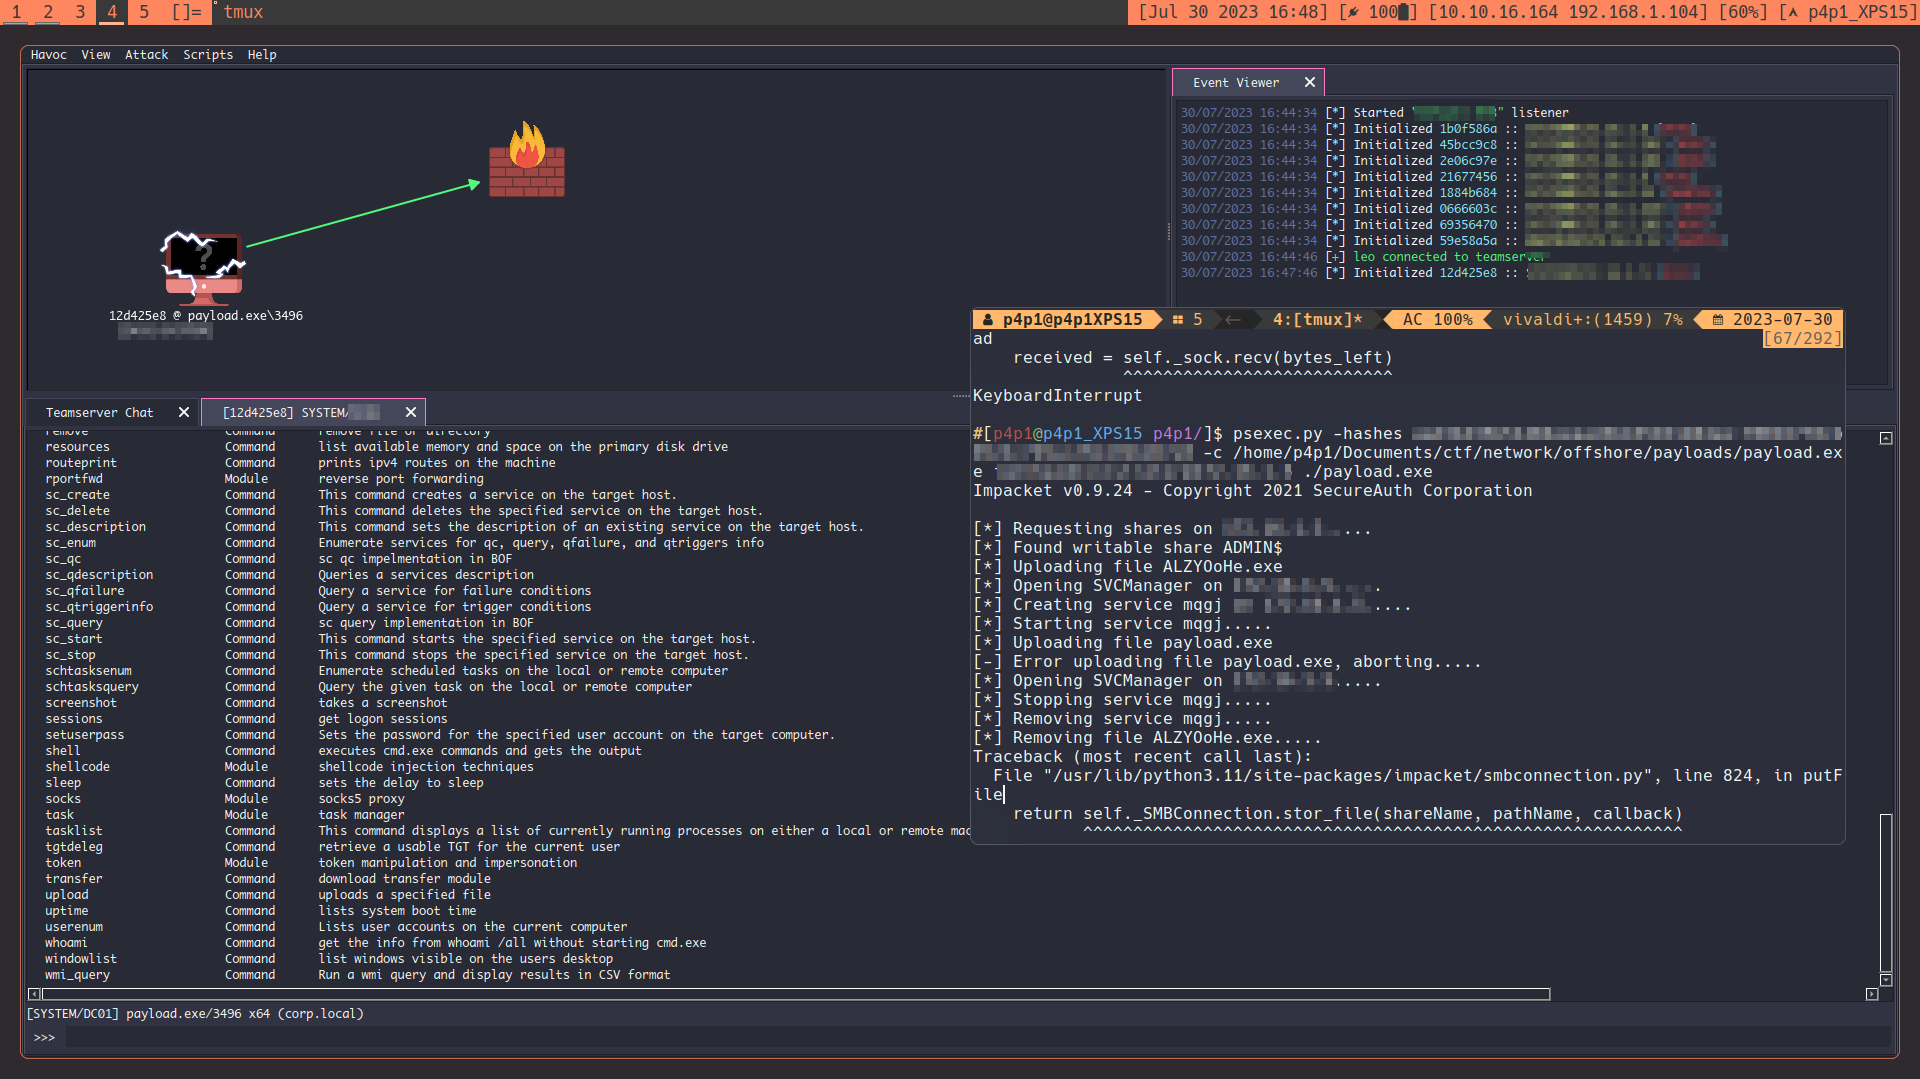
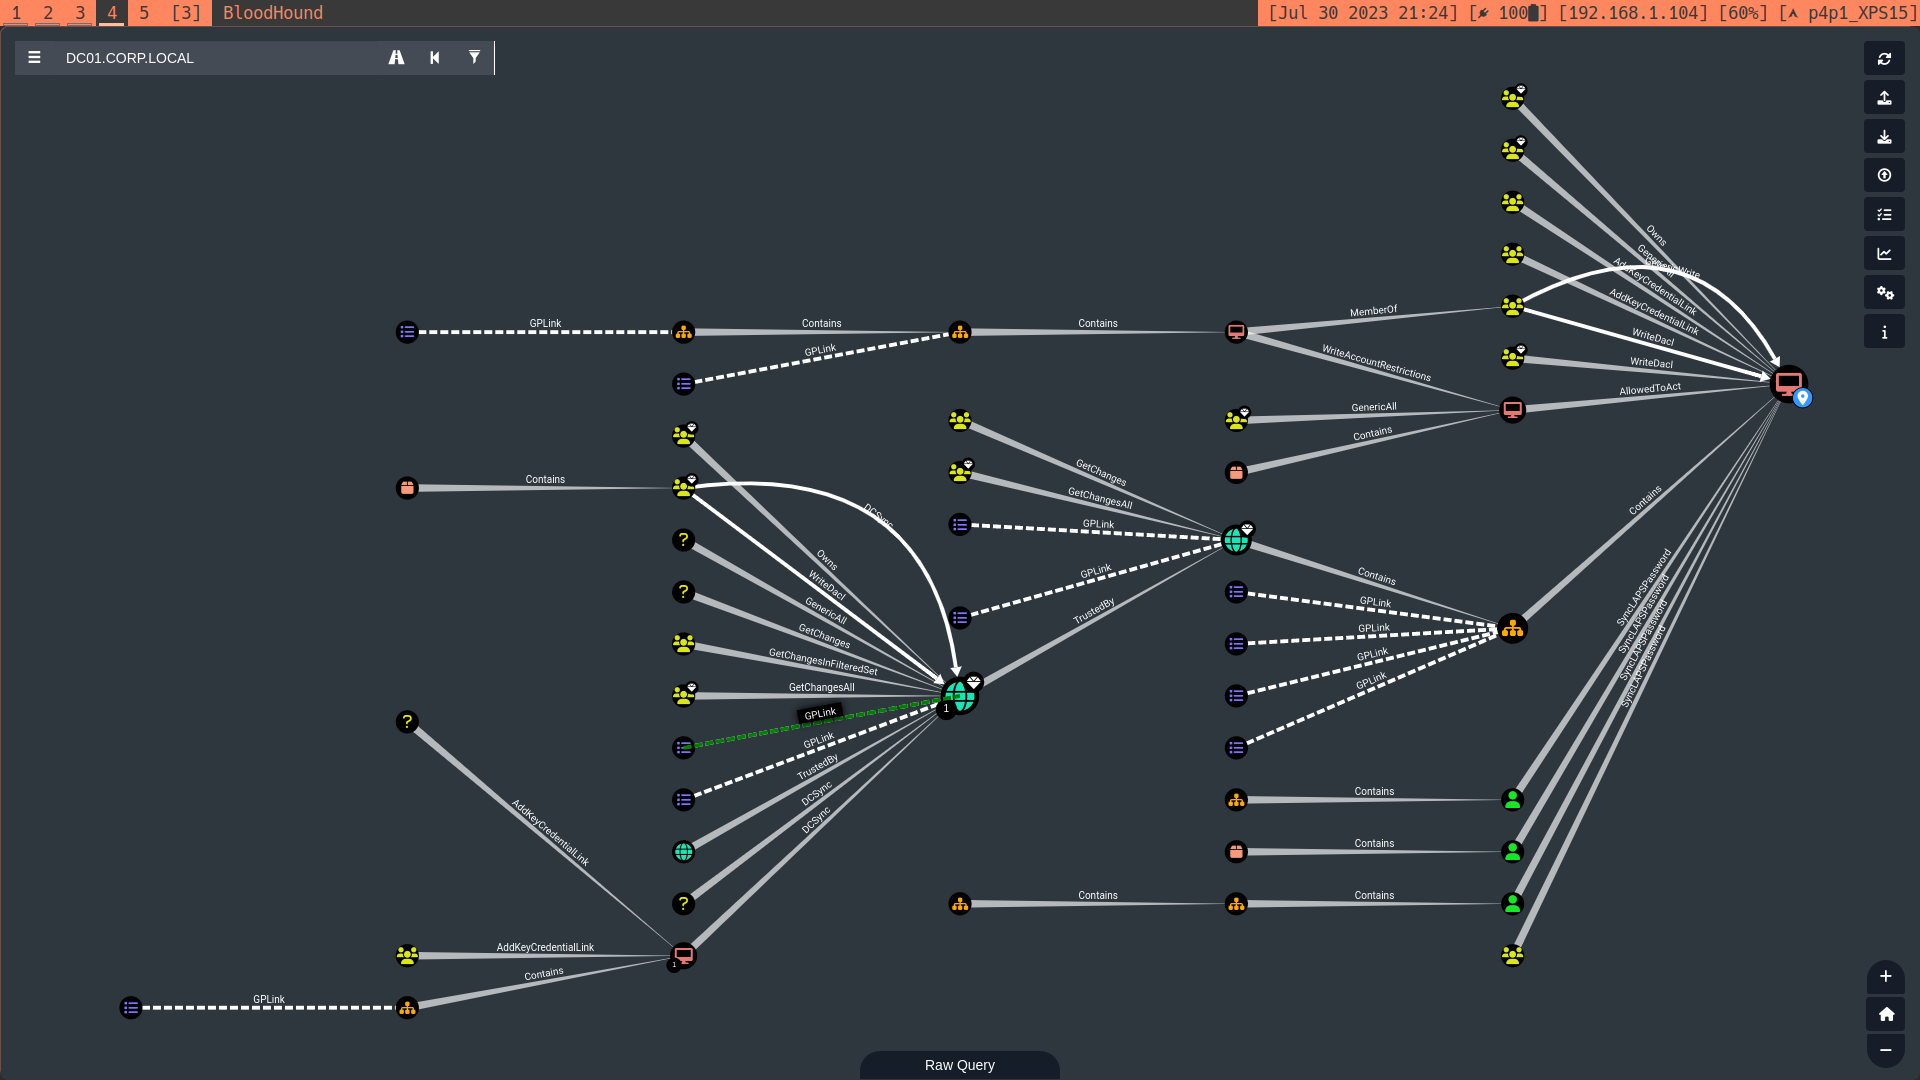
Pentesting with Havoc ^^
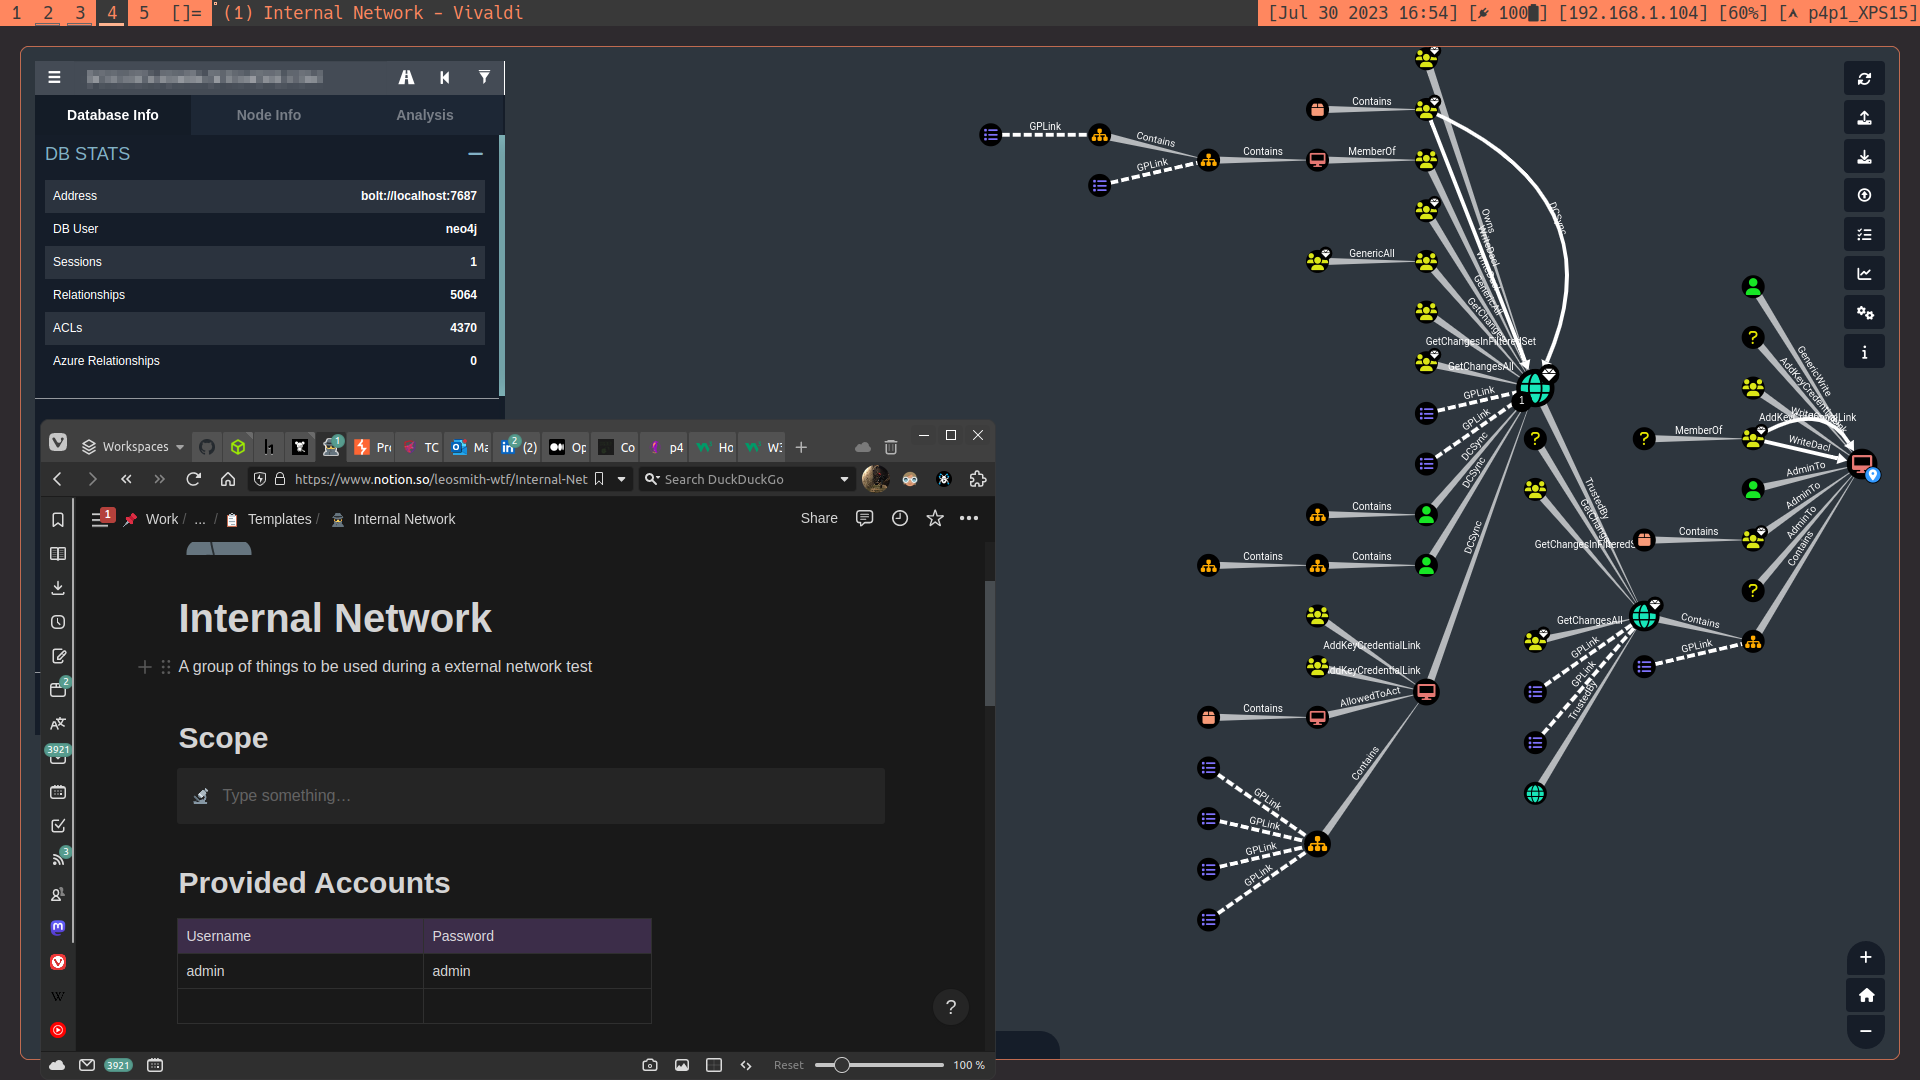
Note taking during red team engagements^^
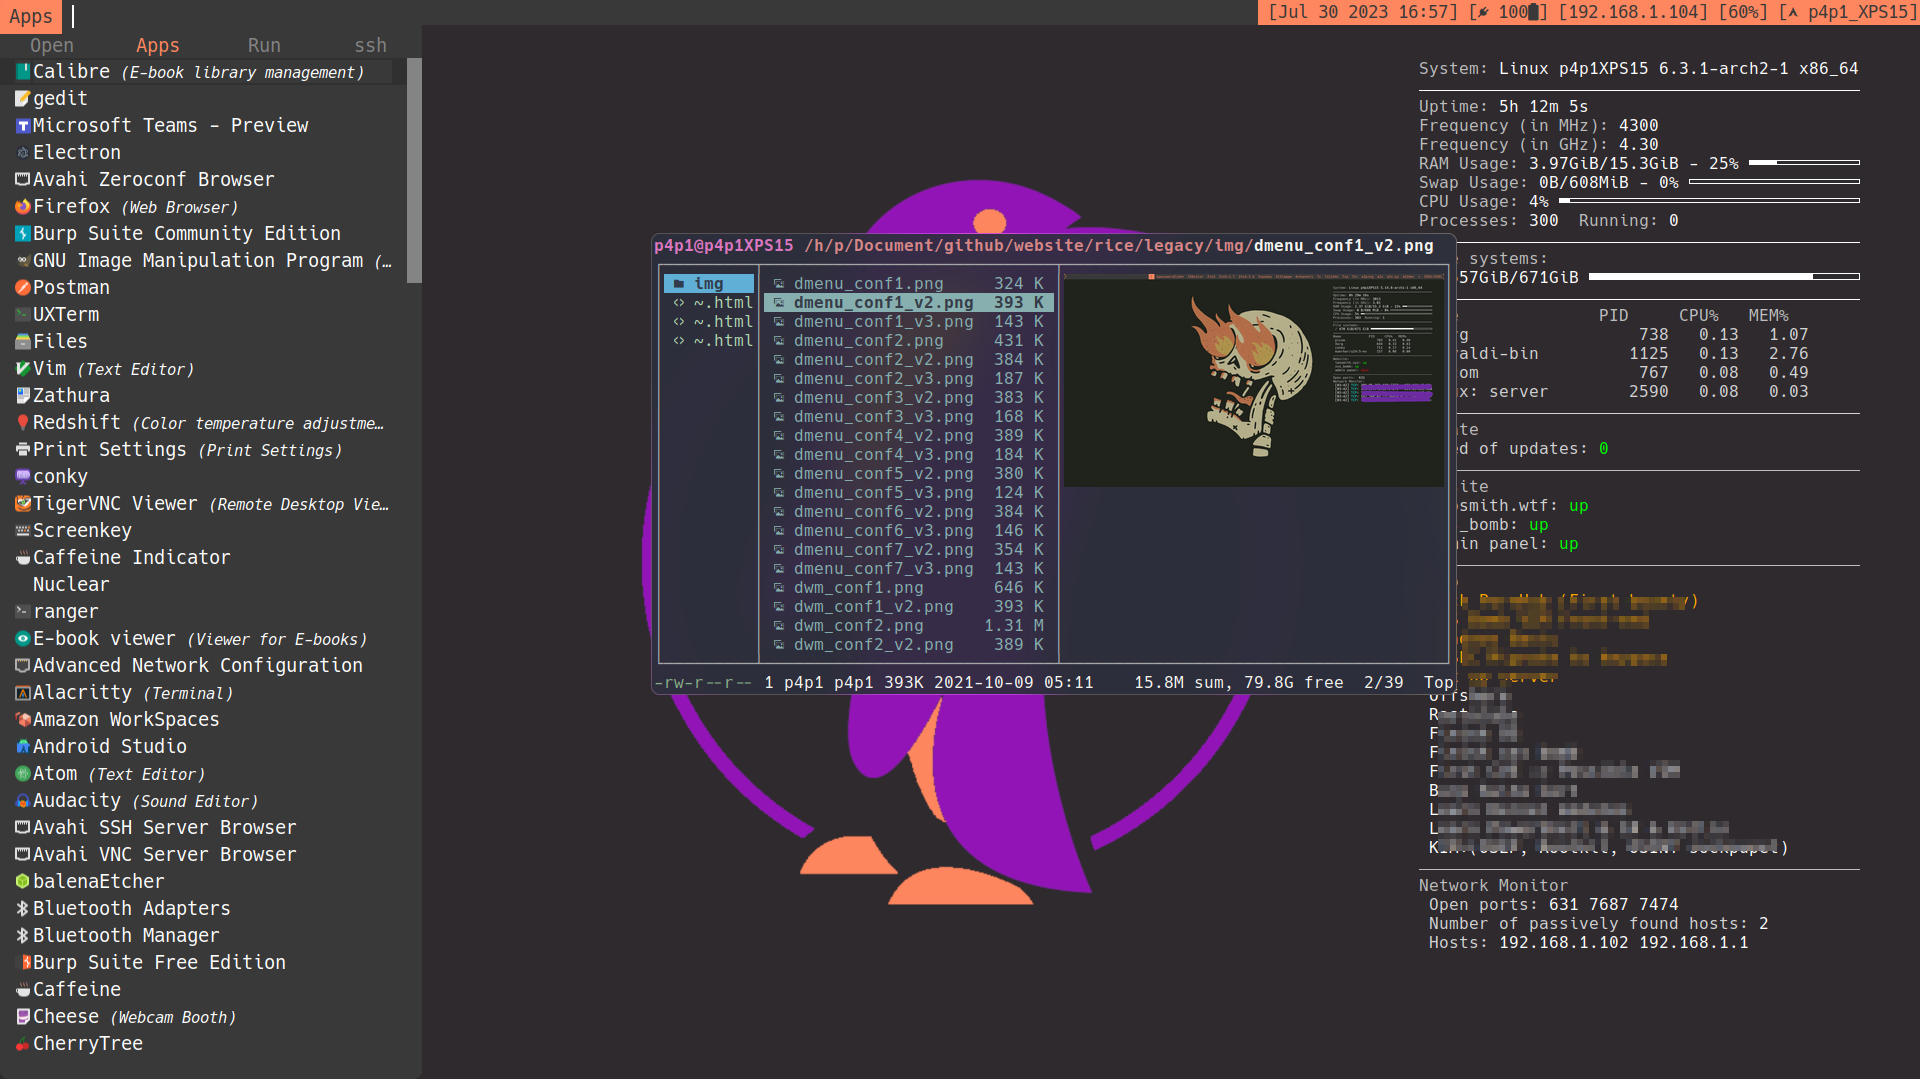
managing files and searching for applications
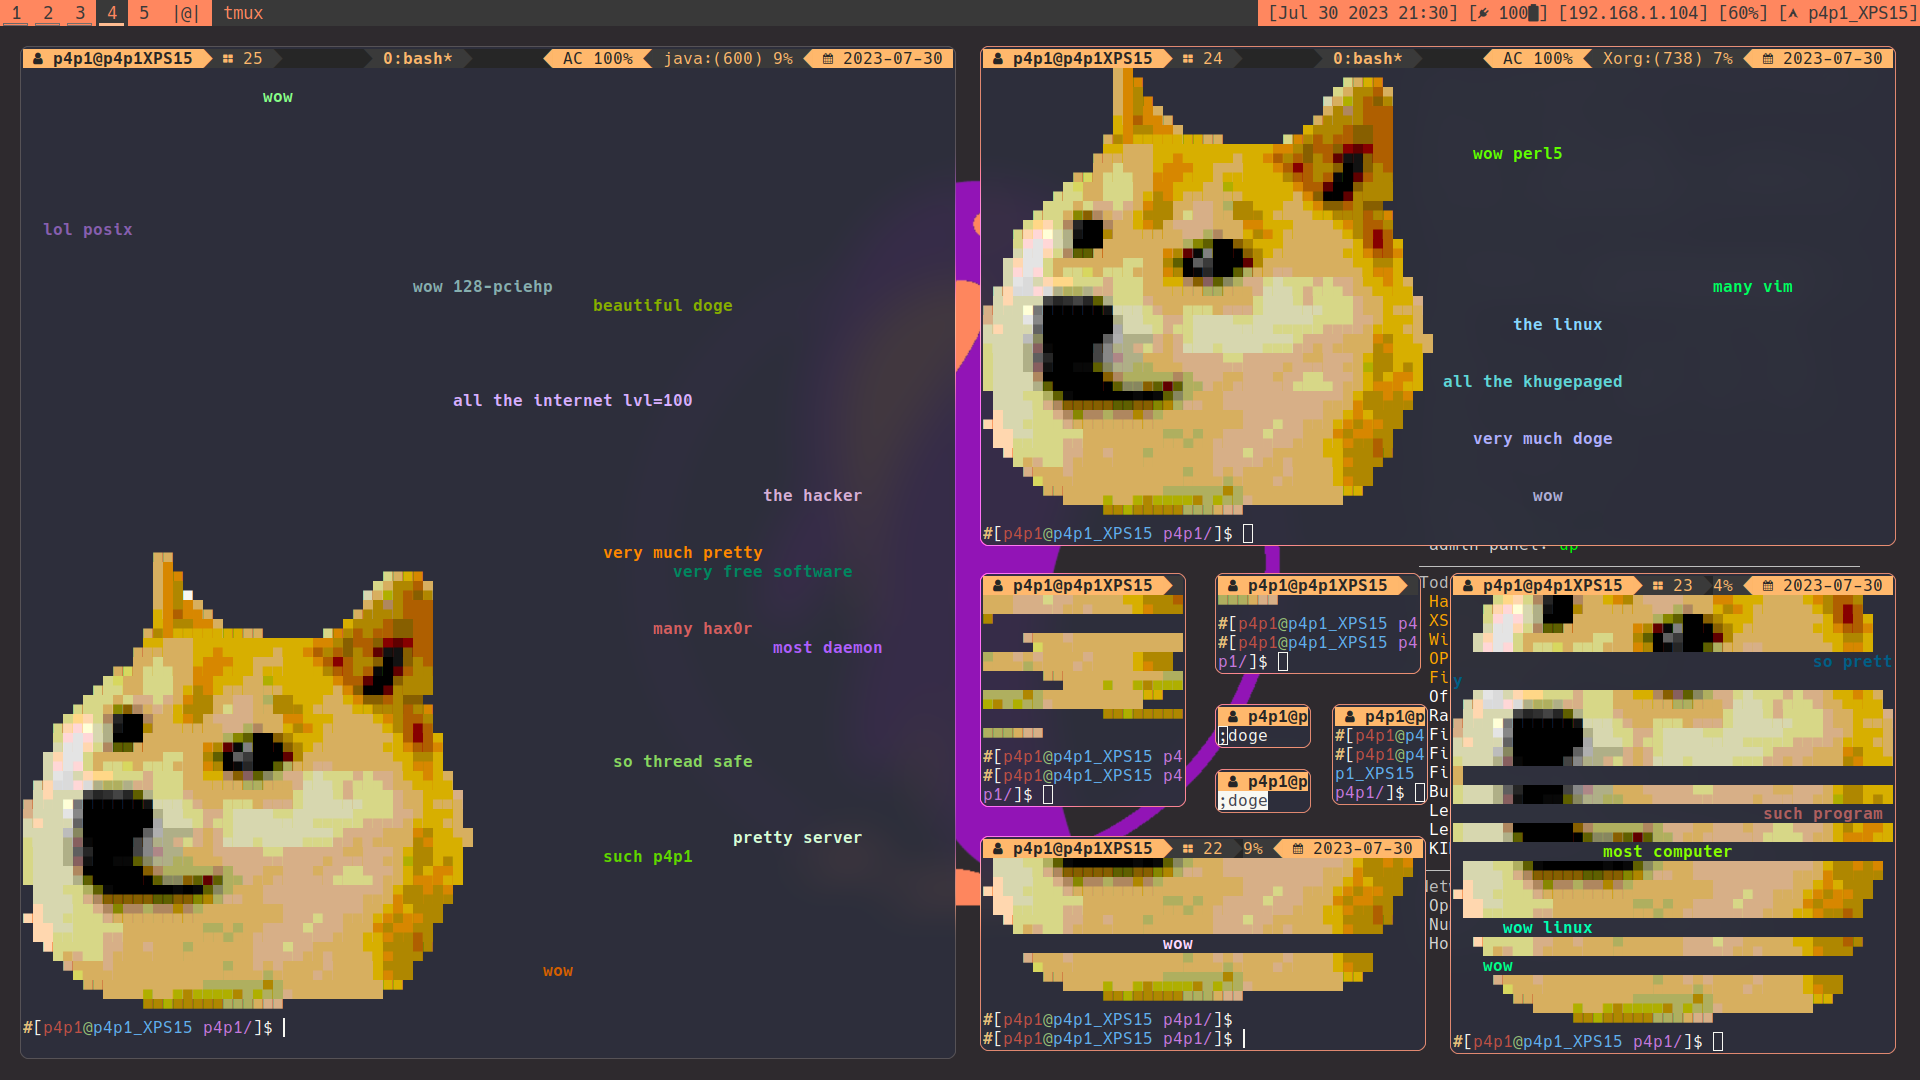
Alt-Tabbing through all apps
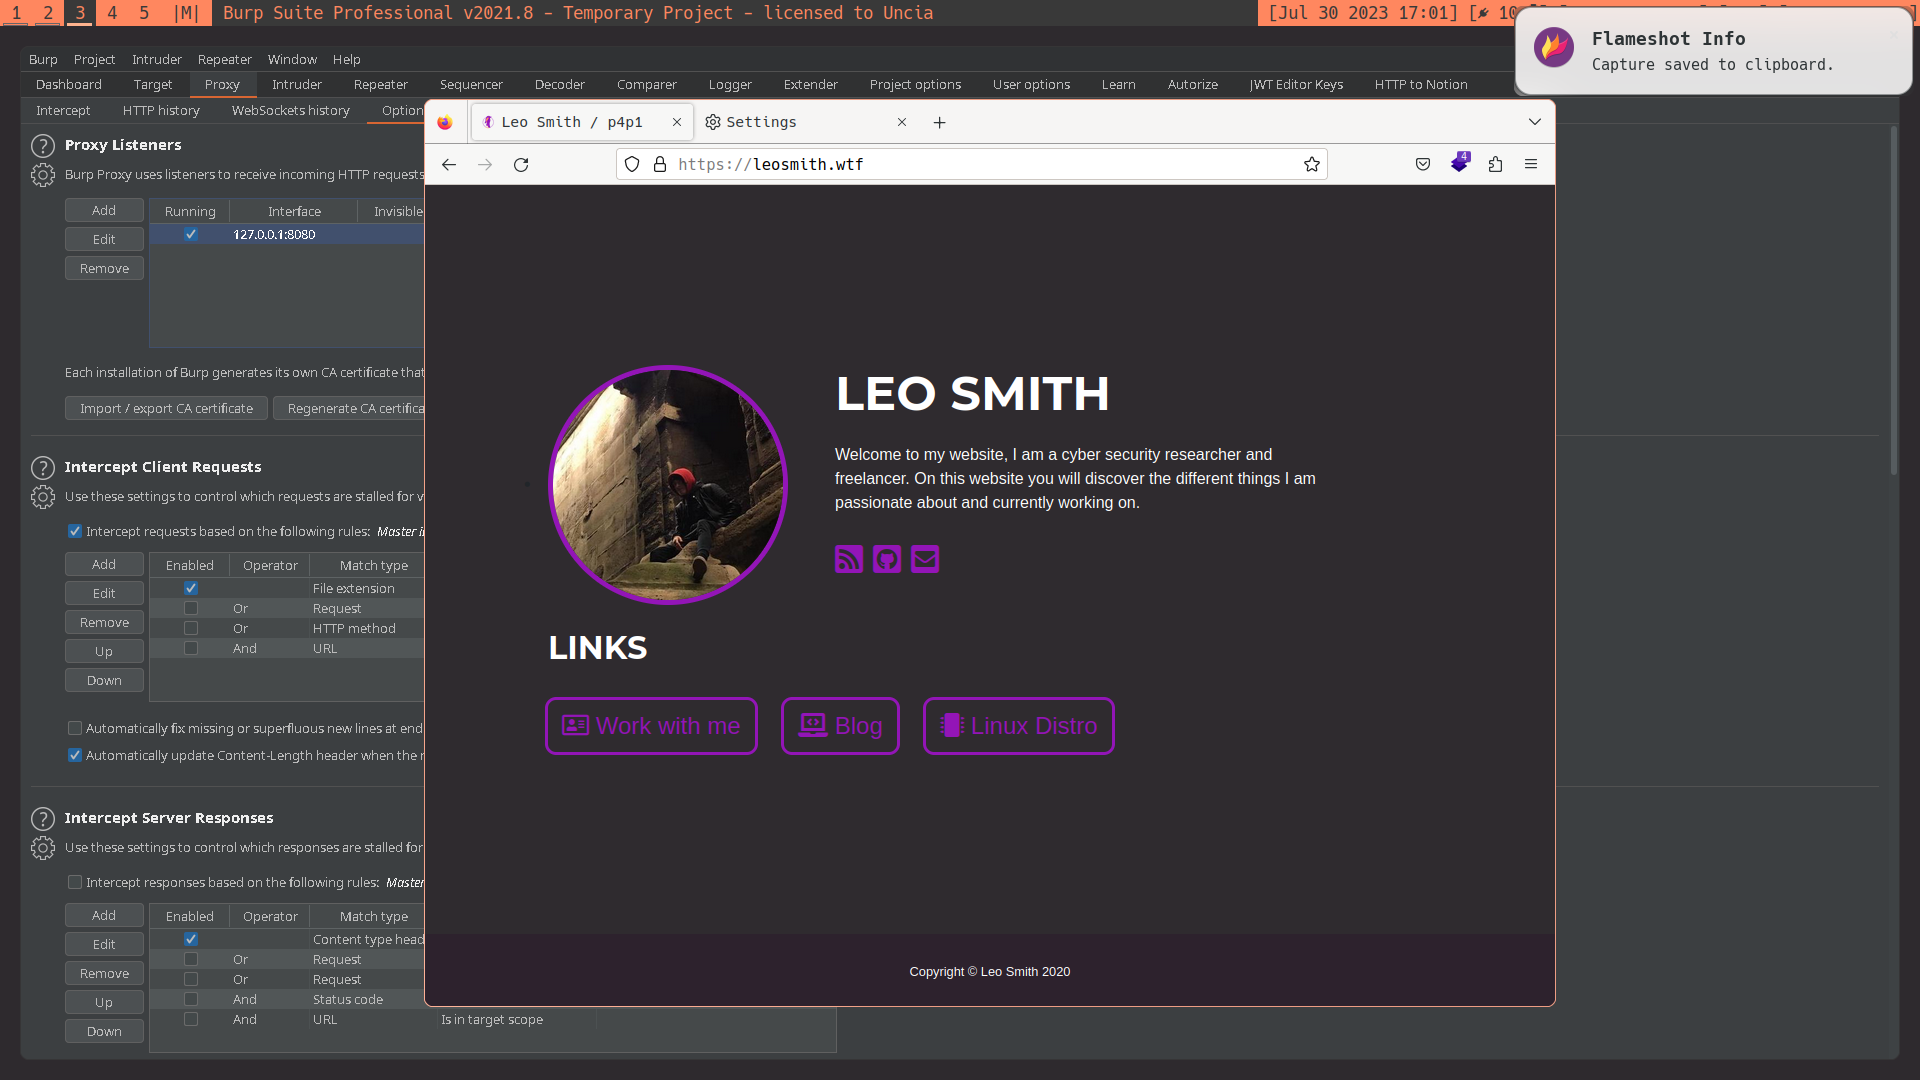
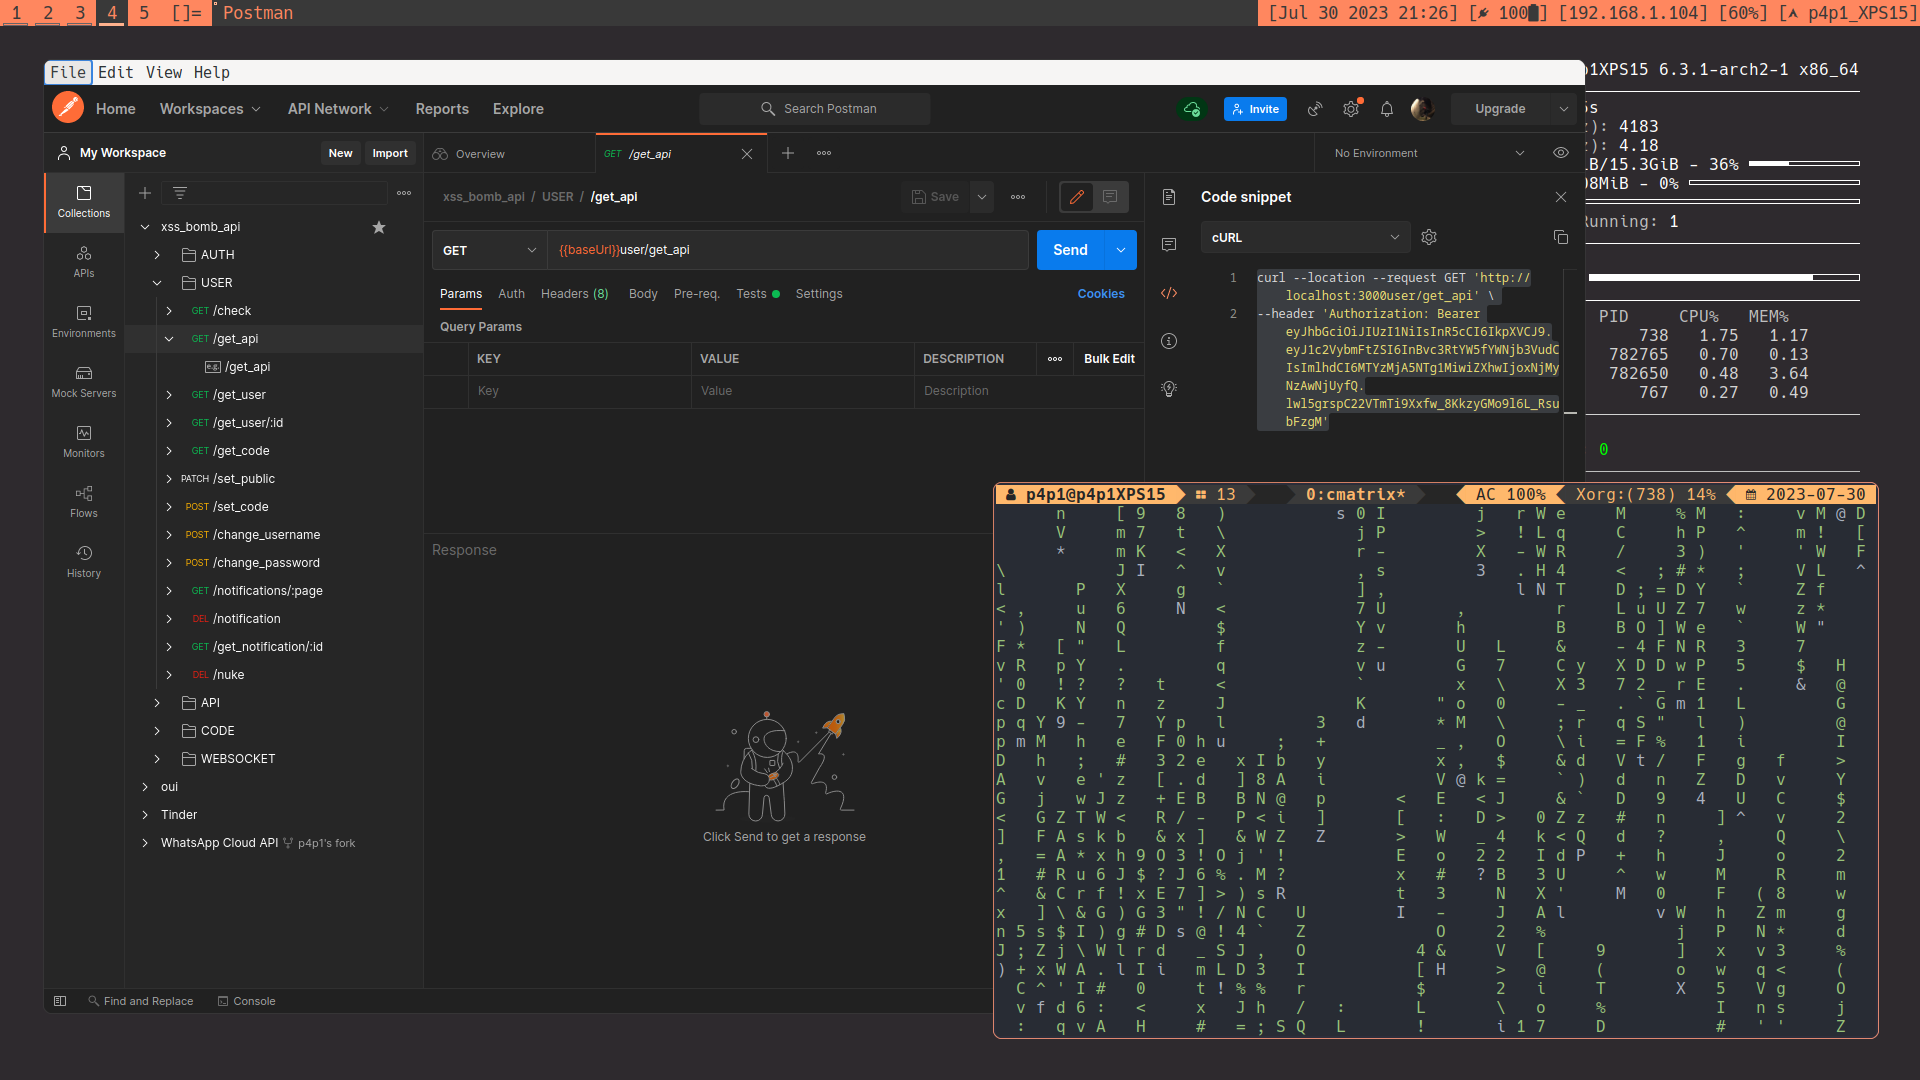
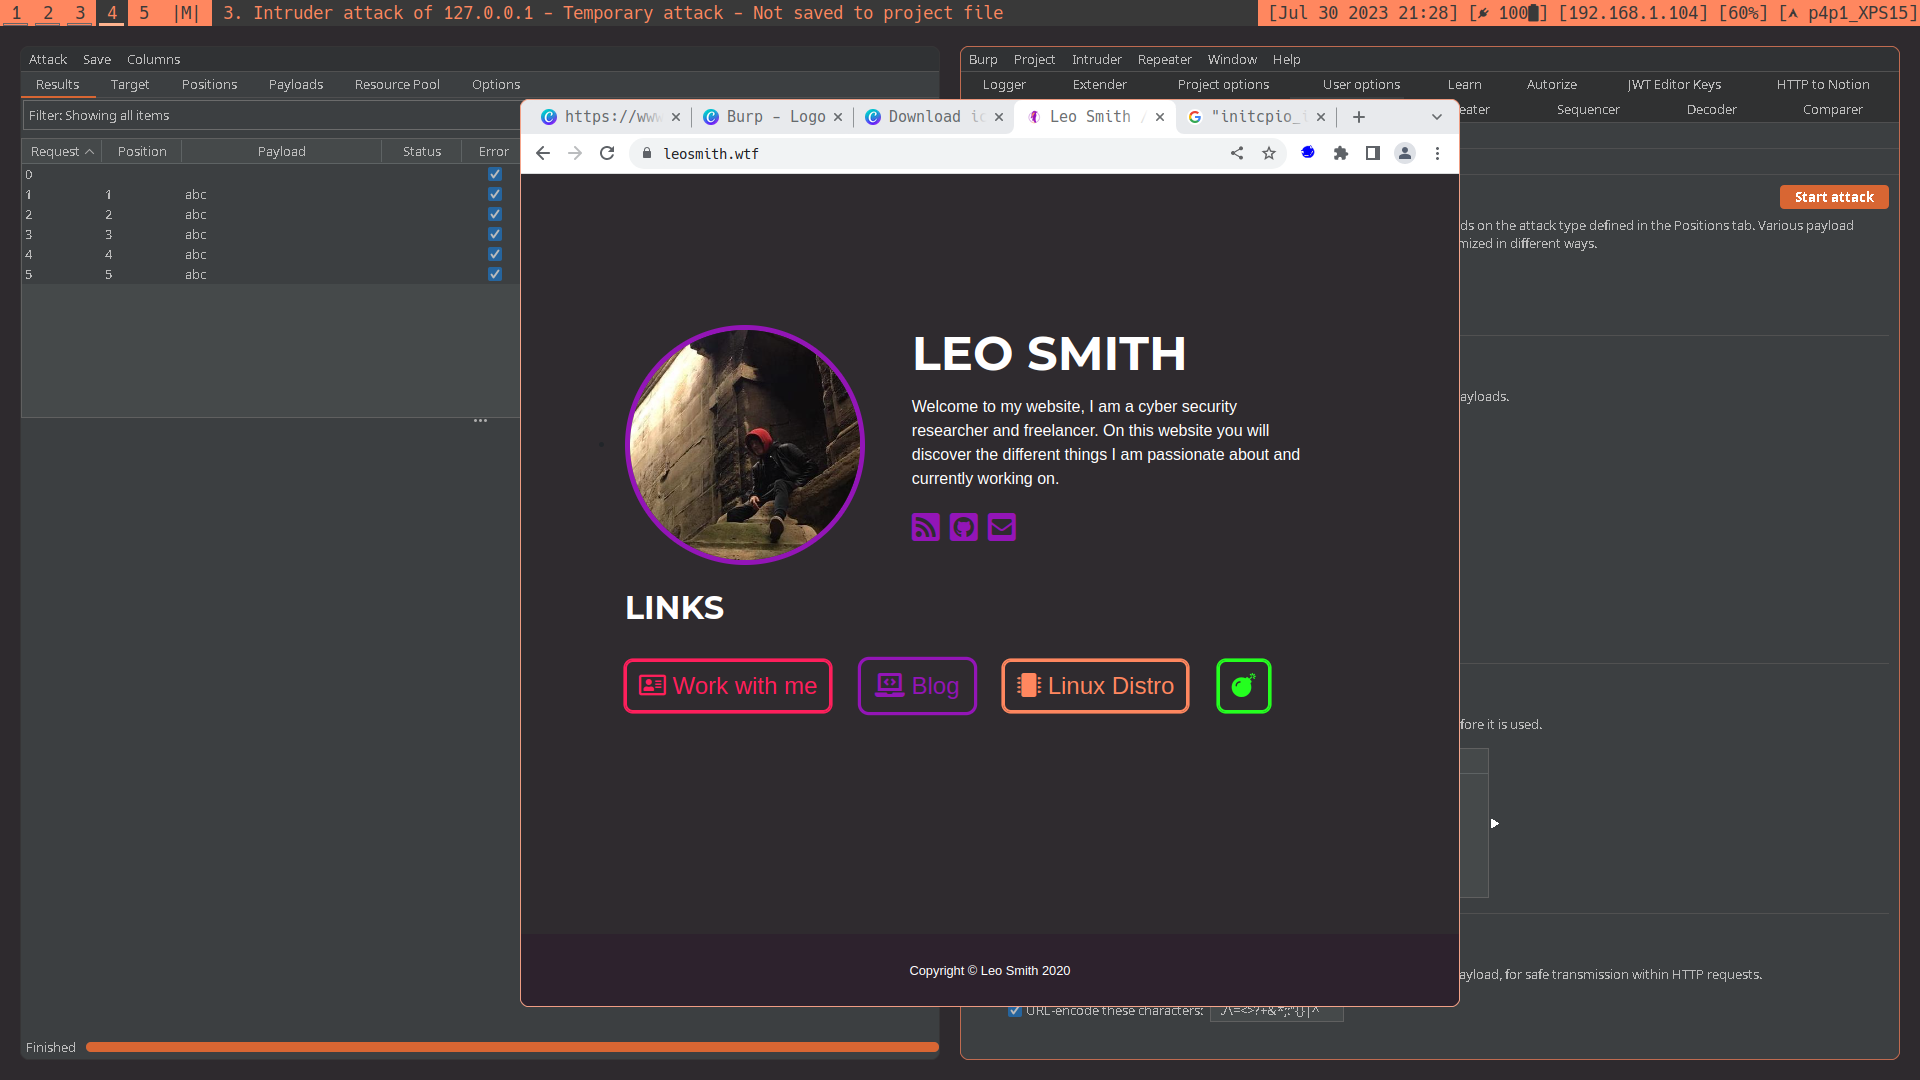
Website security testing
Cool Features
I'm packing this linux distro with a lot of features for fun and when I have a random cute idea I'll usually implement it inside of it. Currently the main ones that I added is the little penguin easter egg on boot and the os_killer script that I use to retrieve SAM, SYSTEM and SECURITY files from windows hosts and passwd and shadown files from linux hosts. os_killer can do more (see the os_killer section). I also implemented a script called git_apocalypse that will install all of the git repositories on the computer after install. Ranging from custom things I built to ctf utilities and tools I would use for work. This script is basically a giant git pull and structures all of the tools inside of /opt/. The distro also comes with great shortcuts and scripts that allow to automate some redundant pentesting tasks like disabling defender on remote hosts or creating backdoor users and also the infamous python tty technique to stabilise reverse shells.
Install

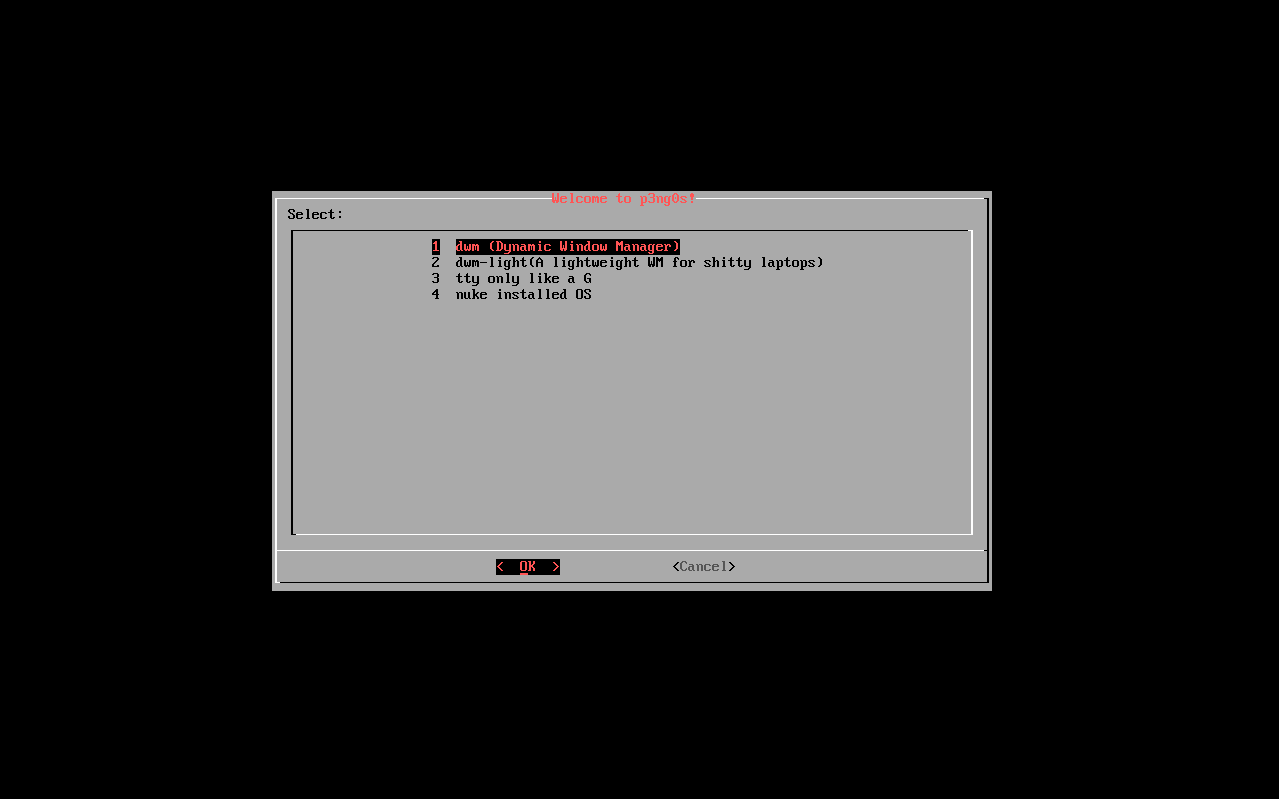
The install process is quite simple and straight forward on first boot of the ISO you will have a welcome to p3ng0s pop-up where you can choose either dwm, dwm-light (see window manager modes for more info) , tty only or os_killer(nuke installed OS). I recommend for users to just pick the first if you want a straight forward install experience. The installer should automatically open on entering the window manager where you can just type in your information. Nothing you haven't done before. The iso download link is available at the bottom of the left panel under the shortcuts for the wiki and above the github button. I do recommend going through this website in it's entirety before installing since a lot of the shortcuts are meant to be known and there is no hand holding. You can get a shortcut list in the man page of dwm straight on the machine ;) and if you are connected to the internet you can open the wifi through the xmenu shortcut.
To note: I might do a little video tutorial to explain the install process for really new users but I do not recommend beginners using this. And for advanced users I would recommend building your own...
Default credentials
Default user: p4p1-live
Password: p4p1
root user: root
root password: p4p1
Usage
OS_killer.sh
This is one of the small things that really sets apart my little project from other distributions and live installs. A lot of time during my life I was confronted with machine where I wasn't admin / just forgot their password and I needed a simple way to edit the file system to escalate privileges or reset the password. A lot of the basic attacks I would regularly use to achieve my goals could be done with any iso. I personally used to use a kali-linux iso to do the following things this script automates. But seeing my previous wording this script automates those tasks for me in a simple and easy to understand way. The script is not fail-safe and if you endup quitting the program in some areas it will just default boot you in the window manager saved in the .xinitrc file. But for now it's quick and easy purpose this script is perfect. I will now go through the typical workflow to showcase what the script does because I honestly believe that a practical example will showcase a lot more than some list of functionality. For the windows example see the last screenshot since all of the functionalities are covered here currently.
Let's imagine a simple scenario where I have a linux machine that I do not know the password of. This happened to me multiple times since I have a lot of hard drives with linux on them but don't remember how I set it up in the past. In this scenario I can boot the live p3ng0s iso on the machine and after the initial login instead of picking the window manager I would pick the 4th option which is nuke the installed OS. I was having fun that night wasn't I :).
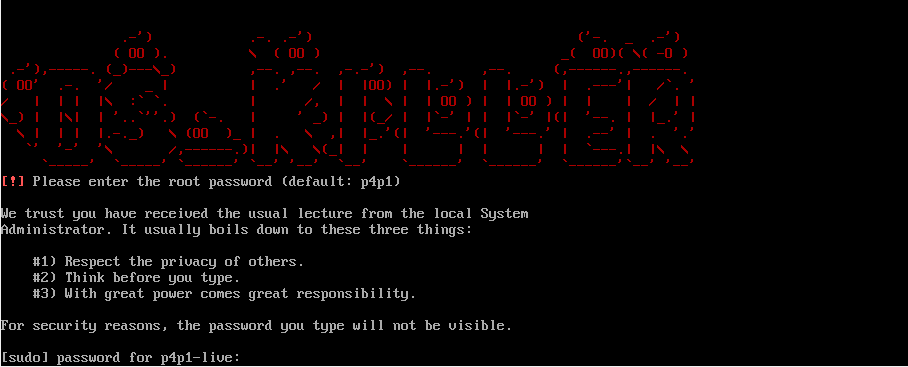
From there you are usually prompted to enter the admin password see default credentials at the end of the install section:
After this you are presented with a list of partitions that you can work with.
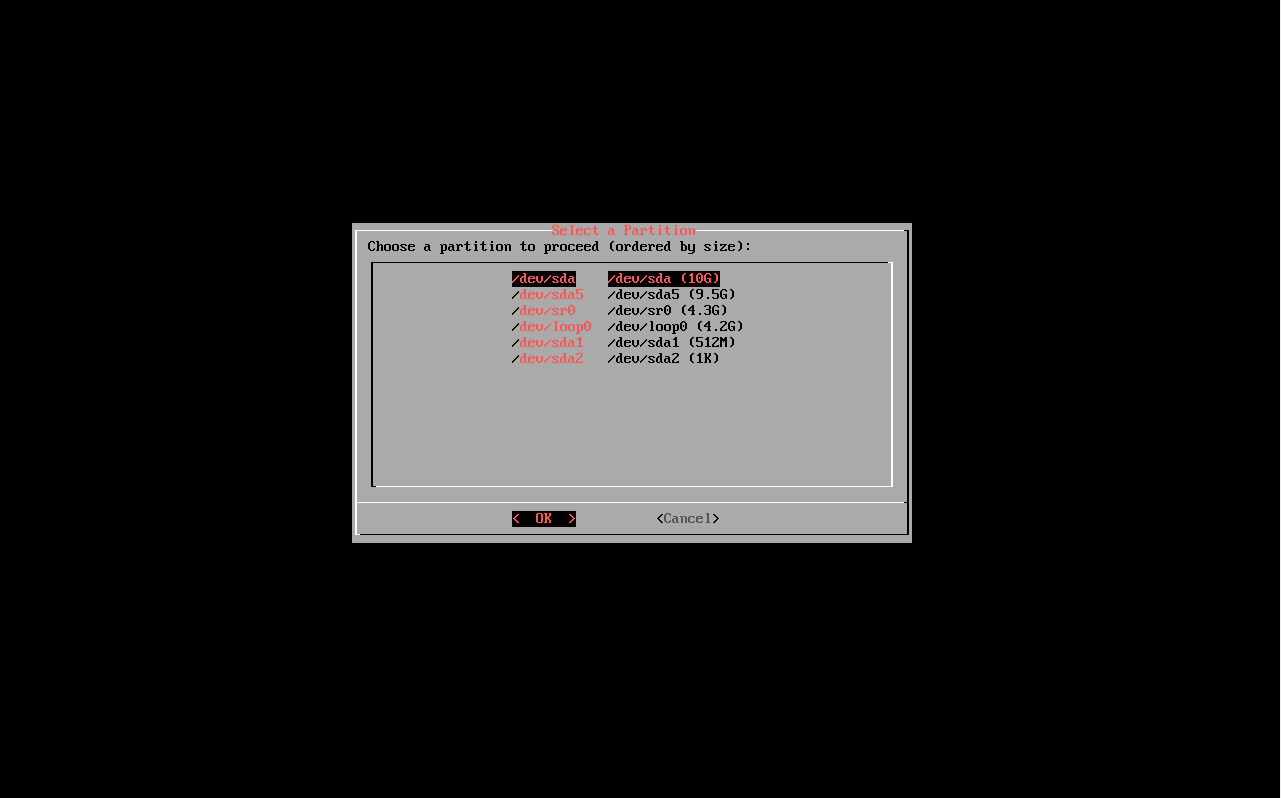
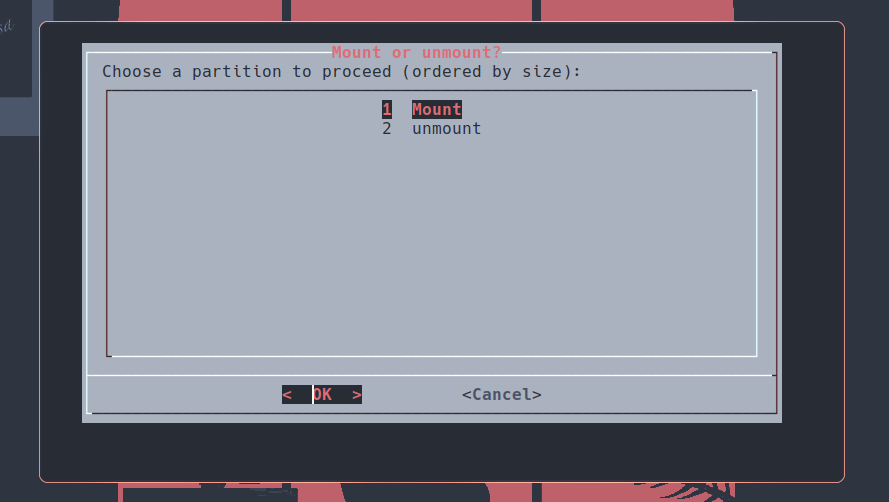
Picking a drive will automatically mount it to /mnt this will lead you to then be able to execute different commands on the file system
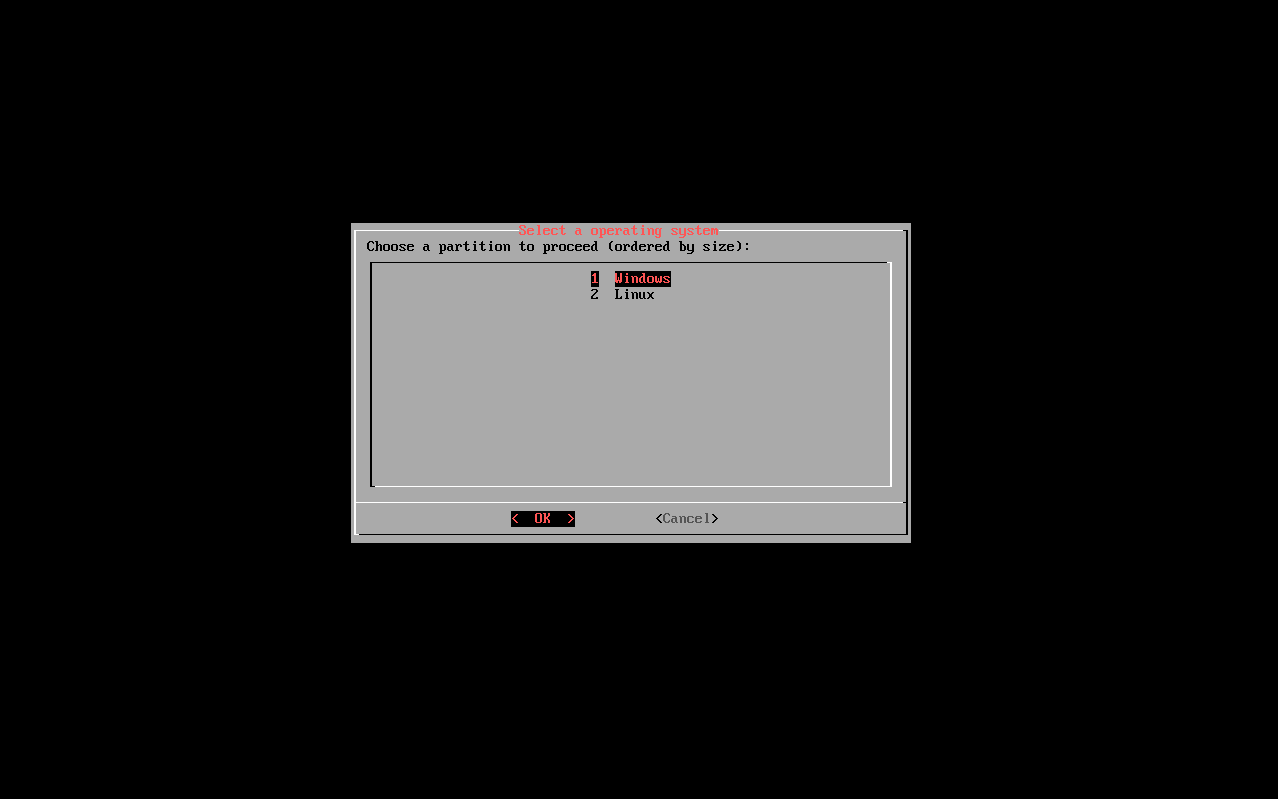
You then need to specify which kind of operating system the drive is running to select which kind of attacks to do. Note: some windows hosts will only allow you to mount as read only.
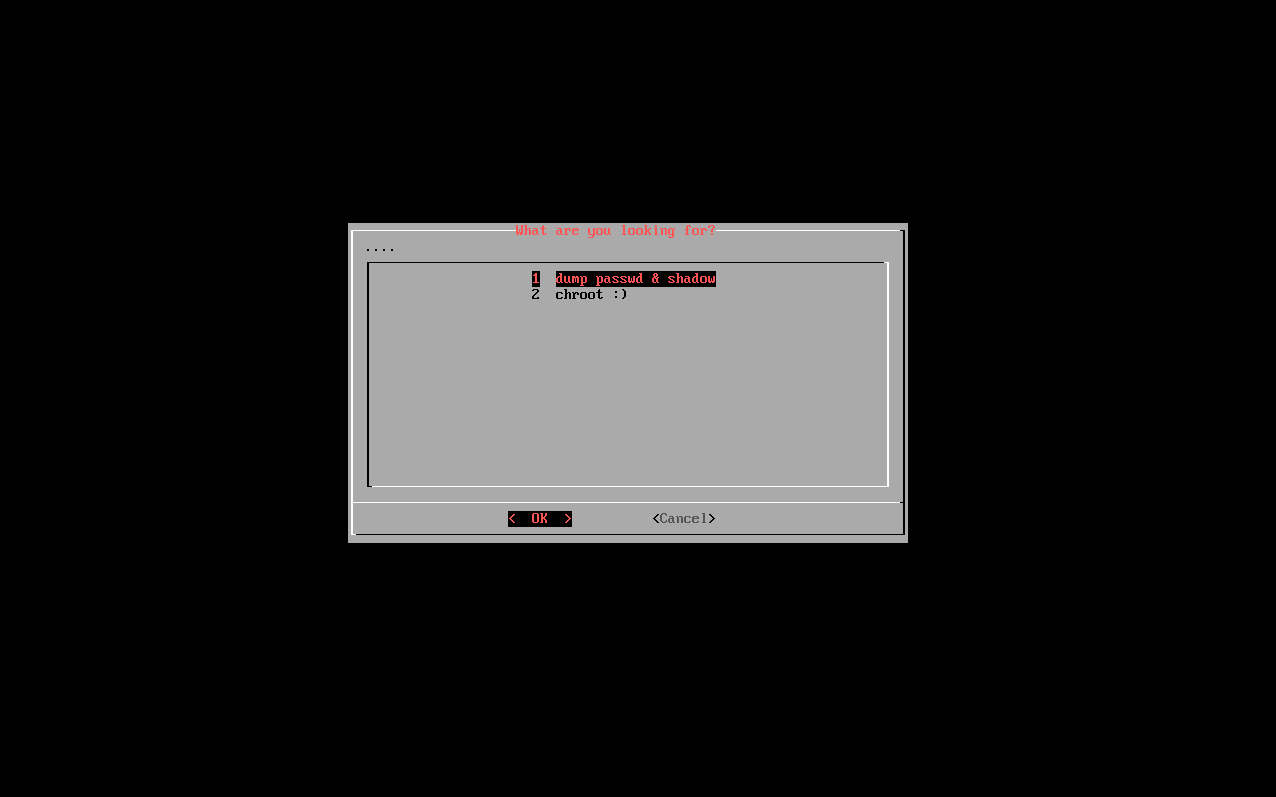
Now here you have 2 options either dump the shadow and passwd files for future cracking or chroot into the system. For the example sake I would typically chroot and then change the password with the passwd command.
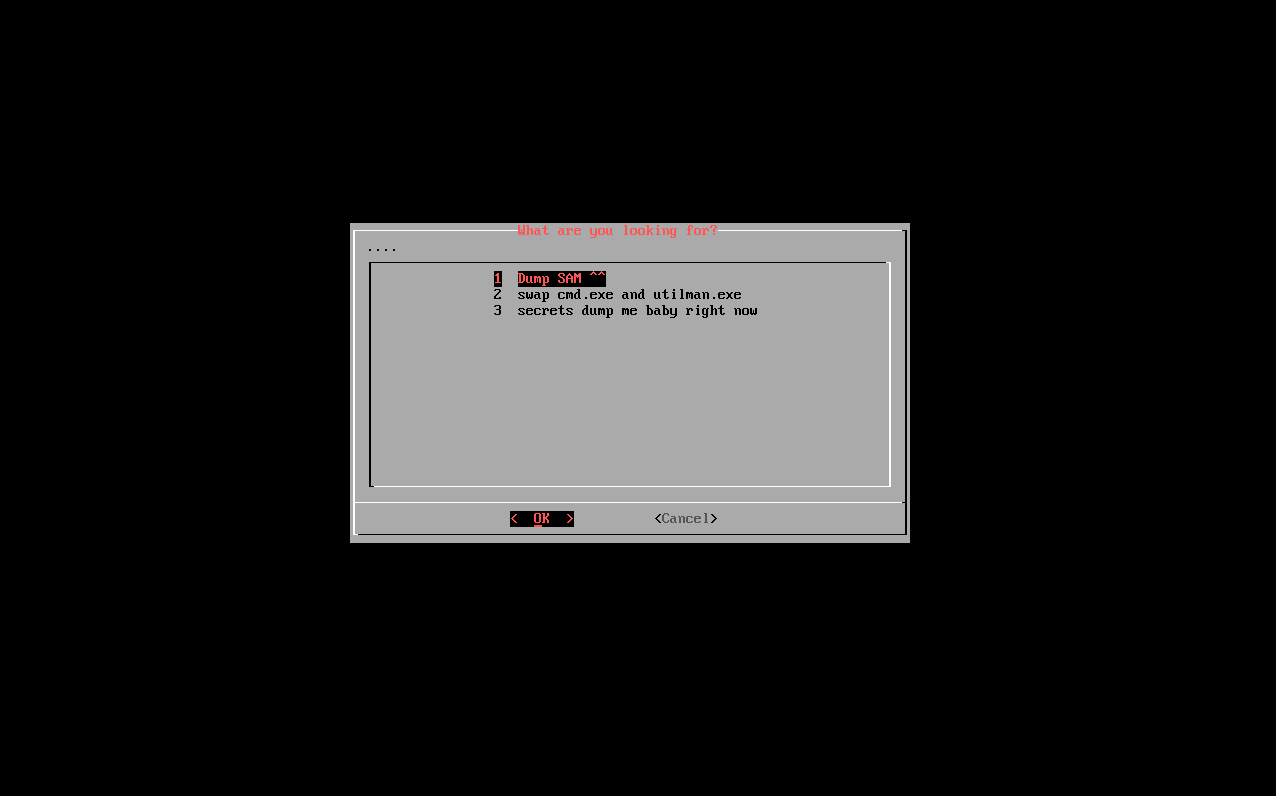
On the windows section I also have the option to dump SAM and SYSYEM or just do a really quick secrets dump which the output would be saved for later use. It also can create a backdoor for you by switching cmd.exe with Utilman.exe.
git_apocalypse.sh
This script must only be ran after install it will be present in every created users home repository and basically does a giant git clone from a ton of useful git repositories and save them inside of /opt. Since there is a lot of tools and things they are organised from pentest tools inside of /opt/pentest and software source code inside of /opt/dev.

Web Browser
The default web-browser of p3ng0s is firefox and is preconfigured with a few plug-ins like whappalyzer and dracula theme.
Window Manager
The Window Manager packaged with p3ng0s is a personal fork of dwm it comes with a lot of custom shortcuts GUI elements and 2 specific modes that are in separate binaries.
Modes
Normal mode
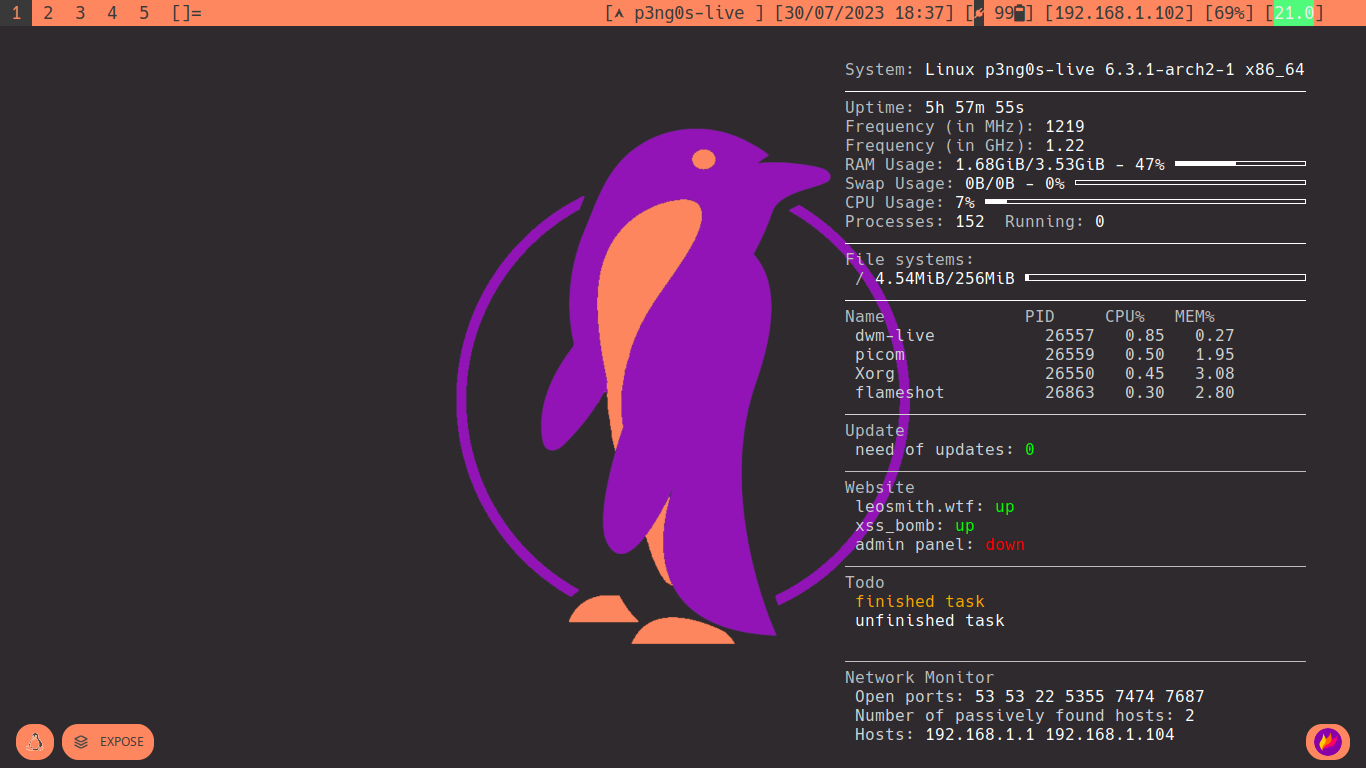
This mode for DWM is what you would expect from dwm with a few patches to make dwm more usable with certain startup apps a little status bar at the top that displays important information like the local ip addresses sound and battery with the date and on the live iso the CPU usage. The default startup apps on the normal mode are picom for transparency blueman-applet for bluetooth, feh is used to set the wallpaper, the status bar script, xautolock is also present to lock the computer with i3lock-fancy I just like blurry transparent things, flameshot for screenshot, conky for general system info and my on wallpaper todo list and network monitor and finally redshit is also present for dark working nights.
Light mode
Sometimes I want to reduce the network output of my laptop for focusing, watching movies or just if I'm on a network where I can't do requests every 2 minutes for checking if my website is up. For this I use light-mode it is also perfect when I use the iso on laptops that hand a little bit.
GUI things
The window manager comes with a few cool rebuilt menus where you can find shortcuts to useful apps. A list of all installed software and a MS Windows type bottom of screen app picker. A few of the GUI things I really did add them in just for the aesthetics and because I though the concept was pretty cool. The main 4 that I use are dmenu, tint2, xmenu and rofi. If you are looking for more information about dmenu you can navigate to the Menu System tab where I go in detail on what each dmenu instance does.
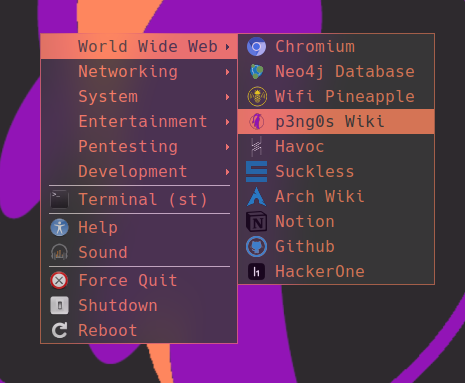
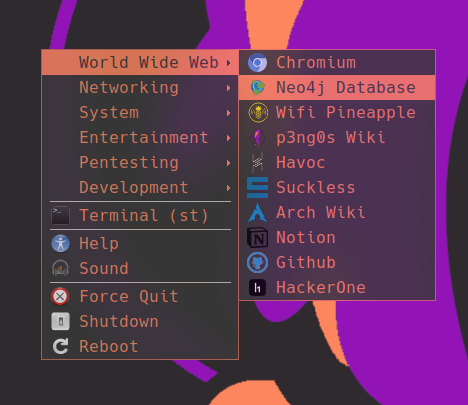
xmenu (shortcut launcher
If you are on the desktop and do not have any applications open you can Left-Click anywhere and a cute shortcut menu will open allowing you to quickly open a specific web shortcut, application or do a quick task like kill an application (yes there is a xkill shortcut :) saves my ass every time). With this quick menu you can also see a sample of curated apps that I often use. It also comes with web shortcut to common localhost I use with the specific port. It opens those inside of chromium by default ^^. Xmenu can also be opened with the menu shortcut some keyboards have that button :).
tint2 (application switcher and widget bar)
The bottom bar of the screen has a hidden menu where you can hover your mouse over and will pop-up, in this menu you can see system tray applications the different windows you have open, notifications if you got any a home button which can also be called with the windows key shortcut and a expose button which has the same behaviour as Alt-Tab.

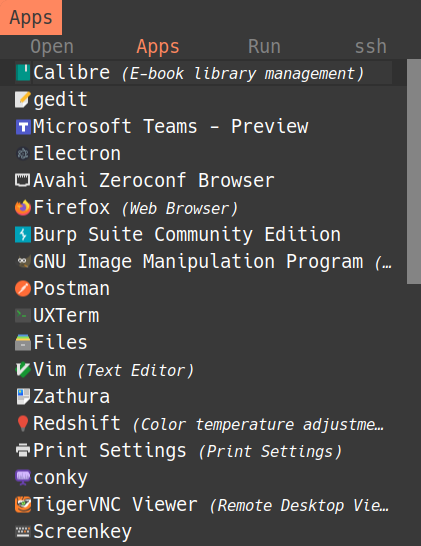
rofi (A GUI focused keyboard app lancher)
When you press the Windows key or click the penguin in the tint2 menu you will get the rofi menu to pop-up. Inside of this menu you have 4 main tabs: Open Windows, Apps, Run or basically dmenu and ssh. Now I personally use rofi for the SSH and Apps section. I do forget what tools I installed and software I have so the Apps section is especially usefull for me.
Tiling Window workflow
Since DWM is a tiling window manager there is a few supported tiling styles. From the base one DWM offers with tile, monocle and floating, I then patched in a deck mode, centered floating master and spiral mode. I mainly use monocle floating and tile. But sometimes on big screens centered floating master is supper useful. Deck and spiral are mainly there just for my amusement. I used to only use spiral but I outgrew it since I basically usually just have one app per desktop anyway.
Tiling
Monocle
Floating
Centered Floating Master
Deck
Spiral
Shortcuts
Here is a list of every shortcut configured on my dwm fork strap in because there is a lot of stuff. To note maybe some of these shortcuts do not work since on the live I did cut a few apps like the email client. Also by default the modkey is mapped to Alt sorry but I hate the Super key for shortcuts Alt is just faster for me and for touch typing it just makes more sense.
| Shortcut | Command | Description |
|---|---|---|
| Alt+Space | dmenu_run | A simple app launcher for running commands. |
| Alt+Enter | st tmux | Runs the terminal with tmux |
| Alt+Ctrl+Enter | st | Runs the terminal on it's own (without tmux) |
| Alt+Shift+Enter | chromium | Runs the Web Browser. Yeah I use chromium i know |
| Alt+Shift+l | i3lock-fancy | Locks the screen |
| Alt+w | nmtui | Opens the network manager window to pick a wifi |
| Alt+Shift+w | wireshark | Opens the Wireshark packet sniffer tool |
| Alt+Shift+s | pavucontrol | Opens the audio manager tool |
| Alt+Shift+p | dmenu_shut | Opens the shutdown / reboot menu |
| Alt+Shift+j | brightness.sh | Turns down the brightness |
| Alt+Shift+k | brightness.sh | Turns up the brightness |
| Alt+r | ranger | Open the ranger file manager |
| Alt+Shift+r | nautilus | Open the nautilus file manager |
| Alt+Shift+d | thunderbird | Open the desktop email client |
| Alt+f | newsboat | terminal based newsfeed |
| Alt+Shift+f | keepass | Opens the password manager keepass |
| Alt+Shift+m | dmenu_splain | Menu that lists every manpage on the system that can then be opened |
| Alt+o | dmenu_emoji | Menu that lists every emoji and copies it to the keyboard |
| Alt+Shift+o | dmenu_vpn | Menu that lists every vpn file and runs openvpn on the selected |
| Alt+a | mocp | the mocp music player |
| Alt+p | dmenu_keyboard | List useful shortcut that are then auto typed |
| Alt+x | flameshot gui | screenshot tool |
| Alt+Tab | skippy-xd | Tool to view all opened windows |
| Alt+b | N/A | Toggles the top bar |
| Alt+Shift+b | BurpSuite | Opens Burp Suite http proxy |
| Alt+j | N/A | Scrolls through windows |
| Alt+k | N/A | Scrolls through windows |
| Alt+i | N/A | Increase master window count |
| Alt+Shift+i | N/A | Decrease master window count |
| Alt+h | N/A | Decrease master window size |
| Alt+l | N/A | Increase master window size |
| Alt+Shift+Space | N/A | Set current window as master |
| Alt+Shift+Tab | N/A | Alternate between current and previous desktop |
| Alt+Shift+q | N/A | Close windows |
| Alt+t | N/A | Set to tab layout |
| Alt+d | N/A | Set to deck layout |
| Alt+m | N/A | Set to monocle layout |
| Alt+c | N/A | Set to master center floating layout |
| Alt+s | N/A | Set to spiral layout |
| Alt+u | N/A | toggle window in floating mode. |
| Alt+u | N/A | toggle window in floating mode. |
| Alt+Shift+e | N/A | Exit dwm |
Terminal
General
As a terminal emulator I use ST from suckless that I forked and added a little modification for light mode I thought it would be funny. Sadly I didn't customise this one to much but it's honestly perfect as it so I wouldn't see why I would change anything unless I have a great idea some day.
Dark mode(default)
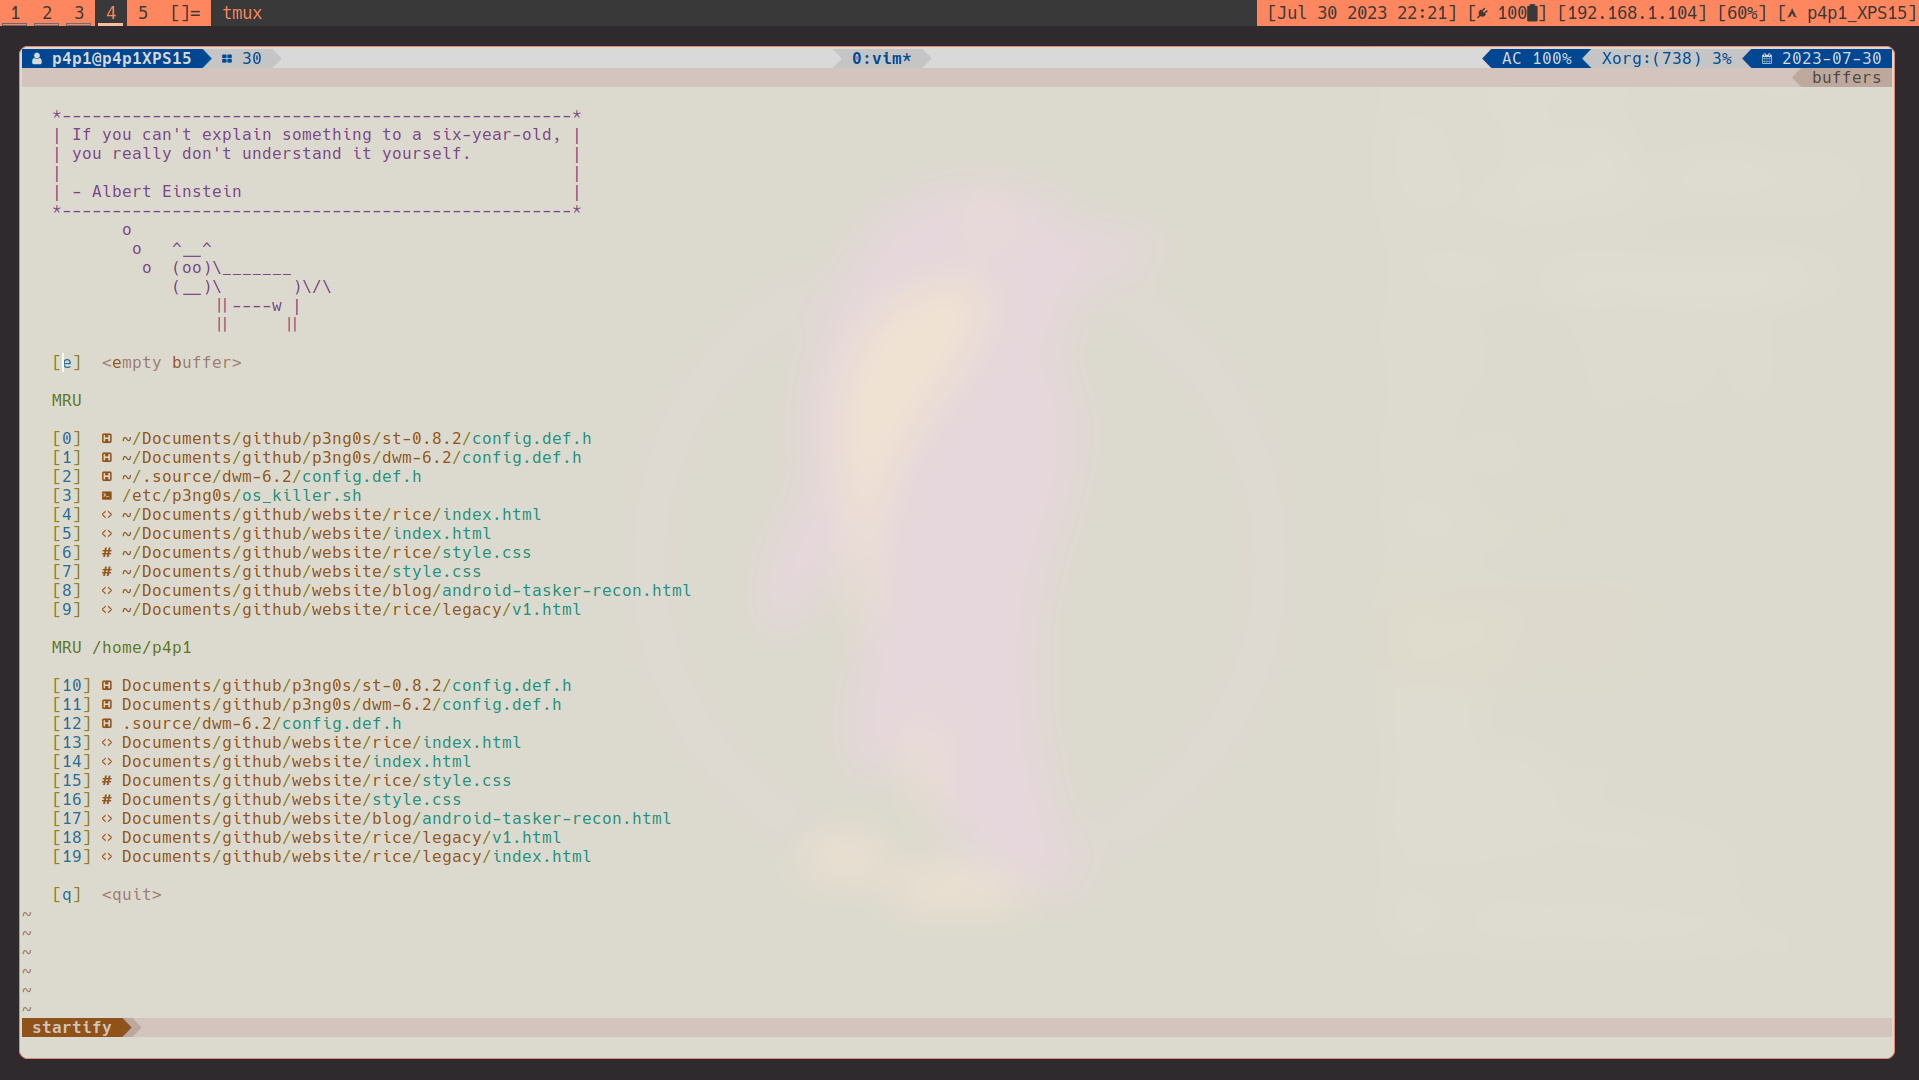
Light mode
Shortcuts
Quick list of shortcuts you know the drill
| Shortcut | Command | Description |
|---|---|---|
| Ctrl+Shift+c | N/A | Copy |
| Ctrl+Shift+v | N/A | Paste |
| Ctrl+Shift+x | N/A | Turns light mode on the terminal |
| Ctrl+Shift+u | N/A | Pipes all url into dmenu and opens them |
| Shift+PageUp | N/A | Page up |
| Shift+PageDown | N/A | Page Down |
File Manager
General
As a file manager p3ng0s uses ranger a terminal based file manager. This file manager is configured to have all of the capabilities as any other from mounting drives and also drag and drop even if it a terminal app.
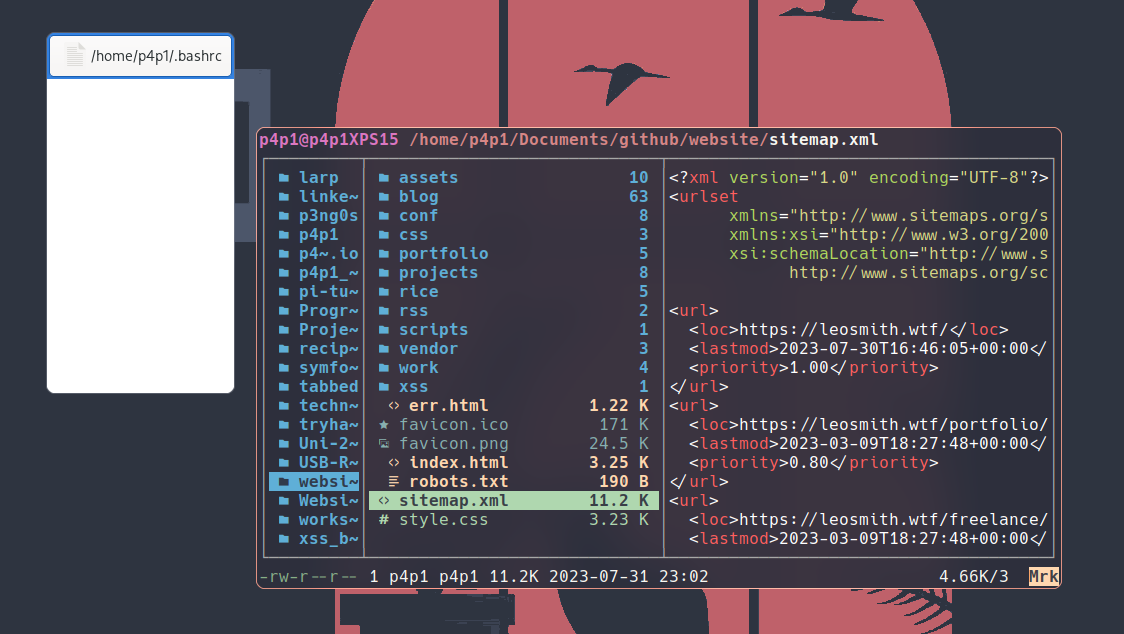
File Manager
Mount drive
Shortcuts
Quick list of shortcuts you know the drill
| Shortcut | Command | Description |
|---|---|---|
| bg | N/A | Set the image as the wallpaper |
| ee | N/A | Extract the selected archive |
| xy | N/A | Copy the file with xclip |
| xp | N/A | Paste a file with xclip |
| do | N/A | Drag files out of the directory |
| di | N/A | Drag files in the directory |
| mm | N/A | Mount and Unmount a drive |
Menu System
For the menu systems I use dmenu I decided to separate this section since this is one of the features that can really allow you to elevate your workflow. Inside of the p3ng0s distro I have 4 simple dmenu scripts that really allow me to automate really redundant tasks.
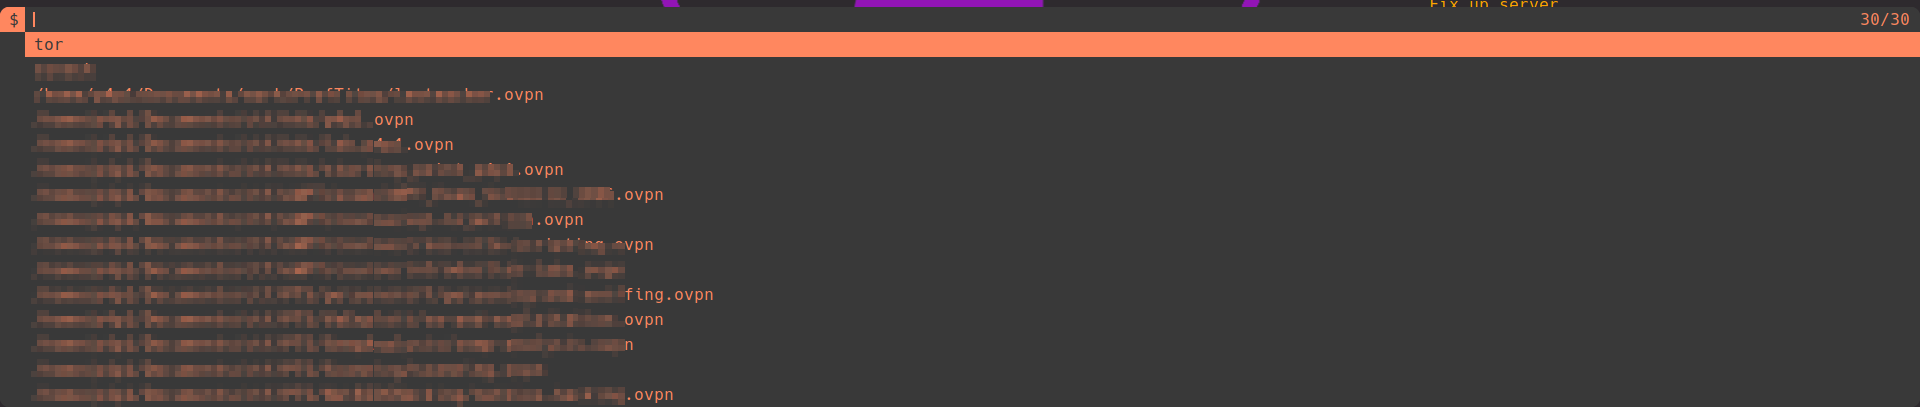
VPN Picker
The first menu I want to talk about is the VPN picker that comes by default with the "tor" option to run tor as the tor user so you will need to type in your admin password with kdesu if selected. Then this option will run a find command inside of the home directory and list all of the ovpn files so during learning and development if you just download a ovpn file it will be automatically added to this menu ;).
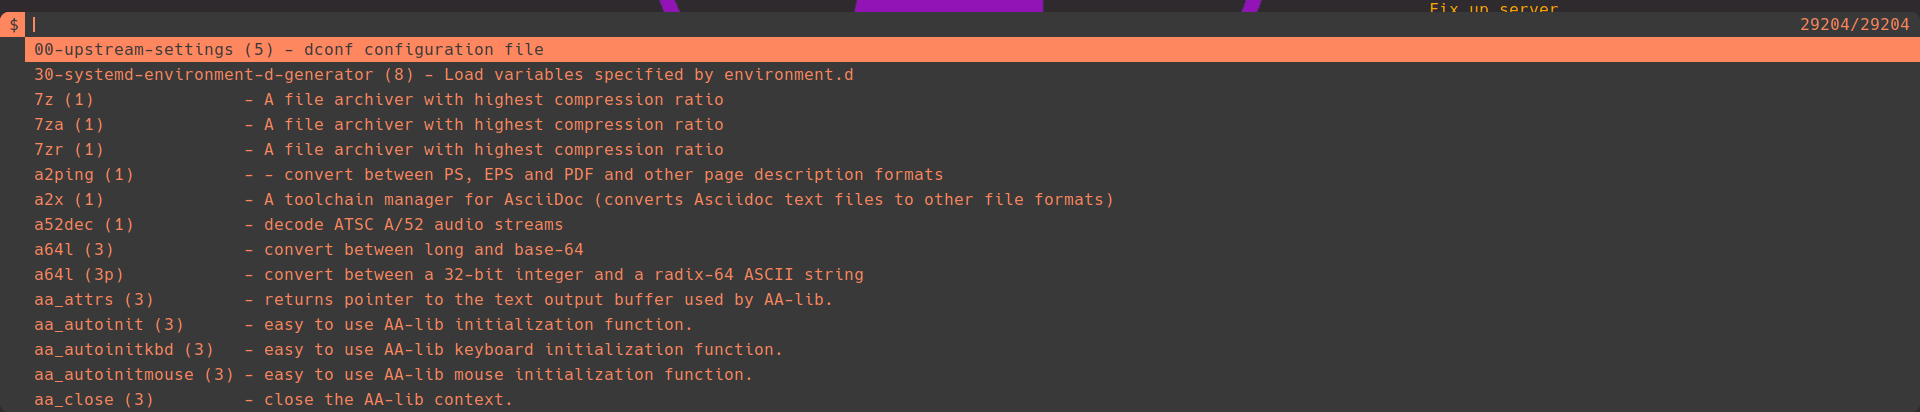
Documentation
The second menu is the cool documentation menu, you will need to have an up to date manual database by running the mandb command which is why if you run on the iso this menu you might see nothing. But even if that seems like a bug it is still working (call it a feature). You can type in any command and you will have a zathura pdf pop-up where you have a man page of the command asked.
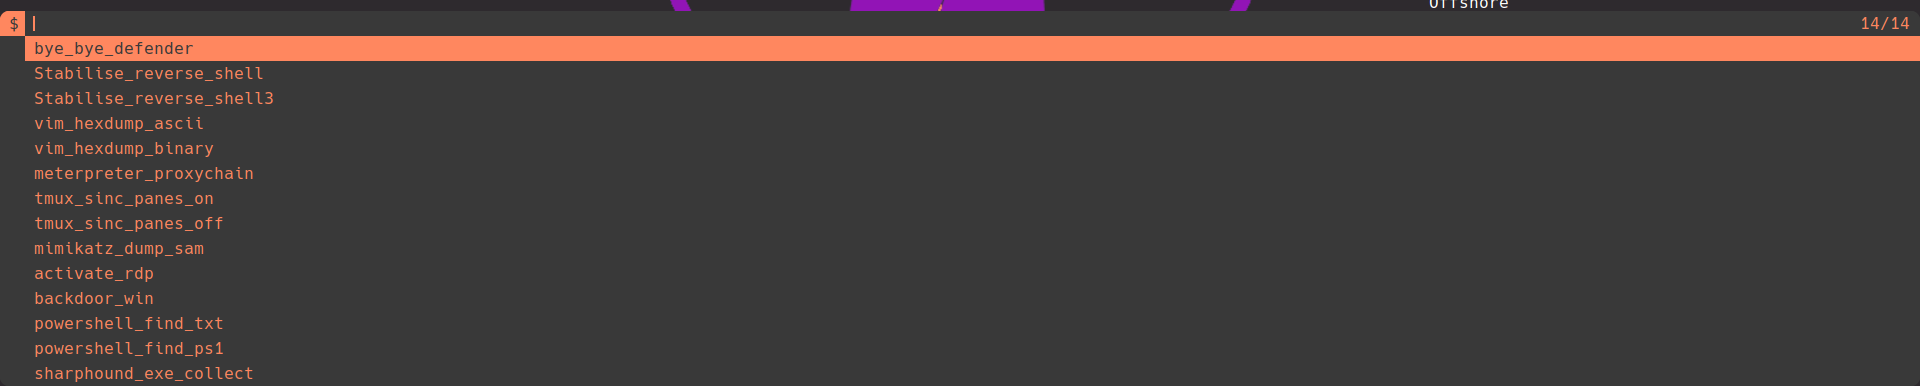
Onboard Ducky
The third menu is a little Swiss army knife of useful commands for penetration testing engagements where a lot of the redundant commands you would use like disabling windows defenses and such are pre-wrote and will automatically be typed out for you inside of a selected window.
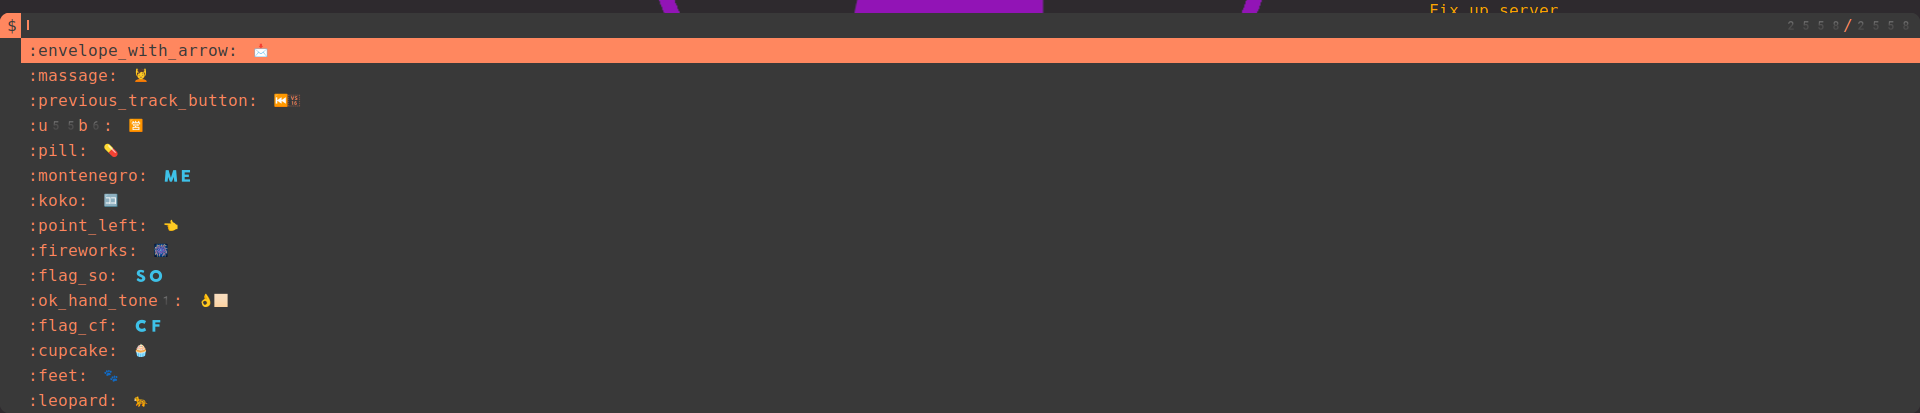
Emoji lister
This fourth one is mainly used for fun this menu will list out all available emojis on the machine and will allow you on select to copy it and paste it into any application it will copy the Unicode character and the :name: so that if the application doesn't support the character you can still get your point across.
Windows Virtual Machine
Inside of p3ng0s there is a built-in windows virtual machine. To configure this machine you will need a windows iso file saved inside of ~/.qemu then you can install windows directly inside of the VM all of the drivers should function and should be installed automatically. This VM can be used to test malware compile programs that are saved inside of /opt/windows/. You can find in the following link full documentation on how to set this up.

Tools
The following is a quick list of application available on p3ng0s. To note some dependencies are not listed and if I add more apps in the future I cannot promise them being available here. But I will try to update as often as possible. A full list ordered by categories can be found here.
| Program Name | Program Name | Program Name |
|---|---|---|
| dwm | st | dmenu |
| xmenu | wmname | i3lock-fancy |
| skippy-xd | BurpSuite | Bloodhound |
| Havoc c2 | Postman | nikto |
| nmap | whois | aircrack-ng |
| bettercap | hashcat | impacket |
| responder | pypykatz | python-bloodhound |
| crackmapexec | diff | doge |
| lynx | vim | calamares |
| chromium | flameshot | rofi |
| keepass | pavucontrol | ranger |
| nautilus | redshift | tint2 |
| newsboat | gcc | g++ |
| nasm | git | gdb |
| radare2 | ruby2.7 | python |
| php | udftools | valgrind |
| sqlitebrowser | gparted | testdisk |
| moc | vlc | transmission-gtk |
Configure
For configuration or customization of p3ng0s it is a bit different. Now this might sound like a sick joke to you but this is legit how I personally change things. I edit the source code and rebuilt the bits I changed. Since I love most of the programming languages used in this at least by editing the source you have full power. Now this is why I prefaced this page at the beginning to not use if you are a beginner. Since a lot of the stuff in this OS is come as is no support you can just use the source code and good luck. Now this comes at an advantage there is no sugar coating here if you use this kind of environment you will get good it's just at what cost and if you think it is not for you fine. But let's be honest I think you should challenge yourself a bit. This is why I made this publicly available at the end of the day.
Support
If you like this linux distribution and really want to sponsor it you can sponsor it through github. I setup a one time tier the same price as a windows license since everyone loves windows I propose this alternative you can pay the windows license price but have a dodgy hacking distro instead wouldn't that be hilarious :)

In all seriousness I would prefer if you just supported the blog directly monthly instead since a lot of the work for the blog is intertwined with p3ng0s since I use p3ng0s for everything ^^ You can access the support page here.