Flipper Zero Rubber Ducky Parser
Created on Tue 01 Mar 2023
Your favourite mentally insane tester is back with some new project! After putting the blog on hold again, changing countries and partying a bunch with friends I've been cooking up a few things for this blog. I recently purchased a flipper zero, after all the hype I was a bit unsure if I should get one, the device seemed legit but I didn't know if I would have some use to it.
With this post you can guess my conclusion, I caved in to my wants bought one and messed around a bit had fun and started looking at the code. I really enjoy picking stuff apart and after the months of going out I needed a cute project to get me back into it. Having the bad usb functionality on the flipper zero I wanted to test out the ducky 2.0 language but I was disappointed that functions, ifs and some other features where not present. So I thought I should implement them myself.
Understanding the code
When I start working on a project like that where I want to implement my own system, I usually go through the code a bit seeing how they originally implement the current features. Going through the code a bit I found the bad_usb_script.c file. Where the parser is implemented. In college I mainly specialised in parsers so this is stuff that I really enjoy when I code.

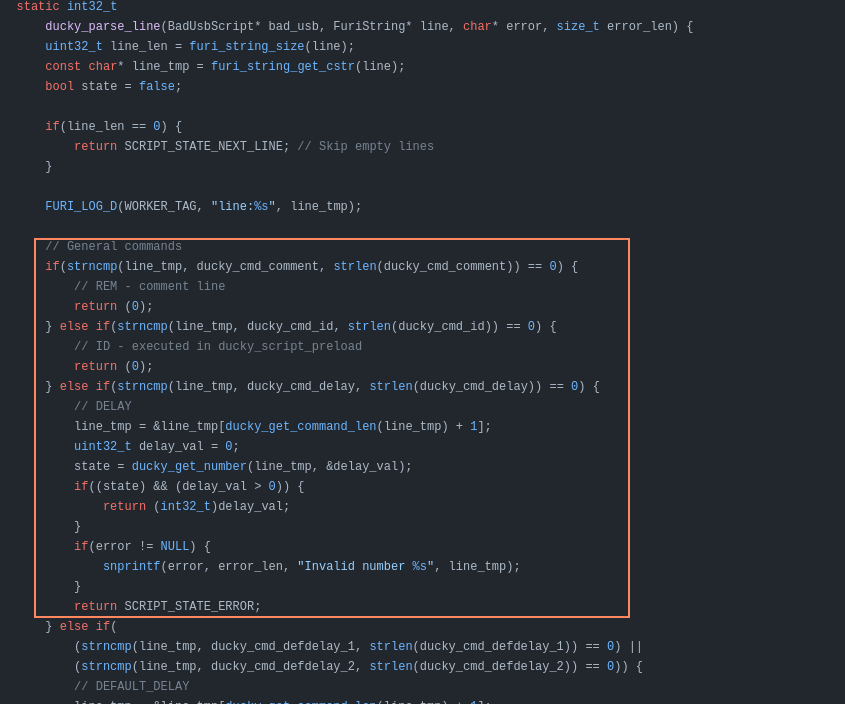
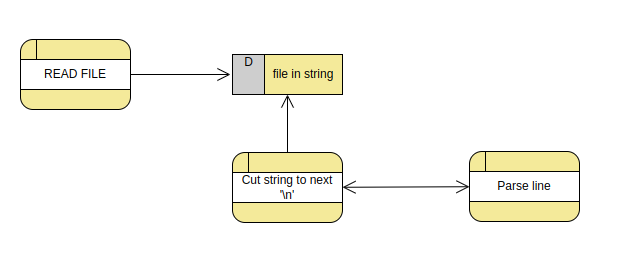
In the above screenshot is the original implementation the logic behind the parser is this. The flipper reads the files sets in inside of a giant string and then the string is parsed through some kind of c++ wrapper with the different lines executed through ducky_parse_line which then contains a giant if/else system where the different functionality are called inline with a strncmp seeing this I was personally getting a head ache.

Seeing this I already thought of a few ways that could clear up the code and allow me to implement new functionalities in a lot more simpler way.
Practicing
To practice on the code base I decided to implement myself functionalities from different firmware to the original firmware. I was playing around with the flipper unleashed firmware where they had functionality to save credit cards and I thought this could be good practice to get more familiar with the code base:

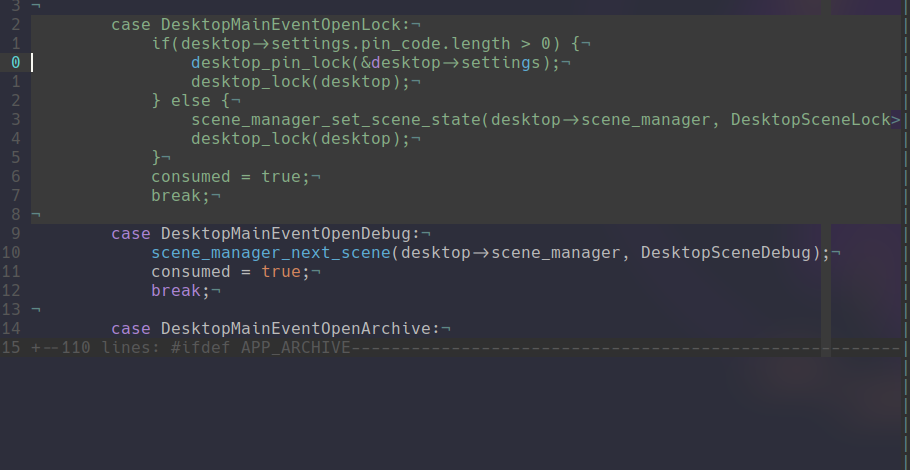
Going through old commits on the flipper zero firmware I found where the bank cards used to be emulated so I decided to use the diffs to reimplement that inside of my "custom" firmware. Then on the unleashed firmware I enjoyed the fact that you could lock the flipper by holding the up arrow on the device so I added that too:

The flipperzero firmware handle events through getting the input and returning the enum variable to then be handled inside the scene file.
Planing
Before coding the parser I had a little planning moment in my head to figure out how I was going to implement my idea. The objective was to structure the function a bit and have isolated function for each mnemonic. I am using the word mnemonic in the assembler context (A mnemonic is a name that groups different opcode that have the same purpose.) since I am trying to avoid code repetition thought what I am doing, or at least isolate it from the main parser code base to make it more aesthetically pleasing. So I figured using a array with all of the operation words which matched and array of function pointers with all of the actual operations.
The Fun Stuff
So seeing it is a function pointer array, each operation need to have the same definition for each so I went through the parser and isolated 5 variables that are used by most operations:

I then started working on the logic with the two arrays:

1) array of operation string
The main logic is that here we would have all of the operation and at each index we could match a function pointer.
2) array of operation function
Here are located the actual functions that would be called when the parser arrives on a ducky payload instruction. The index of each function matches the index of the operation string.
3) loop through the array
Now here is the actual loop that replaces the 118 line of if/else we check if we arrived at the end of the array of operation strings. To be more diligent this could be improved through also checking the function pointer array.
4) Check the line with the operation string
This second line is self explanatory we just check the operation string with the line.
5) Function pointer call
Here we call the function pointer that matches with the operation string.
After testing the code with original scripts that worked with the old parser it was now time to implement more functionality like HOLD, RELEASE and STRINGLN from the ducky 2.0 language. To do that now it was quite simple I just had to go to the file mnemonic.c where I had all of the operation function stored and add a few and also updating the array of strings.

The main structure of those operation functions is actually quite simple you just have to (void) the arguments you do not use put the code that will execute what you want, and return a delay value.
I hope this post was a fun read, I tried explaining as much as I could on the code without making this too long. Writing those posts is fun I missed this. You can checkout the code on github if interested I also have a pull request on the official firmware so hopefully it gets accepted 😺 Down the line I think I will be implementing function, variables and condition. I probably will do a new blog post when I get there.
Categories
XSS_BOMB
Book a phishing campaign

You can book a phishing campaign from me on your organisation by contacting me.
LinkedIn or twitter / X. I also use twitter as a platform to update on new posts!Questions / Feedback
Donate

If you like the content of my website you can help me out by donating through my github sponsors page.