Github TryHackMe Action
Created on Tue. 19 Oct 2021

Ever since github implemented their profile README.md feature I have been really into customizing my profile. I don't know why I just like spending time on my config and creating aesthetic stuff like that.
And during that profile README craze that I had a few months ago I added the feature to automatically add my latest blog posts to the README so that you can find my blog posts on my profile :) So I then ran in the issue of wanting to automatically fetch my tryhackme badge and source it on the README but for some reason the link to the badge is a bit strange and I can't really link it to github for some reason. So I decided to have it download automatically and updated inside of my repo without me having to worry about it!
Github Actions 101
I had no idea on how to make a github action so I decided to research how one is built. Basically you can go either of 2 routes: 1. Docker or 2. Javascript Programs. I obviously went the JS route I wanted to interact with a repository. A basic github Action is actually quite small:
            ├── action.yml # The yaml file used by github to understand how the action works
            ├── dist/ # The build folder
            │   └── index.js # the packed version of your code
            ├── index.js # The source code (can be put in a seperate folder)
            ├── LICENSE # The license of the source code
            ├── package.json # the definition of the package (name, version, dependencies, ...)
            └── README.md # The read me file
And surprisingly that's it most tutorial did clutter that bit strangely so I was very confused going through on how to make this action. But basically that's it! From there there are a few dependencies needed:
- @actions/core -> Used for working with core actions elements
- @actions/github -> Used for working with github
- @vercel/ncc -> Used for building
How to use a github action
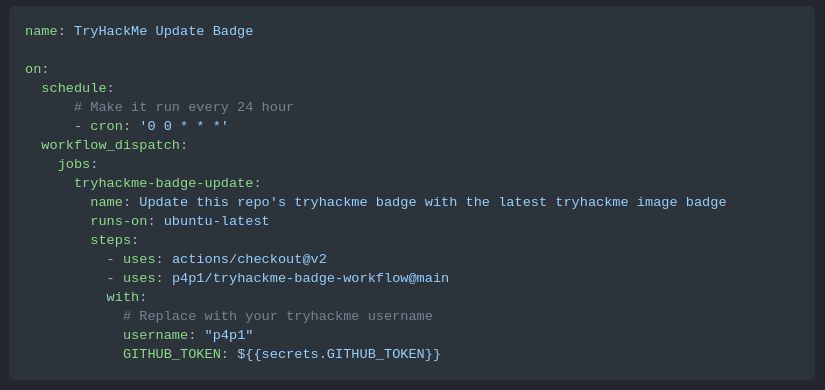
To use a github action you mainly need to configure it inside of the .github/workflows directory of your repository. Create a yaml file named after the action that it should perform and most actions give you a sample code inside of the README to guide you here is a screenshot of my README:

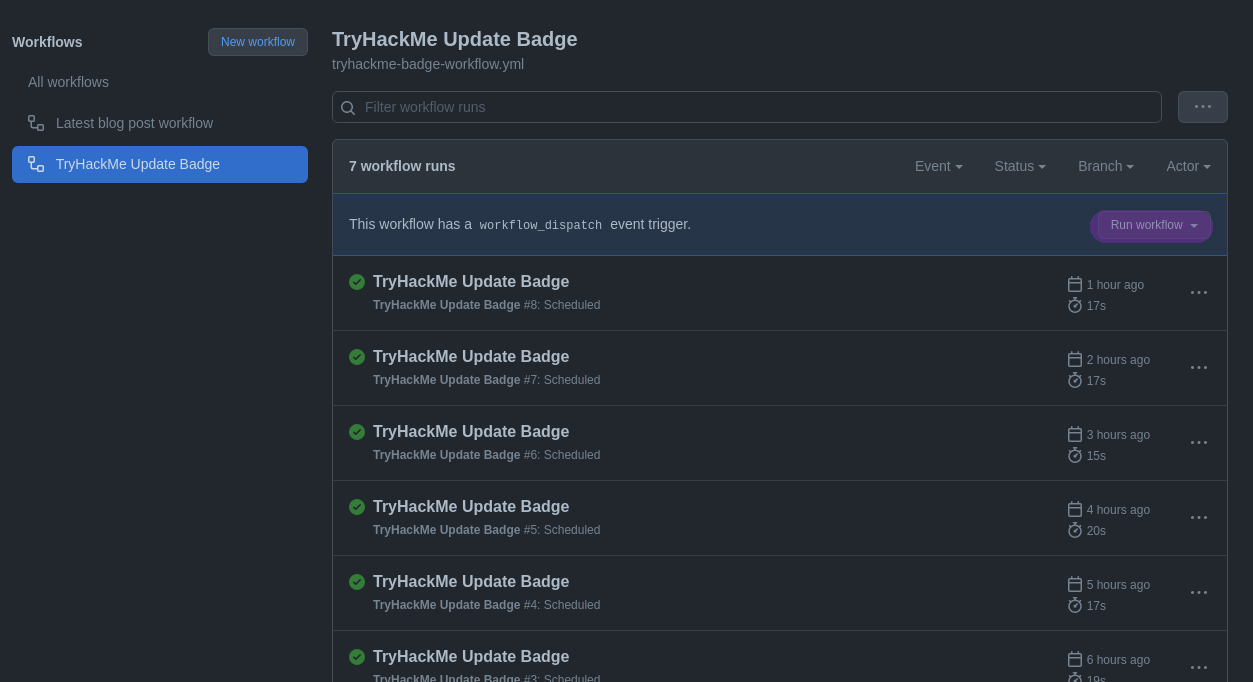
After creating that file and pushing it to your appropriate repo you can test out the action by either triggering the event in question or clicking on the Run Workflow button:

How Does Your Github Action Work?
Great now that you know more about Github Actions we can now talk a bit more about the github action that I built! So knowing the basics I will mostly now concentrate on the index.js script to explain the code and how I thought about it. To note a great thing about github actions in JS is basically that the code runs in a copy of the repository sitting on a server somewhere in the CLOUD wow the cloud :D Yeah so knowing that I basically had to do the logic that would:
- 1) Download the picture
- 2) Commit the picture
- 3) Push the picture
core.getInput("image_path");
With that we can now start doing some basic work like downloading the badge from tryhackme's server.

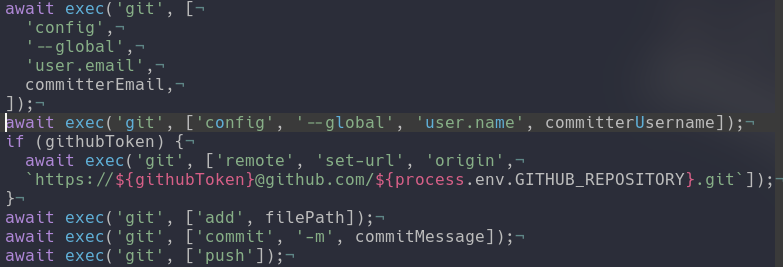
Basically I do a fetch on https://tryhackme-badges.s3.amazonaws.com/${username}.png and then save that to the file provided inside of the image_path variable which is inside of the yaml file. I then run the git add -> git commit -> git push combo to upload the file inside of the repo:

And that's basically it. The exec command I did steal that from an other repo linked here and to understand how to build an action I basically reverse engineered his code which was a lot easier to understand compared to the github official tutorial :D
How To Use It
If you find this concept cool and want to use it here is how :) Basically you need to go to your profile README.md repository and create the following folder structure .github/workflows inside of that directory workflows you will need to create a yml file referencing my repo and set a few variables:
            name: TryHackMe Update Badge

            on:
              schedule:
                # Make it run every 24 hour
                - cron: '0 0 * * *'
              workflow_dispatch:
            jobs:
              tryhackme-badge-update:
                name: Update this repo's tryhackme badge with the latest tryhackme image badge
                runs-on: ubuntu-latest
                steps:
                  - uses: actions/checkout@v2
                  - uses: p4p1/tryhackme-badge-workflow@main
                    with:
                      # Replace with your tryhackme username
                      username: "{USERNAME}"
                      GITHUB_TOKEN: ${{secrets.GITHUB_TOKEN}}
Now after creating that file and pushing it to the repository you will need to open up the repository on your web browser and navigate to the action tab:

Here you can see the Workflow you just created to the left if you click on it you will see information about the workflow:

Here you can manually run it if need be, I would recommend doing that to test if it all works correctly and if doesn't you can go through the documentation on the readme or open up an issue here. Then you can add the following line to your README and it should now include the badge:

From there everything should be set you can find more information on the github marketplace page linked to the right or bottom of this page or directly from the README!
Thank you for reading this! I had a lot of fun making this little tool and I hope you use it consider giving this repo a star or trying it out. Before leaving working on github actions made me think a bit. The possibilities are endless and you could make a github virus out of an action because anything can trigger an action, like every commit send details from the uploaded code to a remote server to steal information. You could even obfuscate the payload inside of an existing extension or something :D maybe I'll do that if people request it!
Categories
Resources
Questions / Feedback
Donate

If you like the content of my website you can help me out by donating through my github sponsors page.