Not so secure boot
Created on Sun. 08 Nov 2026

Halli hallo everyone, this blog post is a continuation of the p3ng0s series that has been going on on this blog for a few years. This is my latest research on how secure boot works that I did back in April of this year and this blog post is a tease for p3ng0s V2 release that will happen probably in 1 Year from now.
Before I start on this post I want to explain something really quick I will focus the rest of this year and early next year on finishing maldev academy writing a small research paper on PIC malware and doing CRTO 1 + 2. I really want to add a bunch of stuff to p3ng0s but first I need to finish the stuff I just mentioned so that I am not mentally distracted when doing p3ng0s V2. I really wan't to push the physical security side of the OS and I have a bunch of great ideas. This secure boot work that I'm gonna explain here is a direct parallel to this work. It was an idea I had in the middle of developing V1 but I pushed it back too V2 to avoid scope creep and then ended up implementing it anyway on a V2 branch. So if you like this post you can use this technique right now, a mini tutorial is mentioned at the end of the post here.
Misconceptions
Before going to much into the weeds of secure boot let me just put this out here. Before doing this research I personally knew nothing exactly about secure boot. To me it actually just was this annoying BIOS option that blocked me from booting into linux when I bought a new laptop, I knew it was a Microsoft pushed thing and because of that I was never very happy of buying hardware and having to disable this feature to then use the computer how I wanted. You reading this post I would like you to take a minute to think about the following questions, obviously this works best if like me your knowledge of secure boot was limited: what you think secure boot actually is? What do you think this feature is actually for? Why does it exist?
Great so after some thinking my conclusion before reading up about secure boot in detail was to lock down what operating system is running on the machine. I thought well there's these keys that say okay this OS can boot this OS cannot more or less. And that you needed specific keys to boot and those where microsoft controlled. This answer is close but not exactly right. The actual reason secure boot exists is for the following: Ensuring the integrity of the booting OS. Now the wording here is very important isn't ensuring integrity the same as locking to one booting OS? (at least that is how I would interpret that statement back then). Well turn's out not at all ensuring integrity means: Yes yes the signature of this OS is in the database of accepted OS and that is it.
Microsoft Corporation UEFI CA 2011
Now some companies do allow employees to run linux right? Does that mean the CISO of those is just nuts and disables secure boot on his fleet? Turn's out that is a flat NO. There is this thing called Microsoft Corporation UEFI CA 2011 and is used to sign 3rd party operating systems that can work with Microsoft keys that are installed on 99% of BIOSes out there. Okay so turns out secure boot can just work with ANY keys you can just make your own enroll them in your BIOS and sign your linux build with them and that's it it will just work.
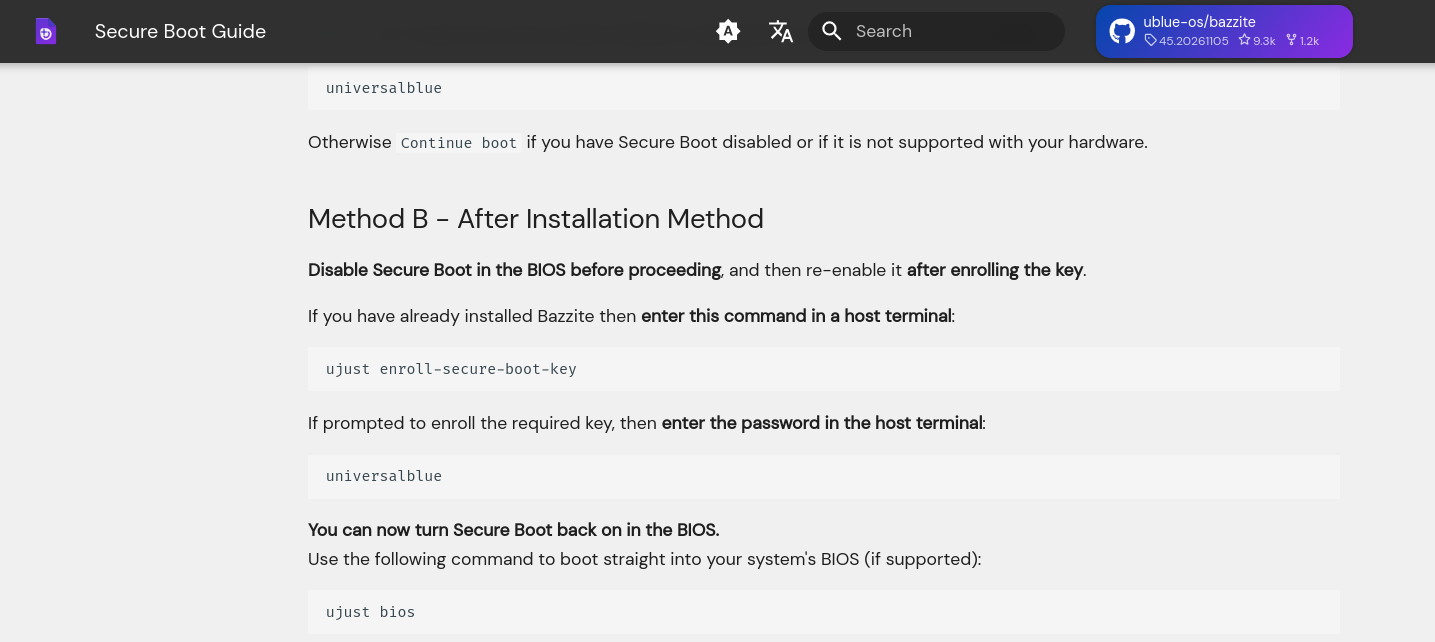
Here is a screenshot of the bazzite OS tutorial on enrolling their keys inside of your BIOS. Okay so now we understand 2 things: 1. Microsoft has 3rd party keys for some linux distributions, 2. If you can mess around in the BIOS you can just enroll your own keys. Now let's just sit with this and think what is secure about this? Like if I can just enroll my own keys how is this secure? Well turn's out secure boot was not to target consumers nor physical access to a machine, secure boot was only to stop one specific attack: EFI malware. Like if a malware is sitting on the EFI level and windows does not wipe EFI partitions on computer reset you have a "Immortal" malware excluding the fact that if you just wipe every partition this problem goes away but yeah that is besides the point.
Shimmy Shimmy Yay

Now so we know that Microsoft signs 3rd party OS for secure boot access but these OS are always changing and those keys don't change that often but the grub version the OS those things keep on moving so how come 1 key that never really changes unless expires changes but the software underneath changes all the time does that not break integrity of the boot chain? Well yes it does this is where something called a shim and MOK enrollement comes into play!
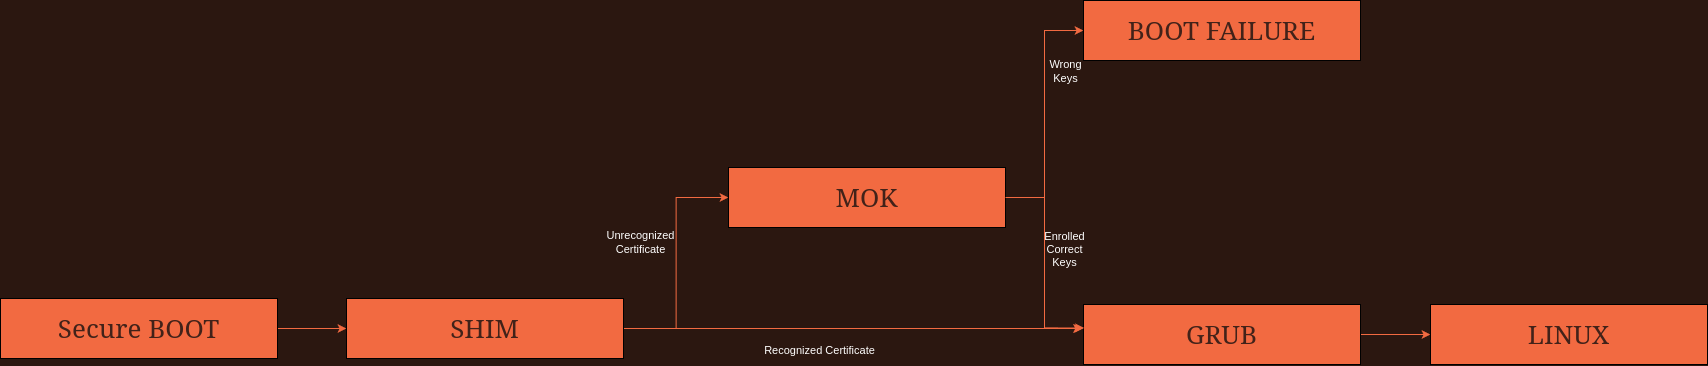
Okay here is a provided diagram of how MOK enrollment looks like. Do you see the issue that I have with this? To me it seems a bit trivial well if I can pick the keys during mok enrollment why not just pick my own keys? From there it's jackpot I booted my OS on hardware that has secure boot enabled! Okay so in the previous chain let me explain something clearly the BIOS has microsoft 3rd party keys installed, the shim is 3rd party microsoft signed if the grub image is signed with a unrecognized key the shim fails and boot's into this MOK software where you can PICK the key that matches the GRUB and linux signature.
Shim borrowing
Okay so like I mentioned a few times now this 3rd party program from Microsoft for those magic keys, who is in them? Turns out a few OS: ubuntu, debian, fedora and some others. These open source OS are well open source can't I find the shim and make my OS just stand as ubuntu? Like opsec wise this would be gold I make my "hacking" OS look like ubuntu on the secure boot chain and if the computer itself has those 3rd party certificates installed I win and can boot into a dropbox or whatever on the hardware of the place I am targeting.
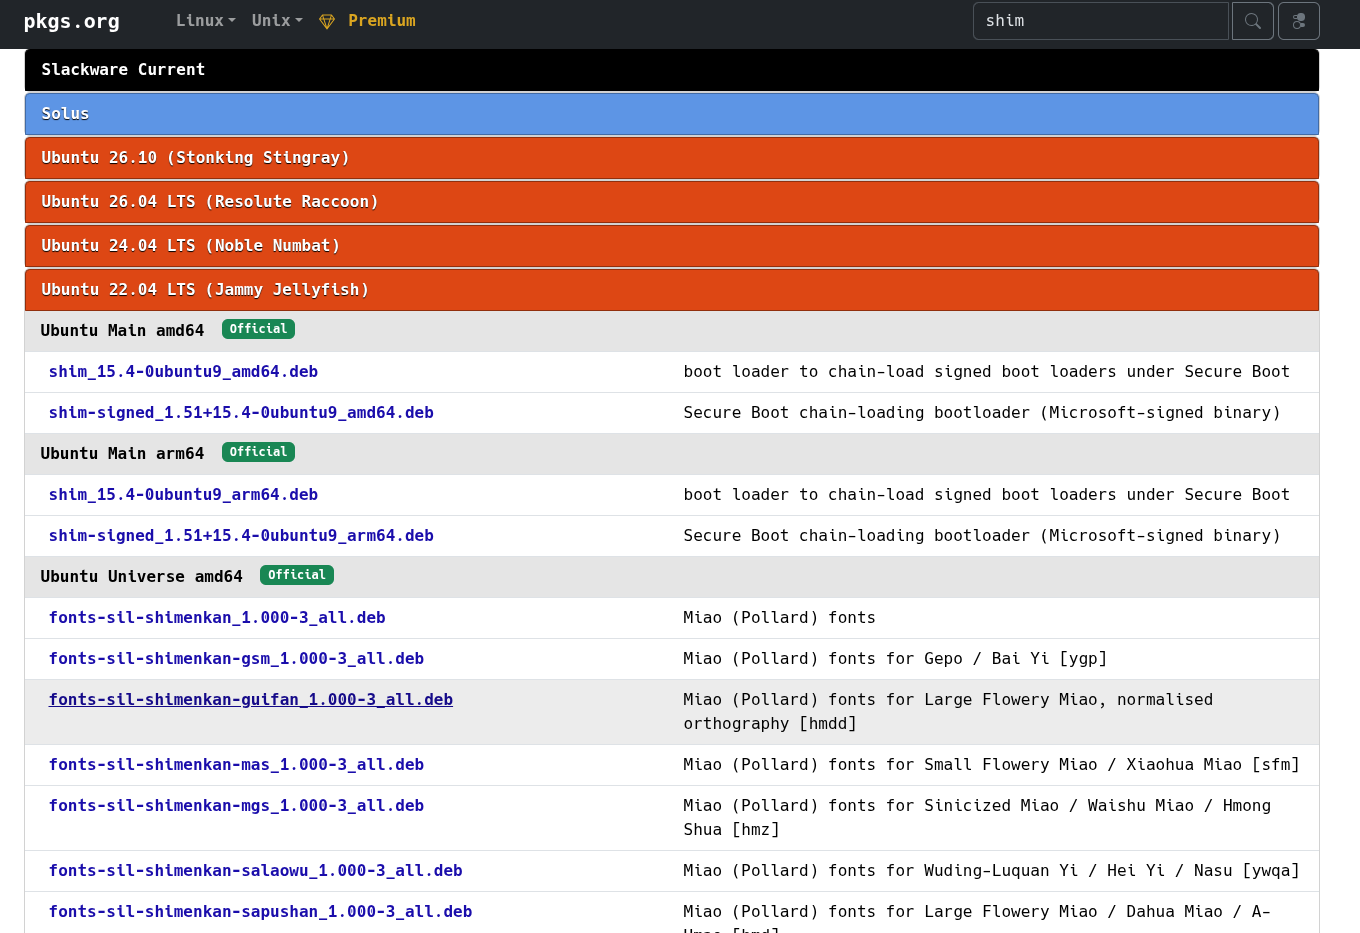
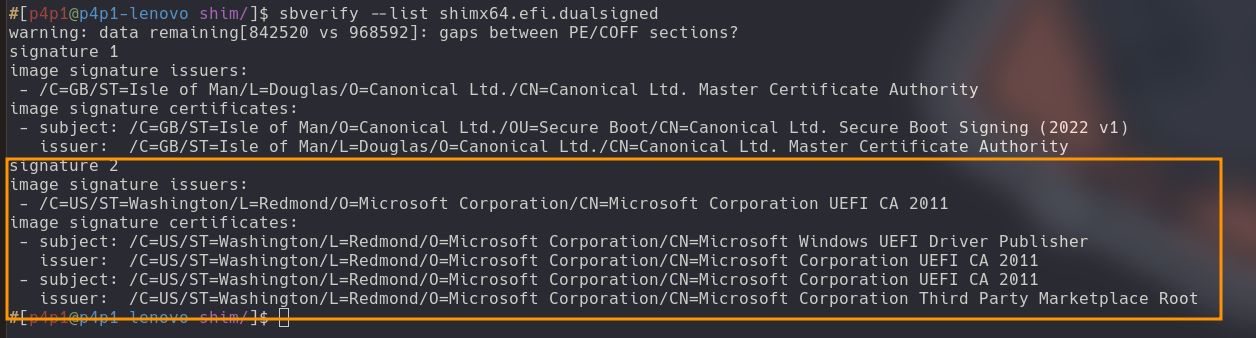
Let me introduce you to my new favourite website pkgs.org a website where you can search for packages across multiple linux distributions! And when we search for a package named shim we can find something that I find hilarious! A package named shim-signed. Well well well what do you guys think I am going to do with those? Exactly we will borrow them ;)
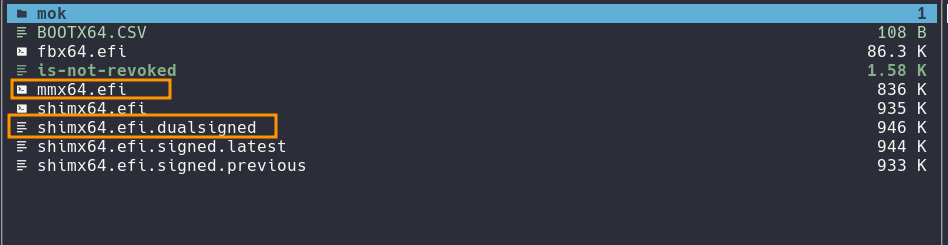
So what we need is the MOK software for enrolling our crap and we need well the actual
shim signed by Microsoft. Really quick in this example I did skip something: how I know
it's actually Microsoft signed here is the command to check: sbverify --list you_shim_file.efi
and the output should have something similar:
Installing the shims
Okay so since this is all BOOT adjacent things we need to actually mess around with EFI partitions and how things are actually booting. Quick note if you fuck up here well your drive / USB won't boot, hehehe happened to me a few times call it a right of passage! Right so to get the SHIM installed you will need to take your EFI partition and mount it! From there you should see the following files:

Start with generating your keys with the following command:
openssl req -newkey rsa:4096 -nodes -keyout "./MOK.key" -new -x509 -sha256 -days 3650 -subj "/CN=some name/" -out "./MOK.crt"Once you have your keys make sure you sign your kernel with the keys
sbsign --key "./MOK.key" --cert "./MOK.crt" --output /boot/vmlinuz-linux /boot/vmlinuz-linux
Side note to sign the kernel you cannot do that on a live USB unless you build it yourself.
In the case of p3ng0s I specifically added a hook that does this during build time your can
see it under the file airootfs/etc/pacman.d/hooks/zzzz98-mok-signing.hook of the V2 branch.
But technically you can install for example kali linux directly to a USB drive: boot that drive and then sign that kernel
then unboot the drive and do the EFI steps on that usb drive and you would have the same tech working on kali linux.
Honestly to do this I recommend copy pasting this entire blog post into claude and asking him
to generate you a tutorial and walk through that with him!
Okay next you need to rename the EFI file we found before to "grubx64.efi" and sign it:
mv ./BOOTx64.EFI ./grubx64.efi # rename
sbsign --key "/where_you_put_your_shim/MOK.key" --cert "/where_you_put_your_shim/MOK.crt" ./grubx64.efi --output ./grubx64.efi # sign grub
Okay after that you take your actual shim and name it "BOOTx64.EFI" and place the MOK software next to it:
cp -r "/path_to_your_shim/shimx64.efi" ./BOOTx64.EFI
cp -r "/path_to_your_shim/mmx64.efi" ./mmx64.efi
After that make sure you convert your certificates to a format secure boot will accept like so, and place the key inside of the EFI partition for quick access later:
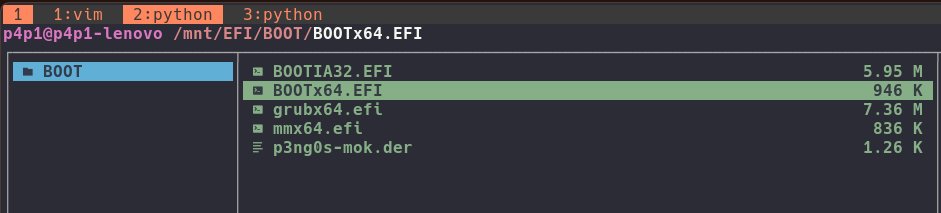
openssl x509 -in "./MOK.crt" -outform DER -out ./borrowed-mok.derThis is what the EFI partition should finally look like inside of it's BOOT folder:
Abusing secure boot

Okay now we have the drive primed and ready with our newly acquired Microsoft signed shim! The way this works is simple you have a laptop with well secure boot active and the Microsoft 3rd party certificates pre-installed (They are most of the time btw especially on corporate machines since well some software actually needs them on on windows. But also some don't have it installed HP wolf security for example was hit and miss some did some didn't, cutaway was maybe last year or 2 years where they stopped enabling it :P)
So in our case let's make it realistic we just plug in the drive and go inside of the BOOT from other device option usually F7 but it changes on some models of computers (NOTE: you don't need BIOS passwords for this option LOL). From here we select our newly created drive and we will boot the sim and fail the grub signing section and be present with the MOK enrollment software like so:
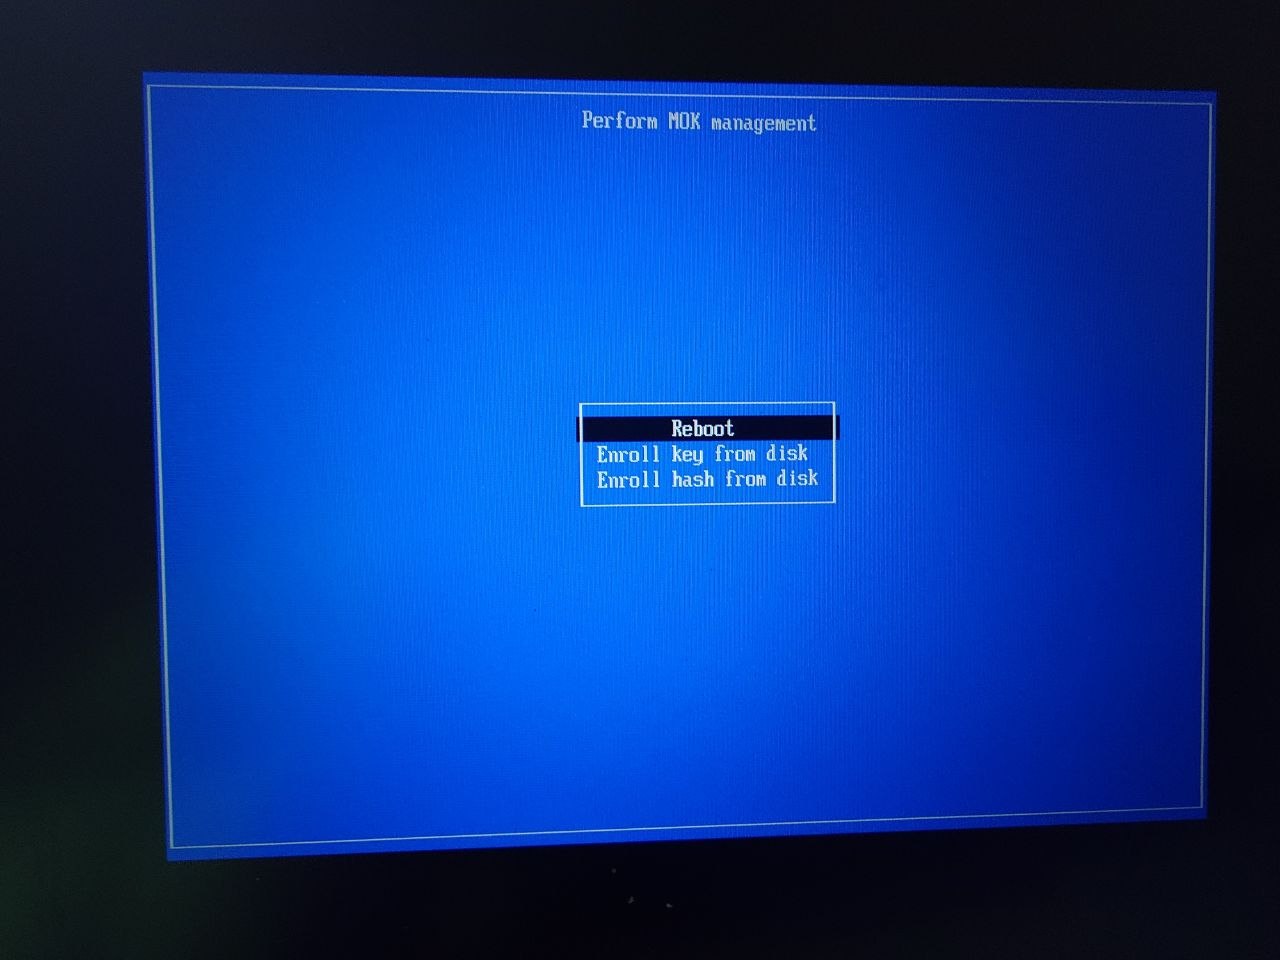
Here we select Enroll Key from disk and navigate to the BOOT/ folder where our key was put in the previous steps!
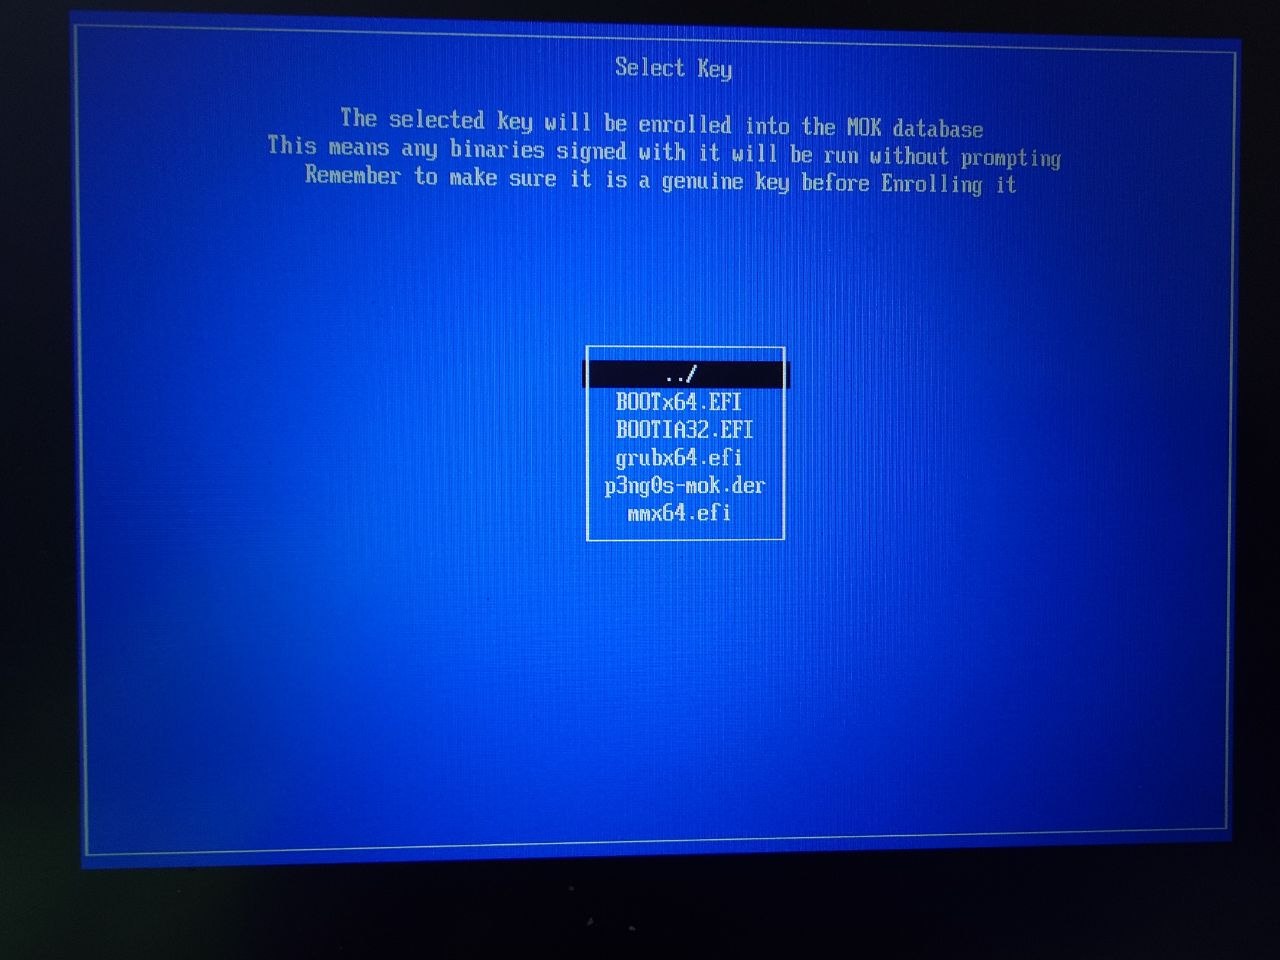
How we just say yes we want to enroll that key
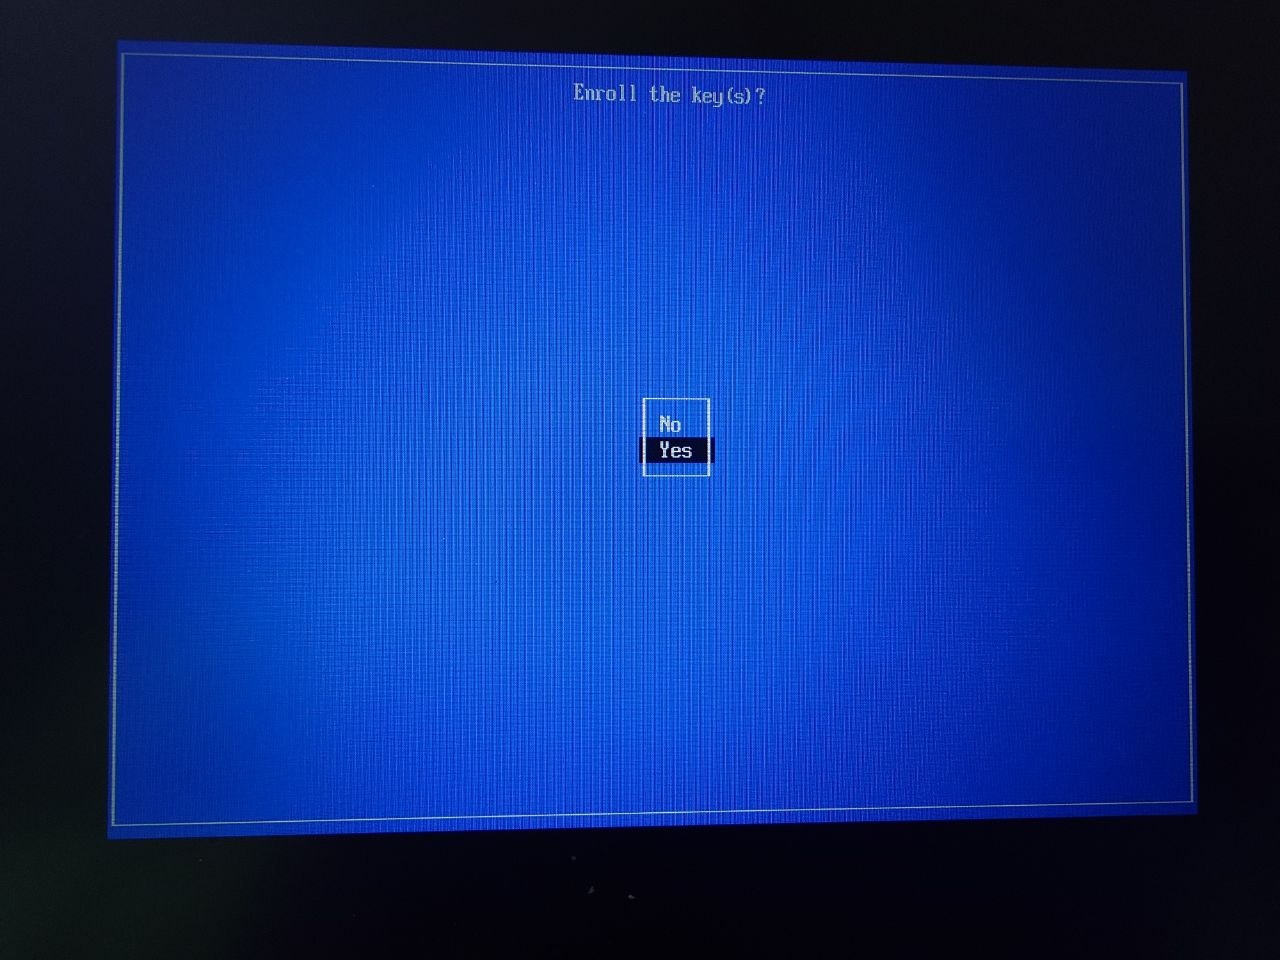
Great and here we can just continue to boot and grub will just appear! Yeah so not so secure boot after all....
Using this tech with p3ng0s
Okay so if you want to use this on p3ng0s when you clone archlive make sure
you do a git checkout on the V2 branch and before running
the build command you need to place the shim and mok manager inside of the
overlay/airootfs/etc/p3ng0s/shim folder!
I did update the Live ISO.pdf file for p3ng0s that has the instructions
on how to build the OS with the steps for secure boot it can be found
here
before I make V2 fully public and update the official documentation.
Well I hope you liked this little blog post on something I found kinda fun to poke at! I am thinking of expanding this blog to also feature some lockpicking in a bit once I get properly onto green belt for that. You can support the blog by getting my amazing merch on red bubble via the link on the side / bellow. Everything here is self made so please share around I obviously don't have a PR team. Any follow on github / linked-in twitter is welcome or you can just use the RSS feed directly from the home page of this blog there is a little button. Check out the other p3ng0s posts as well they are quite good. Or you can read-up on NTDLL-Reconstruction an EDR bypass technique I made after being inspired by Hell's Gate. Also if you have feedback message me directly on linked-in I answer questions since my blog is not famous I do answer.
Navigation
Categories
Links
p3ng0s
Questions / Feedback
Stickers & Donations
If you like the content of my website you can get the amazing stickers from this websize. You can also support me through my github sponsors page.